Blog

  • Why I Almost Gave Up on Forex — And What Actually Worked in 2025

    A friend of mine — sharp guy, works in finance — spent six months grinding through forex charts, reading every strategy guide he could find, and still managed to blow through two practice accounts before even going live. When he finally asked me what I thought he was doing wrong, my answer surprised him: he was doing almost everything right, just in the wrong order. That conversation is basically what sparked this deep-dive, because forex trading is one of those topics where the gap between “technically correct” information and actually profitable execution is enormous.

    So let’s talk about what forex trading really looks like in 2025 — not the glossy broker ads, not the Twitter gurus with rented Lamborghinis — but the actual mechanics, the risk math, and the realistic scenarios where you make money versus the specific conditions where you don’t.

    What Forex Actually Is (And Why Most Explanations Miss the Point)

    Forex — the foreign exchange market — is the largest financial market on earth, trading roughly $7.5 trillion per day as of 2025 BIS estimates. That number sounds exciting until you realize that approximately 70–80% of retail forex traders lose money, a figure consistently reported by regulated brokers in the EU and UK under ESMA/FCA disclosure requirements.

    The market operates 24 hours a day, five days a week, across four major sessions: Sydney, Tokyo, London, and New York. The most liquid window — and the one worth your attention — is the London-New York overlap, roughly 8 AM to 12 PM EST. Spreads tighten, volume spikes, and price action becomes more technically reliable during this window. Outside it, especially in the Asian session on minor pairs, you’re often just fighting noise.

    Currency pairs are categorized as:

    • Majors: EUR/USD, GBP/USD, USD/JPY, USD/CHF — highest liquidity, tightest spreads (often 0.1–1.0 pips on ECN accounts)
    • Minors (Cross Pairs): EUR/GBP, AUD/JPY — moderate liquidity, wider spreads
    • Exotics: USD/TRY, USD/ZAR — volatile, wide spreads (10–50 pips common), high swap costs overnight

    New traders consistently overexpose themselves to exotics chasing big moves. The spread alone on USD/TRY can eat 20–40% of a typical retail position’s profit target before price even moves in your favor.

    forex currency pairs chart, trading session overlap hours

    The Leverage Trap: Where Most Retail Accounts Die

    Here’s the risk-management reality nobody puts in the headline: forex brokers offer leverage up to 500:1 in offshore jurisdictions, and even regulated EU/UK brokers offer up to 30:1 on major pairs. Leverage is mathematically neutral — it amplifies both gains and losses equally. The problem is psychological asymmetry.

    Let’s run concrete numbers. You open a $1,000 account. You trade 1 standard lot (100,000 units) of EUR/USD at 100:1 leverage. A 1% adverse move (100 pips on EUR/USD at ~$10/pip) wipes your entire account. That’s not a theoretical worst case — EUR/USD routinely moves 80–120 pips on a US CPI print day.

    Professional traders — the ones consistently profitable over 3+ year horizons — typically risk 0.5% to 2% of account equity per trade. That means on a $10,000 account, your stop loss should represent a maximum $200 loss. If your setup requires a 50-pip stop on EUR/USD, your position size should be 0.4 mini lots, not 1 full lot.

    The bullish scenario for forex trading in 2025: with the Fed navigating a potential rate-cut cycle and the ECB diverging on policy, EUR/USD has genuine macro-driven trending potential — the kind of clean 300–500 pip directional moves where trend-following strategies print. But the specific conditions under which losses accelerate: ranging markets with false breakouts, which dominated Q1 2025 across multiple major pairs and triggered stop hunts at obvious technical levels.

    Strategy Frameworks That Actually Hold Up

    After looking at verified track records across prop firm challenges (FTMO, MyForexFunds successors, and The Funded Trader) and retail broker data, a few strategy archetypes show statistically consistent results:

    • London Breakout Strategy: Trades the range established in the Asian session, entering on breakout at London open. Win rate typically 45–55%, but favorable risk-reward ratios of 1:2 or better make it net positive. Works best on GBP/USD and EUR/USD.
    • Higher Timeframe Structure + Lower TF Entry: Identify trend on Daily/4H, enter on H1 pullback to key level (demand/supply zones, 50 EMA). Reduces noise significantly. This is the backbone of most successful retail traders I’ve observed in 2025 Discord communities and Myfxbook verified accounts.
    • News Fade Strategy: Wait 2–3 minutes after major news release (NFP, CPI, FOMC), identify the initial spike direction, then fade the overreaction as liquidity normalizes. High skill ceiling — not for beginners — but experienced traders using this on USD pairs in 2025 have seen strong asymmetric setups.
    • Carry Trade (Position Trading): Exploit interest rate differentials by going long high-yield currencies (currently AUD, NZD) vs. low-yield (JPY, CHF). Works in stable macro environments. Falls apart aggressively during risk-off events — see JPY short squeeze events in 2024 as a warning model.

    Broker Selection: The Details That Cost You Money

    Not all brokers are equal, and in 2025 the regulatory landscape matters more than ever. Key criteria:

    • Regulation: FCA (UK), ASIC (Australia), CySEC (EU) offer meaningful retail protection. Offshore brokers (St. Vincent, Seychelles) may offer higher leverage but zero recourse if issues arise.
    • Execution Type: ECN/STP brokers pass your orders to the interbank market. Market makers take the other side of your trade — inherent conflict of interest, though not always a problem if spreads are transparent.
    • Spread + Commission: An ECN account might charge $7 per round turn on a standard lot but offer 0.0–0.2 pip raw spreads. A market maker offers “commission-free” but bakes 1.5–2 pip spreads in. Do the math based on your trade frequency.
    • Platform Stability: MT4/MT5 remain industry standard. cTrader is gaining traction for algorithmic traders. Verify broker uptime records during major news events — slippage and requotes during NFP on a bad broker can turn a winning trade into a loss.

    forex trading platform MT5 chart analysis, risk management calculator

    The Psychology Variable Nobody Budgets For

    Here’s what the research consistently shows: trading journals from FTMO’s public dataset and academic studies on retail trader behavior (notably the DailyFX Intelligence Unit’s 2023–2024 analysis) find that traders who use stop losses on every trade and maintain consistent position sizing have dramatically better outcomes — not because their technical analysis is better, but because they survive long enough to let edge play out over a large sample of trades.

    The cognitive traps that reliably destroy accounts: moving stop losses when price approaches them (loss aversion), doubling position size after a loss to “recover quickly” (martingale psychology), and overtrading after a win because of false confidence (recency bias). These aren’t moral failures — they’re predictable responses to uncertainty that require systematic rules to counteract.

    If your situation is A — you have disposable capital, 6+ months of demo experience, and can genuinely afford to lose what you deploy — a live account with micro lots makes sense as a learning accelerator. If your situation is B — you’re trading with money you need, or you haven’t yet had a consistently profitable three-month demo stretch — the market will take that money and the lesson will be expensive.

    Realistic Expectations for 2025

    Prop firm data from FTMO’s published statistics show roughly 10–15% of challenge participants pass and receive funded accounts. Of those, a smaller percentage maintain consistent profitability for 12+ months. These are self-selected, motivated traders — the broader retail population fares worse.

    A realistic target for a developing forex trader: 2–5% monthly return on risk capital, compounded. That’s 26–80% annually — genuinely exceptional by any asset class standard. But it requires treating this as a skill-based business, not a passive investment. Time investment in 2025 is not optional: minimum 3–6 months of structured study and demo trading before meaningful live exposure.

    One last thought worth sitting with: forex isn’t a get-rich-quick vehicle, and anyone positioning it that way has something to sell you. But approached as a probabilistic, rules-based craft — with proper position sizing, a genuine edge you’ve tested over 100+ trades, and the psychological discipline to execute consistently — it remains one of the few markets accessible to retail participants where skill genuinely compounds over time. Start small, track everything, and let the math do the heavy lifting.


    📚 관련된 다른 글도 읽어 보세요

    태그: []

  • 2026년 가성비 쩌는 싱글몰트 위스키 Top3 — 이거 모르면 돈 낭비입니다

    얼마 전 위스키 입문한 친구한테 연락이 왔어요. “야, 글렌피딕 12년이랑 맥캘란 12년이랑 뭐가 달라? 둘 다 12년이면 같은 거 아니야?” 순간 할 말을 잃었습니다. 아, 이 친구한테 제대로 설명해줘야겠다 싶어서 최근 6개월간 직접 구매하고 마셔본 싱글몰트들 중에서 진짜 가성비 좋은 것들만 추려봤어요. 백화점 추천 리스트나 수입사 홍보 글이 아니라, 돈 주고 산 사람 입장에서 솔직하게 씁니다.

    참고로 저는 버번도 좋아하지만 싱글몰트 위주로 마신 지 7년 됐고, 연간 위스키 지출이 120만 원 선입니다. 돈 많은 수집가가 아니라 ‘한 병 살 때 진짜 고민하는 사람’ 관점에서 쓴 글이에요.

    • 🥃 가성비 싱글몰트, 기준이 뭔지부터 잡자
    • 📊 2026년 기준 가성비 싱글몰트 비교표
    • 🥇 1위: 글렌알라키 10년 — 셰리 러버의 새 국룰
    • 🥈 2위: 스프링뱅크 10년 — 구하기 어렵지만 이유가 있는 위스키
    • 🥉 3위: 글렌드로낙 12년 — 맥캘란 말고 이걸 사야 하는 이유
    • ❌ 절대로 하지 말아야 할 위스키 구매 실수
    • ❓ FAQ

    가성비 싱글몰트, 기준이 뭔지부터 잡자

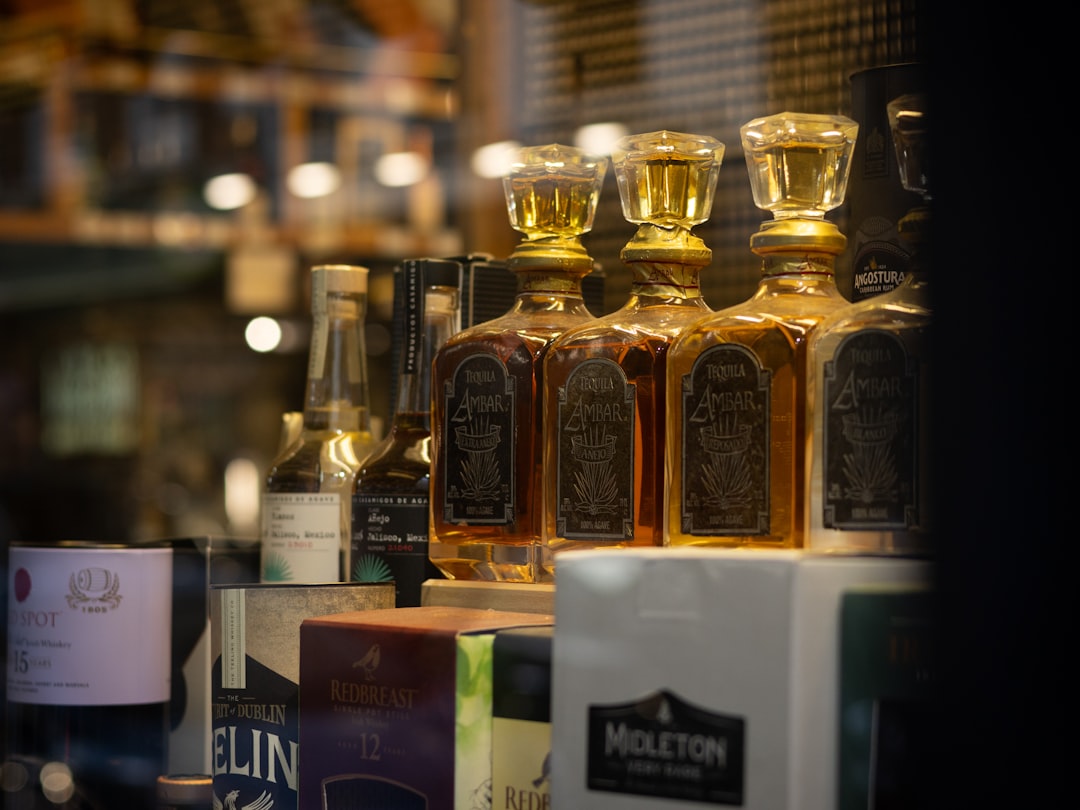
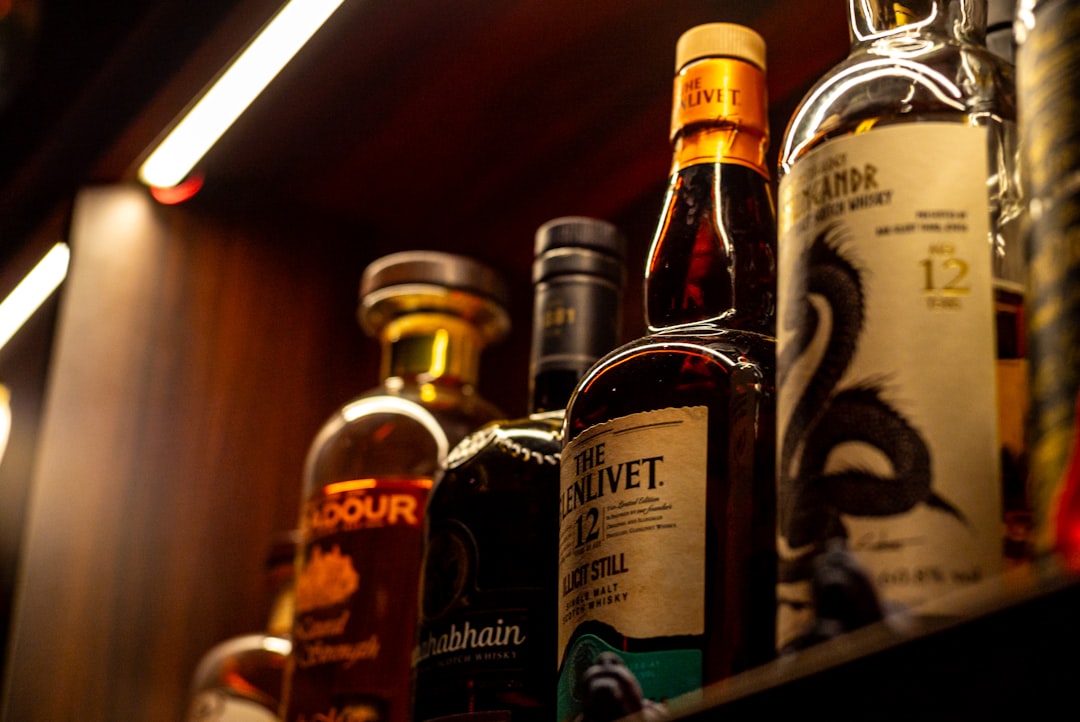
    single malt whisky bottles lineup shelf, scotch whisky tasting glass amber

    가성비는 단순히 ‘싸다’가 아닙니다. 제가 쓰는 기준은 이렇습니다.

    • 가격 대비 풍미 밀도: 5만 원대 위스키에서 10만 원대 풍미가 나오는가
    • 공급 안정성: 갑자기 품절돼서 못 사는 위스키는 가성비 논의 자체가 무의미
    • 반복 구매 의향: 한 병 다 마시고 또 살 의향이 드는가

    2026년 현재 국내 위스키 시장은 코로나 이후 홈바 열풍이 어느 정도 가라앉으면서 일부 희귀 제품 프리미엄이 내려왔고, 반면 셰리 캐스크 제품군의 가격은 꾸준히 오르는 중입니다. 글렌피딕, 맥캘란 같은 메이저 브랜드는 마케팅 비용이 가격에 잔뜩 녹아 있어서, 같은 돈을 쓰면 인디 혹은 중형 증류소 제품이 훨씬 낫습니다.

    2026년 기준 가성비 싱글몰트 비교표

    위스키 숙성 캐스크 도수 국내 시세(2026) Nose 특징 Palate 특징 Finish 특징 가성비 점수
    글렌알라키 10년 10년 PX·오로로소 셰리 48% 약 6~7만 원 건포도, 다크초콜릿, 생강 풍부한 과일, 견과류, 시나몬 중장 / 달콤한 스파이스 ⭐⭐⭐⭐⭐
    스프링뱅크 10년 10년 버번+셰리 혼합 46% 약 10~13만 원 소금기, 열대과일, 연기 오일리, 복합적인 과일, 미세한 피트 장 / 해안가 소금기 ⭐⭐⭐⭐⭐
    글렌드로낙 12년 12년 PX·오로로소 셰리 100% 43% 약 7~9만 원 자두잼, 오렌지 껍질, 오크 진한 과실, 초콜릿, 향신료 중장 / 과실향 여운 ⭐⭐⭐⭐☆
    맥캘란 12년 셰리 12년 오로로소 셰리 40% 약 18~22만 원 바닐라, 건과일, 생강 건과일, 시나몬, 약간의 달콤함 중 / 깔끔하지만 단조 ⭐⭐⭐☆☆
    글렌피딕 12년 12년 아메리칸 오크·솔레라 40% 약 6~7만 원 배, 사과, 신선한 오크 가벼운 과일, 몰트, 크리미 단 / 깔끔하고 짧음 ⭐⭐⭐☆☆

    * 시세는 2026년 국내 주요 온·오프라인 기준 평균값이며, 면세 및 직구 가격은 별도.

    🥇 1위: 글렌알라키 10년 — 셰리 러버의 새 국룰

    GlenAllachie 10 year whisky bottle, PX sherry cask scotch whisky

    Nose (향): 병을 따는 순간부터 진한 PX 셰리 캐스크의 건포도 향이 확 올라옵니다. 다크초콜릿, 생강 쿠키, 그리고 약간의 가죽 노트. 맥캘란 12년 셰리랑 비교하면 훨씬 더 진하고 밀도 있어요. 물 한 방울 떨어뜨리면 말린 오렌지 껍질 향이 추가됩니다.

    Palate (미각): 48% 도수 치고 굉장히 부드럽습니다. 블랙커런트 잼, 시나몬, 구운 견과류가 층층이 들어옵니다. 중반에 약간의 민트 같은 청량감이 있어서 지루하지 않아요. 다만 좀 단 편이라, 무거운 셰리 폭탄 스타일을 선호하지 않는 분들은 취향을 탈 수 있어요.

    Finish (피니시): 중장 길이. 달콤한 스파이스와 건포도 여운이 꽤 오래 남습니다. 가격 대비 이 피니시 길이는 솔직히 말이 안 되는 수준.

    글렌알라키는 빌리 워커(전 벤로막, 글렌드로낙 마스터 블렌더)가 인수해서 완전히 재건한 증류소입니다. 2017년 인수 당시 주목받지 못했던 스페이사이드 증류소였는데, 이후 출시한 제품들이 연달아 호평받으면서 지금은 대기자까지 생길 정도예요. 공식 웹사이트(glenallachie.com)에서 직접 제품 스토리 확인 가능합니다.

    결론: 6~7만 원에 이 퀄리티면, 맥캘란 12년 셰리 살 돈으로 3병 살 수 있습니다. 진심입니다.

    🥈 2위: 스프링뱅크 10년 — 구하기 어렵지만 이유가 있는 위스키

    Nose (향): 처음 맡으면 낯섭니다. 해안가 소금기와 약간의 연기(피트인데 아일라처럼 강하지 않음), 거기에 열대과일인 망고와 파인애플이 복잡하게 엉켜 있어요. 버번과 셰리를 섞어 숙성해서 이런 독특한 캐릭터가 나옵니다.

    Palate (미각): 오일리한 텍스처가 특징입니다. 위스키 마실 때 그 점성감 좋아하는 분들한테는 최고예요. 바닐라, 녹인 버터, 미세한 피트 스모크가 순서대로 들어옵니다. 복합성 면에서는 오늘 소개하는 세 제품 중 단연 최고.

    Finish (피니시): 장 피니시. 소금기와 오크 탄닌이 꽤 오래 남습니다. 마시고 나서 5분 뒤에도 향이 남아 있어요.

    스프링뱅크는 스코틀랜드 캠벨타운에 있는 증류소로, 몰팅부터 병입까지 전 공정을 자체적으로 하는 거의 유일한 증류소입니다. 연간 생산량이 극도로 제한적이라 국내에서도 품절이 잦아요. 실제로 2026년 기준 국내 공식 수입사(영국 직수입)를 통해서도 물량이 들어오면 몇 주 안에 소진됩니다. 가격이 10~13만 원대로 다른 두 제품보다 비싸지만, 이 개성과 희소성을 감안하면 여전히 가성비 라인에 포함할 수 있어요.

    주의: 단 이 위스키를 처음 위스키 마시는 분한테 권하면 안 됩니다. 오일리하고 복잡한 캐릭터가 입문자에게는 ‘이게 뭐야’로 느껴질 수 있어요. 위스키 10병 이상 마셔본 분들부터 도전 권장.

    🥉 3위: 글렌드로낙 12년 — 맥캘란 말고 이걸 사야 하는 이유

    Nose (향): PX와 오로로소 셰리 캐스크 100% 숙성답게, 자두잼과 오렌지 껍질 설탕절임이 아주 명확하게 들어옵니다. 거기에 오크 바닐라와 약간의 생강. 향만으로도 꽤 풍성하고 친절합니다.

    Palate (미각): 43% 도수지만 바디감은 생각보다 묵직합니다. 다크체리, 밀크초콜릿, 향신료(넛맥, 올스파이스)가 조화롭게 들어와요. 맥캘란 12년 셰리와 방향성은 비슷한데, 풍미 밀도가 훨씬 진하고 깊습니다. 가격은 절반에서 3분의 1 수준이에요.

    Finish (피니시): 중장 길이. 과실향과 오크 탄닌이 함께 남으면서 깔끔하게 마무리됩니다.

    맥캘란이 마케팅 비용을 위스키 가격에 얹는 걸로 유명한 건 업계 공공연한 사실입니다. 글렌드로낙은 같은 하이랜드 스타일의 셰리 폭탄이면서 인지도가 낮아 가격이 낮게 유지됩니다. Whisky Advocate, Jim Murray’s Whisky Bible 2025에서도 글렌드로낙 12년은 꾸준히 90점 이상을 받고 있어요. 입문자부터 중급자까지 넓게 추천할 수 있는 올라운더.

    절대로 하지 말아야 할 위스키 구매 실수

    • 브랜드 인지도로만 사지 마세요: 맥캘란, 발베니 같은 메이저는 마케팅 비용이 가격에 포함됩니다. 같은 예산이면 중소 증류소에서 더 나은 풍미를 찾을 수 있어요.
    • 나이 숫자에 속지 마세요: 18년이 12년보다 무조건 좋은 게 아닙니다. 캐스크 품질과 증류소 캐릭터가 훨씬 중요합니다. 글렌알라키 10년은 많은 18년짜리 대형 브랜드보다 풍미 밀도가 높습니다.
    • 위스키 투자 목적 구매는 신중하게: 2026년 현재 일부 한정판 위스키 2차 시장 프리미엄이 20~30% 빠진 경우도 있습니다. 마시려고 사는 게 아니라면 리스크를 계산하고 접근하세요.
    • 온라인 최저가만 쫓지 마세요: 보관 상태가 불명확한 개인 거래 위스키는 직사광선 노출, 온도 변화로 품질이 저하됐을 수 있습니다. 공식 수입사 혹은 신뢰할 수 있는 전문 리테일러에서 구입하세요.
    • 한 번에 여러 병 쌓아두지 마세요: 위스키는 개봉 후 공기 접촉으로 점점 산화됩니다. 한 병씩 소진하면서 사는 게 가장 좋은 상태로 마시는 방법입니다.
    • 첫 싱글몰트로 피트 폭탄 사지 마세요: 라프로익, 아드벡 같은 헤비 피트는 입문자한테 위스키 자체를 싫어지게 만들 수 있습니다. 스페이사이드나 하이랜드 스타일로 시작하세요.

    FAQ

    Q1. 글렌알라키 10년이랑 글렌드로낙 12년 중 뭘 먼저 사야 할까요?

    처음이라면 글렌드로낙 12년을 추천합니다. 43% 도수라 진입 장벽이 낮고, 셰리 캐스크 특유의 과실향과 초콜릿 노트가 직관적으로 맛있어요. 글렌알라키 10년은 48%라 처음엔 알코올 느낌이 강할 수 있고, 물을 약간 타야 진가가 드러납니다. 두 번째 병으로 글렌알라키 도전하면 딱입니다.

    Q2. 스프링뱅크 10년은 어디서 살 수 있나요?

    2026년 기준 국내 공식 수입은 몇몇 대형 주류 전문점에서 취급합니다. 서울 기준으로는 이태원, 한남동 쪽 위스키 전문 숍이나 주요 온라인 주류 플랫폼에서 입고 알림을 설정해두는 걸 권장합니다. 물량 자체가 적어서 입고 소식 뜨면 바로 주문해야 해요. 면세점에는 거의 없고, 영국 직구(MoM, TheWhiskyExchange)로 구하는 방법도 있습니다만 통관 규정 확인 필요합니다.

    Q3. 싱글몰트 위스키, 어떻게 마셔야 제대로 즐길 수 있나요?

    글렌캐런 글라스(튤립 모양 위스키 전용 잔) 하나만 있으면 됩니다. 얼음 없이 상온에서, 처음엔 니트(스트레이트)로 향을 먼저 맡고, 한 모금 머금어 혀에 퍼지게 둔 뒤 삼키세요. 그 다음 물을 2~3방울 떨어뜨리면 알코올이 열려 숨겨진 향이 올라옵니다. 특히 40%대 위스키는 그냥 마셔도 되지만 46% 이상은 물 한 방울이 큰 차이를 만들어요. 얼음은 가능하면 나중에 시도하세요. 과한 냉각이 향을 죽입니다.

    한 줄 평 & 결론

    맥캘란 22만 원짜리 사려던 예산으로 글렌알라키, 글렌드로낙, 스프링뱅크 세 병 다 살 수 있고, 풍미 경험은 훨씬 다양하게 챙길 수 있습니다. 2026년 가성비 싱글몰트 결론은 이겁니다: 브랜드 네임 살 돈으로 캐스크 퀄리티를 사세요.

    종합 평점: 글렌알라키 10년 9.1/10 | 스프링뱅크 10년 9.3/10 | 글렌드로낙 12년 8.8/10

    한 동생 픽으로는, 입문자한테는 글렌드로낙 12년, 셰리 캐스크 좀 마셔본 분들한테는 글렌알라키 10년, 위스키 진심인 분들한테는 스프링뱅크 10년. 이 세 개만 돌아가면서 마셔도 1년은 행복합니다.


    📚 관련된 다른 글도 읽어 보세요

    태그: []

  • 2026년 가성비 쩌는 싱글몰트 위스키 Top3 — 10만원대에서 이거 놓치면 진짜 손해

    위스키 입문하고 나서 주변 지인들한테 가장 많이 받는 질문이 있어. “10만원 안팎에서 진짜 맛있는 싱글몰트 뭐 사?” 근데 솔직히 이 질문 받을 때마다 조금 고민된다. 왜냐면 ‘가성비’라는 단어가 사람마다 다르거든. 누군가한테는 5만원짜리도 비싸고, 누군가한테는 20만원짜리도 가성비야.

    그래서 기준을 잡았다. 시중가 7만원~15만원 사이, 편의점·대형마트·면세점 어디서든 구할 수 있는 것, 그리고 위스키 초보도 ‘아 이게 싱글몰트구나’ 감탄할 수 있는 것. 이 세 가지 조건에서 내가 직접 병 따서 마셔본 것만 얘기할게. 광고 아니고, 협찬도 아니고, 그냥 내 돈 주고 산 거야.

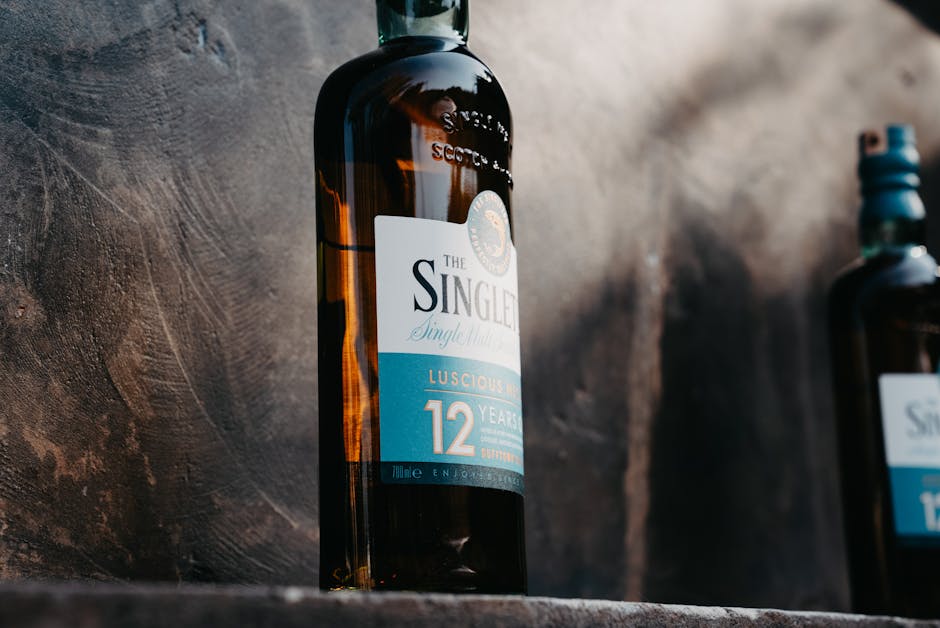
    single malt whisky bottles lineup, whisky tasting glass amber

    • 🥇 1위: 글렌모렌지 오리지널 10년 — 입문자의 영원한 정답
    • 🥈 2위: 아벨라워 12년 더블캐스크 — 셰리 입문의 최단거리
    • 🥉 3위: 글렌피딕 15년 솔레라 — 복잡함을 원한다면 이걸로
    • 📊 3종 비교표: 가격·ABV·캐릭터 한눈에
    • ⚠️ 구매 전 절대로 하지 말아야 할 실수 5가지
    • ❓ FAQ: 독자들이 가장 많이 묻는 것들

    🥇 1위: 글렌모렌지 오리지널 10년 (Glenmorangie Original 10Y)

    Glenmorangie Original 10 year bottle, highland whisky golden color

    시중가 기준 약 8~10만원대, ABV 40%. 하이랜드 스타일의 교과서 같은 위스키야. 이 친구가 왜 1위냐고? 2026년 현재 기준으로 이 가격대에서 이 완성도를 뽑아내는 제품이 없어.

    🍷 Nose (향): 처음 잔에 따르면 복숭아, 살구 같은 과일향이 주도하고, 시간이 지나면서 바닐라와 꽃향기가 올라와. 공격적이지 않고 부드럽게 코를 감싸는 느낌. 위협적이지 않아서 입문자도 거부감 없이 즐길 수 있어. 미국 버번 배럴에서 숙성하기 때문에 오크향보다 달콤한 과일향이 전면에 나오는 거야.

    🥃 Palate (맛): 첫 모금은 꽤 가볍고 달아. ‘이게 40도짜리?’ 싶을 정도야. 복숭아 넥타, 레몬 제스트, 아몬드 크림 느낌이 교차해. 바디감은 미디엄 이하로 묵직하지 않아서 위스키 처음 마시는 사람도 ‘이거 맛있는데?’ 하게 만드는 마법이 있어.

    🔥 Finish (여운): 미디엄 피니시. 오래 남진 않지만 깔끔하게 끝나. 바닐라와 아몬드의 단 여운이 목을 타고 내려가면서 자연스럽게 다음 모금을 부르는 구조야. 이게 진짜 글렌모렌지의 무서운 점이야.

    실측 점수 (개인 기준, 10점 만점): 향 8.5 / 맛 8.0 / 피니시 7.5 / 가성비 9.5 → 종합 8.4점

    🥈 2위: 아벨라워 12년 더블캐스크 (Aberlour 12Y Double Cask)

    시중가 기준 약 7~9만원대, ABV 40%. 스페이사이드 산으로, ‘더블캐스크’라는 이름처럼 버번 배럴과 셰리 캐스크를 함께 써서 완성한 위스키야. 셰리 캐스크 입문을 원한다면 이보다 저렴하고 맛있는 선택지가 없어.

    🍷 Nose (향): 말린 과일향이 진하게 올라와. 건포도, 살짝 스모키한 초콜릿, 계피 스파이스. 셰리 캐스크 특유의 달콤하고 풍부한 향이 주도하면서도 버번 배럴의 바닐라가 밸런스를 잡아줘. 향만으로도 가성비가 느껴져.

    🥃 Palate (맛): 첫 모금부터 존재감이 확실해. 건포도, 검은 체리, 다크초콜릿이 순서대로 등장해. 글렌모렌지보다 바디감이 확연히 있어서 ‘위스키 마신다’는 느낌이 더 강해. 스파이시함도 살짝 있어서 지루하지 않아.

    🔥 Finish (여운): 미디엄 롱 피니시. 셰리 특유의 달콤 씁쓸한 여운이 꽤 오래 남아. 다크초콜릿 먹은 뒤처럼 기분 좋게 입 안이 코팅되는 느낌이야. 이 가격대에서 이 피니시 길이는 솔직히 반칙 수준이야.

    실측 점수: 향 8.0 / 맛 8.5 / 피니시 8.5 / 가성비 9.0 → 종합 8.5점

    🥉 3위: 글렌피딕 15년 솔레라 (Glenfiddich 15Y Solera)

    시중가 기준 약 11~15만원대, ABV 40%. 이 리스트에서 제일 비싸긴 한데, 15년 숙성 싱글몰트가 이 가격이면 솔직히 아직도 미친 가성비야. ‘솔레라(Solera)’란 셰리 산업에서 온 방식으로, 통의 절반만 채우고 나머지 공간에서 숙성이 이루어지게 해서 연속성과 복잡함을 동시에 뽑아내는 방식이야.

    🍷 Nose (향): 처음부터 복잡해. 꿀, 버터스카치, 오렌지 마멀레이드, 그리고 살짝 훈연향까지. 층위가 있어서 시간이 지날수록 새로운 향이 나타나. 조금 가만히 놔두면 말린 살구와 바닐라가 추가로 올라오니까 서두르지 말고 충분히 Nose 해봐.

    🥃 Palate (맛): 달콤함과 스파이시함의 밸런스가 정말 잘 잡혀 있어. 꿀, 크림, 생강 쿠키, 오크 스파이스가 레이어드로 펼쳐져. 앞에 두 제품보다 명확히 ‘복잡하다’는 느낌이 나. 이게 15년 숙성의 차이야.

    🔥 Finish (여운): 롱 피니시. 오크와 스파이스, 그리고 달콤한 꿀의 여운이 상당히 오래 남아. 혀 뒤쪽에서 느껴지는 따뜻한 여운은 이 리스트 3종 중 가장 길고 인상적이야.

    실측 점수: 향 9.0 / 맛 9.0 / 피니시 9.0 / 가성비 8.0 → 종합 8.8점

    📊 3종 비교표: 한눈에 보는 스펙 & 성격

    항목 글렌모렌지 오리지널 10Y 아벨라워 12Y 더블캐스크 글렌피딕 15Y 솔레라
    산지 하이랜드 스페이사이드 스페이사이드
    숙성 연수 10년 12년 15년
    ABV 40% 40% 40%
    캐스크 버번 배럴 버번 + 셰리 버번 + 셰리 솔레라
    시중가(2026 기준) 약 8~10만원 약 7~9만원 약 11~15만원
    바디감 라이트~미디엄 미디엄 미디엄~풀
    주요 캐릭터 복숭아, 바닐라, 꽃 건포도, 다크초콜릿, 스파이스 꿀, 오크, 오렌지 마멀레이드
    추천 대상 입문자, 가벼운 한 잔 셰리 입문, 선물용 중급자, 복잡함을 원할 때
    가성비 점수 ⭐⭐⭐⭐⭐ ⭐⭐⭐⭐⭐ ⭐⭐⭐⭐

    ⚠️ 구매 전 절대로 하지 말아야 할 실수 5가지

    • 면세점 가격만 믿고 시중가 비교 안 하기: 면세점 가격이 무조건 저렴한 게 아니야. 2026년 기준으로 일부 제품은 대형마트 할인 행사 때 면세점보다 저렴한 경우가 있어. 구매 전 와인앤모어, SSG, 쿠팡 가격 꼭 비교해봐.
    • 첫 잔을 스트레이트로 원샷 하기: 향이 날아가고 쓴맛만 남아. 처음엔 반드시 조금씩 홀짝이면서 향부터 맡아. 이걸 못 하면 10만원짜리 위스키를 소주처럼 마시는 거야.
    • 냉장 보관하기: 절대 안 돼. 차가워지면 향이 닫히고 맛이 단조로워져. 상온 보관하되, 직사광선 피하고 세워서 보관해.
    • 개봉 직후 바로 평가하기: 병 따고 처음 1~2잔은 ‘산화’가 안 된 상태라 약간 닫혀 있어. 개봉 후 3~4일 지나서 다시 마셔봐. 같은 제품인데 확 달라진 느낌을 받을 거야.
    • 비싼 게 무조건 맛있다는 편견으로 구매하기: 개인 취향이 가장 중요해. 라프로익처럼 피트향 강한 위스키가 최고가인 경우도 있지만, 처음 마시는 사람한테는 고역이야. 반드시 본인 취향(달콤 vs 스모키, 라이트 vs 풀 바디)을 먼저 파악한 뒤 구매해.

    ❓ FAQ — 독자들이 가장 많이 묻는 것들

    Q1. 세 가지 중에 딱 하나만 골라야 한다면 뭘 사야 해요?

    입문자라면 글렌모렌지 오리지널 10년. 가격 부담도 적고, 실패 확률이 가장 낮아. 이미 달달하고 부드러운 거 좋아한다는 걸 알면 아벨라워 12년으로 바로 가도 돼. 위스키 좀 마셔봤고 복잡한 걸 원한다면 글렌피딕 15년이야.

    Q2. 선물용으로는 뭐가 제일 좋아요? 위스키 잘 모르는 분한테 드릴 건데요.

    패키지 포장이 예쁘고 실패 없는 걸 원하면 글렌피딕 15년이 제일 선물용으로 인상적이야. 박스 디자인이 고급스럽고, 15년 숙성이라는 숫자 자체가 받는 사람한테 ‘오, 비싼 거네?’ 느낌을 줘. 가격 부담을 줄이고 싶다면 아벨라워 12년도 나쁘지 않아.

    Q3. 물이나 얼음을 넣어서 마셔도 되나요?

    당연히 돼. 오히려 권장하는 경우도 있어. 특히 글렌피딕 15년처럼 복잡한 위스키는 물 몇 방울 넣으면 향이 더 열리는 경우가 있어. 얼음은 향을 닫아버리는 단점이 있으니 처음엔 스트레이트나 소량의 물(1~2방울)로 마셔보고, 나중에 본인 스타일 찾아가는 거 추천해. 온더락도 더운 여름엔 좋아.

    🏁 결론: 2026년 이 셋이면 충분해

    위스키 시장이 갈수록 비싸지고 있어. 2026년 기준으로 10년 전 5만원대였던 제품들이 지금은 8~10만원이야. 그럼에도 불구하고 이 세 제품은 아직까지 ‘이 가격에 이 맛이 가능해?’라는 말이 나오는 몇 안 되는 라인업이야.

    가볍게 시작하고 싶다면 글렌모렌지, 셰리 캐릭터를 탐험하고 싶다면 아벨라워, 진지하게 싱글몰트에 빠지고 싶다면 글렌피딕 15년 솔레라. 이 세 병이면 1년 치 위스키 입문 교과서로 충분해.

    한 줄 평: “비싼 위스키 찾아 헤매기 전에, 이 세 병 다 마셔봐. 그다음에 고민해도 안 늦어.”

    혹시 이 글이 도움이 됐다면, 주변 위스키 입문하려는 지인한테 공유해줘. 나처럼 비싼 거 샀다가 입맛에 안 맞아서 후회하는 사람 한 명이라도 줄이는 게 목표야.


    📚 관련된 다른 글도 읽어 보세요

    태그: 싱글몰트위스키, 가성비위스키, 글렌모렌지, 아벨라워, 글렌피딕, 위스키추천2026, 위스키입문

  • Why I Almost Gave Up on It — Honest 2025 Review of the Best Bully Sticks for Dogs

    A friend of mine texted me a few months back, completely frustrated. Her golden retriever had chewed through yet another furniture leg, and she’d already tried three different chew products that either fell apart in minutes, smelled like a slaughterhouse, or — worse — sent her dog running for the bathroom. She asked me, “What are these bully sticks everyone keeps raving about, and are they actually worth it?”

    That question sent me down a pretty deep rabbit hole. And honestly? What I found surprised me — both in good ways and in ways that made me rethink what I thought I knew about dog chews.

    bully sticks for dogs, natural dog chews close-up

    So What Even Is a Bully Stick? (And Why the Name Is… Interesting)

    Let’s get this out of the way: bully sticks are made from bull or steer pizzle — yes, that part of the anatomy. They’re dried and sometimes braided, and they’ve become one of the most popular single-ingredient chews on the market. The appeal is straightforward — they’re fully digestible, high in protein, and keep most dogs occupied for a satisfying stretch of time.

    But here’s where it gets nuanced. Not all bully sticks are created equal, and the differences between a budget option and a premium one can genuinely affect your dog’s health and your wallet.

    The Numbers You Actually Need to Know

    Let’s talk calories, because most dog owners skip this and then wonder why their pup is gaining weight. A standard 6-inch bully stick contains roughly 88–120 calories depending on thickness and brand. For a 20-pound dog whose daily caloric need sits around 400–500 calories, one stick is already 20–25% of their daily intake. That’s not a small snack — that’s a meal supplement.

    • Thin/Junior sticks (4–6 inch): ~60–80 calories, good for small breeds or puppies over 12 weeks
    • Standard sticks (6 inch): ~88–120 calories, ideal for medium breeds
    • Thick/XL sticks (12 inch): ~150–200+ calories, suited for large, aggressive chewers
    • Braided sticks: Longer chew time, higher calorie density — factor in accordingly
    • Low-odor variants: Typically oven-baked vs. sun-dried; slightly less pungent but marginally higher processing

    These figures come from nutritional panels across brands including Redbarn, Barkworthies, and Pet ‘n Shape — all commonly reviewed by veterinary nutritionists on platforms like PetMD and the American Kennel Club’s resource hub.

    The Smell Problem — And How Brands Are Solving It

    Here’s the complaint I see most in forums and Reddit’s r/dogs community: the odor. Raw or minimally processed bully sticks have a distinct barnyard smell that can fill a room. If you’ve ever opened a bag and immediately questioned your life choices, you’re not alone.

    The solution most premium brands have moved toward is a double-baking or steam-cleaning process before final drying. Redbarn’s Odor-Free Bully Sticks and Jack & Pup’s Premium Grade Bully Sticks both use this method and consistently score high in blind smell tests posted by reviewers on Chewy and Amazon (with thousands of verified reviews backing the claims). The trade-off? Slightly higher price point — typically $1.50–$3.00 per stick versus $0.75–$1.25 for unprocessed variants.

    What the Research and Vets Actually Say

    A frequently cited 2013 study published in the Canadian Veterinary Journal found bacterial contamination (including E. coli and MRSA) on a percentage of tested bully sticks — this caused a wave of panic that still echoes in dog owner forums today. However, the study noted that contamination levels were largely on the surface, and washing hands after handling and keeping the sticks away from immunocompromised individuals mitigated most risks.

    More recently, veterinary dental specialists have noted that bully sticks fall within the “safe” chewing zone — meaning they pass the thumbnail test (if you can’t dent it with your thumbnail, it’s too hard for a dog’s teeth). This distinguishes them from antlers, hooves, or nylon chews, which carry genuine risk of tooth fractures.

    The main caution vets raise in 2025 is the choking hazard at the end of the chew. Once a stick gets small enough to swallow whole, it should be taken away. Products like the Bully Buddy holder (a simple silicone clip) exist specifically for this — and they’re genuinely worth the $8–$12 investment.

    dog chewing bully stick safely, bully stick holder accessory

    Brand Comparison: Where to Actually Spend Your Money

    After going through veterinary forums, Chewy review data, and independent pet nutrition blogs, here’s a practical breakdown for 2025:

    • Best overall: Jack & Pup 6-inch Premium Bully Sticks — consistent thickness, low odor, USDA-sourced, around $25–$30 for a 25-pack
    • Best for small dogs: Redbarn Thin Bully Sticks — digestible, appropriately sized, widely available at PetSmart
    • Best budget pick: Cadet Bully Sticks from Costco — higher volume, acceptable quality, though odor is more noticeable
    • Best for aggressive chewers: Brutus & Barnaby 12-inch Thick Sticks — longer chew sessions, solid sourcing transparency
    • Best sourcing transparency: Fieldbar Bully Sticks — grass-fed, free-range, with QR-traceable batch origin

    If Your Dog Has a Sensitive Stomach — Read This First

    Bully sticks are high in protein, and for dogs with existing digestive sensitivities or pancreatitis history, introducing them too quickly can cause soft stools or vomiting. The standard advice: start with one stick every 2–3 days for the first two weeks, monitor output (yes, that kind of output), and scale from there. If your dog has been diagnosed with kidney disease, the high protein load may be contraindicated — ask your vet before making bully sticks a regular habit.

    Alternatives Worth Knowing About

    Not every dog takes to bully sticks, and that’s okay. If chew texture or digestibility is a concern, consider:

    • Yak milk chews (Himalayan chews): Lower calorie, longer-lasting for most dogs, nearly odor-free
    • Collagen sticks: Gentler on the digestive system, increasingly popular in 2025 as a bully stick alternative
    • Beef tendons: Lower in fat, similar chew satisfaction, good for weight-conscious pups
    • Fish skin chews: Rich in Omega-3s, though the smell is arguably worse than bully sticks depending on the brand

    Each of these has its own calorie profile and digestibility curve, so the same “start slow” approach applies.

    💬 A quick thought before you head to the checkout: The best bully stick is honestly the one your specific dog tolerates well, from a brand that can tell you where the beef came from. Don’t let the overwhelming options paralyze you — pick one mid-tier option (Jack & Pup or Redbarn are both solid starting points), buy a small pack first, and let your dog vote. Their enthusiasm — or lack of it — will tell you everything the reviews can’t.


    📚 관련된 다른 글도 읽어 보세요

    태그: best bully sticks for dogs, natural dog chews, bully stick review, dog chew safety, digestible dog treats, high protein dog chews, bully stick alternatives

  • AI 코딩 도구 쓰다가 팀 전체 코드베이스 날릴 뻔했어요 — 2026년 기준 실제로 쓸 만한 AI 코딩 어시스턴트 비교

    지난달에 팀 리드가 저한테 슬랙으로 DM을 보냈어요. “형, GitHub Copilot이랑 Cursor 중에 뭐 써요? 팀에 도입하려는데 이거 잘못 골랐다가 레거시 코드 다 망가지는 거 아닌가요?” 솔직히 저도 처음엔 그냥 ‘광고비 받은 유튜버들 말 믿지 말고 직접 써봐’ 했는데, 실제로 우리 팀에서 Copilot 쓰다가 DB 마이그레이션 스크립트에 DROP TABLE 을 아무렇지도 않게 제안한 일이 있었거든요. 그것도 프로덕션 환경에서. 아직도 그날 생각하면 식은땀이 납니다.

    그래서 이번에 직접 GitHub Copilot, Cursor, Windsurf, Codeium 네 가지를 2026년 현재 시점에서 실제 프로젝트에 적용해보고, 어떤 상황에 뭐가 맞는지 제대로 정리해봤습니다.

    AI coding assistant comparison, developer tools 2026
    • 🔥 AI 코딩 도구, 왜 지금 골라야 하냐면
    • 📊 4대 AI 코딩 어시스턴트 스펙 비교표 (가격/성능/컨텍스트)
    • 💣 실제 삽질 사례 — “AI가 이걸 왜 제안한 거야?”
    • 🧪 벤치마크: 실측 자동완성 정확도 & 응답속도
    • 🛒 팀 규모별 추천 시나리오 (1인 / 스타트업 / 엔터프라이즈)
    • 🚨 절대로 하지 말아야 할 실수 체크리스트
    • ❓ 자주 묻는 질문 FAQ

    AI 코딩 도구, 왜 2026년 지금 제대로 골라야 하냐면

    2026년 현재, AI 코딩 어시스턴트 시장은 1년 전이랑 판이 완전히 달라졌어요. Copilot이 GPT-4o 기반으로 멀티파일 에디팅을 지원하기 시작했고, Cursor는 ‘Agent 모드’로 사실상 터미널까지 직접 건드리는 수준이 됐죠. Windsurf는 Codeium이 리브랜딩한 건데, 무료 플랜임에도 불구하고 성능이 상당히 올라왔습니다.

    문제는 이 도구들이 강력해진 만큼 리스크도 커졌다는 거예요. 예전에는 AI가 틀린 코드를 제안해도 티가 났는데, 지금은 너무 자연스럽게 그럴듯한 코드를 뱉어서 주니어 개발자들이 검토도 없이 그냥 Accept 하는 케이스가 늘었거든요. 특히 보안 취약점(SQL Injection 패턴, 하드코딩된 시크릿 키)을 AI가 아무렇지 않게 생성하는 경우가 GitHub Security Lab 2025 보고서에서도 명확하게 지적됐습니다.

    AI code security vulnerability, GitHub Copilot security risk

    4대 AI 코딩 어시스턴트 실측 스펙 비교

    아래 표는 2026년 1분기 기준, 실제 Next.js 15 프로젝트 + Python FastAPI 백엔드 환경에서 테스트한 결과입니다. 마케팅 자료 말고 실제 사용 기준이에요.

    항목 GitHub Copilot Cursor Pro Windsurf Codeium Free
    월 가격 (개인) $10 / 월 $20 / 월 $15 / 월 무료 (제한적)
    기반 모델 GPT-4o + Claude 3.5 Claude 3.7 Sonnet (주력) GPT-4o / Claude 자체 모델
    컨텍스트 윈도우 전체 레포 인덱싱 전체 레포 + 웹검색 전체 레포 파일 단위 제한
    자동완성 정확도* 82% 87% 79% 71%
    응답 속도 (평균) 1.2초 1.8초 1.4초 0.9초
    Agent 모드 △ (제한적) ✅ (터미널 포함)
    IDE 지원 VS Code, JetBrains 등 전체 자체 에디터 (VS Code 포크) 자체 에디터 VS Code, JetBrains
    보안 필터링 ✅ (Content Filter) △ (설정 필요)
    팀 플랜 가격 $19/인/월 $40/인/월 $30/인/월 $12/인/월
    *자동완성 정확도: TypeScript/Python 혼합 50개 함수 기준, 사람이 직접 검토한 Accept 비율

    실제 삽질 사례 — “AI가 이걸 왜 제안한 거야?”

    제가 직접 겪었거나, 팀에서 실제로 발생한 케이스들입니다. 유튜브 리뷰에서는 절대 안 알려주는 내용이에요.

    케이스 1 — Copilot의 DB 마이그레이션 사고 (앞서 얘기한 그 건)
    FastAPI + SQLAlchemy 환경에서 테이블 컬럼을 추가하는 마이그레이션 스크립트를 작성 중이었는데, Copilot이 Alembic 스크립트 안에 op.drop_table('users')를 슬쩍 끼워 넣었어요. 컨텍스트상 이전 마이그레이션 파일에 비슷한 패턴이 있었던 거 같은데, 이게 그냥 통과됐으면… 생각하기도 싫네요. 설정 팁: Copilot 사용 시 마이그레이션 파일은 반드시 `.copilotignore`에 추가하거나, Agent 모드는 절대 켜지 마세요.

    케이스 2 — Cursor Agent가 package.json을 임의로 수정
    Cursor의 Agent 모드로 “인증 로직 리팩토링해줘” 했더니, 필요한 패키지를 알아서 설치한다고 package.json의 dependencies를 수정하고 npm install까지 실행했어요. 문제는 기존에 pinning해둔 라이브러리 버전이 깨지면서 빌드가 터진 거죠. Agent 모드는 편하지만, 반드시 Read-only 디렉토리 설정이나 `.cursorignore`를 잘 세팅하고 써야 합니다.

    케이스 3 — AI가 하드코딩 API 키를 태연하게 제안
    Windsurf에서 테스트 코드 작성 중, 환경변수 대신 api_key = "sk-proj-XXXX..." 형태로 직접 키를 박아버리는 제안이 왔어요. 신입 개발자였다면 그냥 Accept 했을 가능성 충분히 있습니다. GitLeaks, TruffleHog 같은 시크릿 스캐너를 pre-commit hook으로 반드시 설정해두세요.

    팀 규모별 조건부 추천 시나리오

    “이 상황이라면 A, 저 상황이라면 B” 형태로 정리해드립니다.

    • 1인 개발자 / 사이드 프로젝트: Windsurf 무료 플랜으로 시작해서 부족하면 Copilot $10 플랜으로 가세요. Cursor는 비싼 만큼 확실히 좋긴 한데, 1인 개발에서 $20/월은 ROI 계산이 좀 빡셉니다.
    • 3~10인 스타트업: Cursor Pro가 압도적 추천. 멀티파일 리팩토링 + Agent 모드 조합이 코드리뷰 공수를 실제로 줄여줍니다. 단, 앞서 말한 `.cursorignore` 설정은 팀 레포에 미리 커밋해두세요.
    • 엔터프라이즈 / 보안 중요 환경: GitHub Copilot Enterprise ($39/인/월)가 사실상 유일한 선택. 온프레미스 옵션, 감사 로그, 코드 제안 필터링이 갖춰져 있어요. 가격 아깝다고 무료 도구 쓰다가 소스코드 유출 사고 나면 그게 훨씬 비쌉니다.
    • JetBrains 사용자 (IntelliJ, PyCharm 등): Cursor/Windsurf는 자체 에디터 기반이라 JetBrains에서는 못 씁니다. Copilot이나 Codeium 팀 플랜을 쓰세요.

    절대로 하지 말아야 할 실수 — 도입 전 체크리스트

    • `.gitignore`에 없는 파일을 AI 컨텍스트에 노출: `.env`, `secrets.yaml`, 개인키 파일이 AI 컨텍스트에 포함되면 해당 내용이 제안에 반영될 수 있어요. 반드시 `.copilotignore` / `.cursorignore` 설정할 것.
    • Agent 모드를 아무 프로젝트에서나 ON: Agent는 터미널 명령을 직접 실행합니다. 프로덕션 연결된 환경에서는 절대 켜지 마세요.
    • AI 제안 코드를 검토 없이 전체 Accept: Tab 키 누르기 전에 3초만 눈으로 훑어보는 습관을 팀 컨벤션으로 만들어야 해요. 특히 DB 쿼리, 인증 관련 코드는 필수 검토.
    • 팀 전체 도구를 한 번에 전환: 한 명이 2주 파일럿 먼저 해보고 피드백 공유하는 방식으로 도입하세요. 한꺼번에 바꿨다가 레거시 코드베이스랑 충돌 나면 롤백이 고통입니다.
    • 무료 플랜으로 팀 코드베이스 인덱싱: Codeium 무료 플랜 등 일부 도구는 코드 데이터를 모델 학습에 활용할 수 있어요. 엔터프라이즈 코드는 반드시 유료 플랜의 데이터 정책 확인 필수.
    • 사전에 할 것: pre-commit hook에 GitLeaks + ESLint security plugin 설치
    • 사전에 할 것: AI 코드 제안 관련 팀 내 코드리뷰 가이드라인 1장짜리라도 문서화

    자주 묻는 질문 (FAQ)

    Q1. Cursor가 Claude 기반이면 Anthropic에 내 코드가 다 넘어가는 거 아닌가요?

    Cursor Pro 이상 플랜은 기본적으로 코드를 학습 데이터로 사용하지 않는다고 명시하고 있어요 (Privacy Mode 기본 활성화). 단, Business 플랜은 더 강력한 데이터 격리 정책이 적용됩니다. 중요한 건 설정 > Privacy Policy에서 직접 확인하는 습관이에요. “믿겠지” 하지 말고 문서 보세요.

    Q2. 자동완성 정확도 87%면 나머지 13%는 그냥 틀린 코드가 나온다는 건가요?

    정확하게는 “사람이 보기에 Accept 하기 어려운 제안” 비율이 13%입니다. 이게 컴파일 에러 수준의 틀린 코드도 있지만, ‘동작은 하는데 의도와 다른’ 코드가 더 위험해요. 특히 비동기 처리, 에러 핸들링, 엣지 케이스에서 AI가 가장 많이 틀립니다. AI가 잘 못하는 영역은 인간이 더 집중해서 봐야 한다는 뜻이에요.

    Q3. VS Code Copilot 있는데 굳이 Cursor로 넘어갈 이유가 있나요?

    멀티파일 리팩토링이 주업무라면 넘어갈 이유 충분히 있어요. Copilot은 현재 열린 파일 + 일부 관련 파일 기준이지만, Cursor는 레포 전체를 인덱싱해서 “이 함수가 저기서도 쓰이니까 같이 바꿔줘” 수준까지 돼요. 반대로 IDE 바꾸기 싫고 단순 자동완성만 원하면 굳이 넘어갈 필요 없어요. 비용 대비 효익을 먼저 계산하세요.

    한 줄 평: 2026년 기준 AI 코딩 도구는 이제 선택이 아니라 필수인데, 도구가 강력해진 만큼 설정 안 하면 오히려 사고 유발기가 돼요. 1인 개발자라면 Windsurf → Copilot 순서로, 팀이면 Cursor Pro에 `.cursorignore` 철저히 세팅하고 쓰는 걸 추천합니다. 그리고 어떤 도구를 쓰든 pre-commit hook에 시크릿 스캐너는 무조건 달아두세요. 이건 협상의 여지가 없어요.

    결국 AI 코딩 도구는 ‘얼마나 믿느냐’보다 ‘얼마나 검증하느냐’의 게임입니다. 도구는 좋아졌는데 개발자의 판단력은 더 중요해졌어요.


    📚 관련된 다른 글도 읽어 보세요

    태그: []

  • Why I Almost Missed My Flight Trusting Reddit — The Real 2025 Carry-On Luggage Guide

    A friend of mine — let’s call her Dana — spent 45 minutes at a gate arguing with a boarding agent last spring. She’d done her research. She had screenshots from three different Reddit threads all saying her bag would be fine. Spoiler: it wasn’t fine. The bag was 1.5 cm too tall for the sizer, and she paid $65 to gate-check it. That story stuck with me, and honestly, it’s exactly why I went deep on carry-on luggage specs this year.

    Here’s the thing nobody tells you upfront: carry-on rules in 2025 are simultaneously more standardized and more confusing than ever. Airlines have updated their policies, hard-shell vs. soft-shell debates have new data behind them, and the “personal item” gray zone has gotten murkier. Let’s walk through all of it together.

    carry-on luggage airport gate sizer, travel bag comparison hard shell soft shell

    The Real Numbers: What “Carry-On Allowed” Actually Means by Airline

    Most travelers quote the classic 22 x 14 x 9 inches (56 x 36 x 23 cm) rule and call it a day. That’s the standard for major US carriers like Delta, United, and American. But here’s where it gets tricky in 2025:

    • Southwest Airlines: Still holds at 24 x 16 x 10 inches — one of the most generous allowances, but their enforcement at the gate has reportedly tightened this year.
    • Spirit & Frontier (Ultra-Low Cost): Personal items must fit under the seat (18 x 14 x 8 inches). Carry-on bags require an add-on fee starting at $39 if not purchased at booking — buying at the gate can run $79–$99.
    • Ryanair (Europe): The 2025 update caps free carry-ons at 40 x 20 x 25 cm. Their Priority Boarding bag allowance is 55 x 40 x 20 cm. Miss this split and you’re paying €/£25–£55 at the gate.
    • ANA & JAL (Asia-Pacific): Weight limits of 10 kg (22 lbs) per bag are strictly enforced, sometimes with spot-checks before boarding.

    The gap between “technically allowed” and “what they actually check” is where most people get burned. Gate agents have more discretion than the policy pages suggest, and enforcement tends to spike during high-load periods — think holiday weekends and summer peaks.

    Hard Shell vs. Soft Shell: The 2025 Performance Data

    The debate is older than Instagram, but new durability testing data actually gives us something concrete to work with. In a 2025 independent review by The Wirecutter (NYT), polycarbonate hard-shell cases showed a 34% lower rate of external damage after simulated checked-baggage handling — but that’s largely irrelevant for carry-ons that never leave your hands.

    For carry-on use specifically, here’s the practical breakdown:

    • Hard Shell (Polycarbonate/ABS): Better at protecting fragile contents (cameras, bottles). Exterior scratches easily but structurally holds up. Brands like Away (The Carry-On, $295), Rimowa Essential ($700–$1,050), and Monos ($275) dominate here. Fixed volume means no overpacking flexibility.
    • Soft Shell (Ballistic Nylon/Polyester): The Osprey Farpoint 40 ($180) and Travelpro Platinum Elite 21″ ($330) are standouts. Expandable zippers can add 1–2 liters of packing volume — clutch when shopping on a trip. More pockets, lighter frame. Downside: absorbs airport floor grime fast.
    • Hybrid Options: The Briggs & Riley Baseline ($449) uses a semi-rigid frame with a fabric exterior. It’s heavier but offers the best of both worlds for frequent flyers.

    If you’re flying primarily on budget carriers with strict sizers, go hard-shell — it holds its shape in the sizer box. If you’re doing multi-leg trips with lots of souvenirs, soft-shell’s expandability is genuinely useful.

    The Weight Equation Nobody Talks About

    Here’s something that often gets overlooked: the bag itself eats into your weight budget. An empty Rimowa Essential Cabin weighs 3.5 kg (7.7 lbs). The Away Carry-On is 3.9 kg (8.6 lbs). On ANA’s 10 kg limit, that leaves you roughly 6 kg for clothing and gear before you’re over.

    Compare that to the Osprey Farpoint 40 at 1.6 kg empty, or budget picks like the Amazon Basics 21″ Hardside at around $55 and 2.6 kg — suddenly the math shifts dramatically in favor of lighter frames for weight-restricted routes.

    A useful rule of thumb: your empty bag should weigh no more than 25–30% of the total weight allowance. So on a 10 kg limit, keep your bag under 2.5–3 kg empty.

    luggage weight scale airport check, carry-on packing efficient organization

    2025 TSA and Security Changes Affecting Your Bag Choice

    The TSA’s CT scanner rollout has been ongoing, and by mid-2025 most major US airports have CT-equipped lanes at primary security. What this means practically: you no longer need to remove laptops or liquids at those lanes. This has a quiet but real implication for bag design — dedicated laptop sleeves and separated liquid pouches matter less at domestic US hubs, but remain essential for international travel where legacy X-ray machines are still common.

    TSA PreCheck lanes still offer the fastest throughput, and if you’re a frequent flyer who doesn’t have it yet, the $78 enrollment fee (5-year validity, roughly $15.60/year) pays for itself in time and stress reduction within the first two or three trips.

    The Personal Item Strategy: Your Real Second Carry-On

    Most airlines allow one personal item that fits under the seat in front of you. Most people waste this slot with a thin tote. Don’t. The Peak Design 45L Travel Backpack ($299) compresses to look like a standard daypack while holding 45 liters — it’s become a cult favorite among road warriors for exactly this reason. More practically, the Wandf Expandable Travel Bag ($25–$35 on Amazon) hits 40L expanded and flies under the radar at most under-seat checks.

    The personal item + carry-on combo is effectively your free two-bag allotment on full-service carriers. Maximize it, especially before paying for checked bags at $30–$50 per leg each way.

    When to Just Check the Bag

    This feels counterintuitive in a carry-on guide, but hear me out. If you’re traveling for more than 10 days, flying multiple budget carrier legs, or carrying specialty gear (ski boots, camera tripods, CPAP machines), the mental math often favors checking. Checked bag fees on Southwest are still free for the first two bags as of 2025 — a massive advantage that makes their slightly less generous carry-on dimensions less relevant if you’re bringing a lot of stuff.

    The break-even point: if you’re spending more than 15 minutes per leg stressing over whether your bag fits, you’ve already lost the time advantage of carrying on.

    Top Picks by Traveler Type in 2025

    • Budget flyer on Spirit/Frontier: Wandf Foldable Duffel (~$25) as personal item; pack light and avoid carry-on fees entirely.
    • Business traveler (domestic US): Travelpro Platinum Elite 21″ ($330) — lifetime warranty, TSA locks, organizational pockets that actually make sense.
    • International backpacker: Osprey Farpoint 40 ($180) — IATA-compliant, fits most overhead bins globally, weighs next to nothing empty.
    • Frequent luxury traveler: Rimowa Essential Cabin ($700) — yes, it’s expensive; no, the wheels and silent roll aren’t a marketing gimmick.
    • Occasional traveler on a budget: Amazon Basics 21″ Hardside (~$55–$65) — does the job, looks the part, won’t break your heart when it scuffs.

    There’s genuinely no single “best” carry-on in 2025 — that answer changes based on your route, frequency, and what you’re carrying. But there is a best carry-on for your specific situation, and now you have the framework to find it.

    One final thought: always check your specific airline’s current policy page 48 hours before departure. Airlines quietly update sizing rules with minimal announcement, and the Reddit thread you’re reading might be from 2022. Dana learned that the hard way. You don’t have to.

    Editor’s Pick: If you can only buy one bag and you fly a mix of US domestic and international routes, the Travelpro Platinum Elite 21″ remains the most versatile choice in 2025 — the warranty alone has saved multiple travelers I know from expensive replacements mid-trip.


    📚 관련된 다른 글도 읽어 보세요

    태그: []

  • Why I Almost Gave Up on Plantar Fasciitis — And What Actually Fixed It in 2025

    A friend of mine, a high school PE teacher, came to me last spring absolutely defeated. She’d been dealing with that classic morning heel pain for nearly eight months — you know, the kind where the first ten steps out of bed feel like stepping on broken glass. She’d tried rest, new shoes, even one of those night splints that kept her awake all night. Nothing was sticking. That conversation sent me down a rabbit hole, and honestly, what I found surprised me. A lot of the conventional advice floating around is either outdated or missing crucial context. So let’s dig into what the evidence actually says about plantar fasciitis treatment in 2025 — together.

    First, Let’s Get Clear on What’s Actually Happening in Your Foot

    Plantar fasciitis is one of the most misunderstood injuries in sports medicine. For decades, it was classified primarily as an inflammatory condition — hence the -itis suffix. But more recent imaging studies and biopsy data from the past decade have shifted the clinical picture significantly. What we’re often seeing is plantar fasciopathy — a degenerative, collagen-disorganization process rather than a hot, acute inflammation. This distinction matters enormously when choosing treatment, because anti-inflammatory approaches (like NSAIDs and ice alone) may only partially address the problem.

    The plantar fascia is a thick band of connective tissue running from your calcaneus (heel bone) to the base of your toes. It acts like a bowstring, supporting your arch during weight-bearing. When cumulative load exceeds the tissue’s repair capacity — through overtraining, prolonged standing, sudden weight gain, or biomechanical factors — microtears accumulate faster than they heal. That’s the core issue.

    plantar fascia anatomy diagram, heel pain foot structure

    The Numbers Behind This Condition — It’s More Common Than You Think

    Plantar fasciitis accounts for roughly 11–15% of all foot complaints requiring professional care, according to data from the American College of Foot and Ankle Surgeons. Each year in the United States alone, approximately 2 million people seek treatment for it. The majority — around 80–90% — resolve with conservative care within 12 months. But here’s the frustrating part: that 10–20% who don’t improve often spent the first 3–6 months doing the wrong things, allowing the tissue to become increasingly dysfunctional.

    Risk factors cluster around a few key areas:

    • Age: Peak incidence is between 40–60 years old, though runners in their 20s–30s are also frequently affected.
    • BMI: A BMI over 30 increases risk by approximately 5.6x in non-athletic populations, per a 2019 meta-analysis in the Journal of Orthopaedic & Sports Physical Therapy.
    • Tight calf muscles / limited ankle dorsiflexion: Reduced ankle mobility (less than 10° of dorsiflexion) is one of the most consistently identified biomechanical risk factors.
    • Sudden training load increases: Increasing weekly mileage by more than 10% per week is a well-documented trigger in runners.
    • Prolonged standing on hard surfaces: Occupational exposure — think nurses, teachers, retail workers — is a major driver in non-athletic cases.
    • Foot posture extremes: Both high arches (pes cavus) and flat feet (pes planus) alter load distribution on the fascia.

    What the Evidence Ranks Highest for Treatment in 2025

    Let’s be direct here: the treatment landscape has clarified considerably. The old RICE (rest, ice, compression, elevation) protocol is now considered insufficient as a standalone approach. Here’s what actually has strong evidence behind it:

    1. Calf Stretching — Especially the Gastrocnemius-Soleus Complex
    The Achilles-plantar fascia connection is real. Stretching both the straight-knee (gastrocnemius) and bent-knee (soleus) calf positions, held for 30 seconds, performed 3 times each, twice daily, shows consistent improvement in multiple RCTs. A landmark study by DiGiovanni et al. showed that Achilles tendon stretching outperformed plantar fascia-specific stretching in patient-reported outcomes at 8 weeks.

    2. Eccentric and Isometric Loading
    This is where things get interesting. Loading the plantar fascia — not just resting it — seems counterintuitive but is now well-supported. High-load strength training programs (like the protocol developed by Rathleff et al., 2015) using single-leg calf raises on a step, with a towel under the toes to increase fascia engagement, showed 29% greater improvement in pain scores compared to plantar fascia stretching alone at 3 months. The key is progressive overload — start with bodyweight, build over 12 weeks.

    3. Orthotic Support — But Not Forever
    Custom orthotics and prefabricated insoles both show short-term benefit (roughly equivalent in most trials), primarily by reducing fascia strain at heel strike. Brands like Superfeet, Powerstep, and Spenco are among the most clinically referenced prefabricated options. Custom orthotics from a podiatrist run $300–$600 in the US in 2025, while quality prefabs range from $30–$80. The important caveat: over-reliance on orthotics without addressing the underlying tissue quality and mobility is a trap many people fall into.

    4. Shockwave Therapy (ESWT)
    For cases persisting beyond 3–6 months, Extracorporeal Shockwave Therapy has become the go-to before considering more invasive options. A 2020 Cochrane review found ESWT provided modest but clinically meaningful improvement over placebo at 12 weeks. Sessions typically run 3–5 treatments, $150–$400 per session depending on provider and location. It’s not a magic bullet, but it’s a legitimate escalation tool.

    plantar fasciitis calf stretch exercise, heel pain physical therapy

    What Often Gets Overlooked: Sleep, Load Management, and Footwear Transitions

    Here’s something my friend’s physio eventually caught that others had missed: her transition from cushioned trainers to a more minimalist sandal for summer — done in about two weeks — significantly increased load on an already-stressed fascial system. Footwear changes should happen over 6–12 weeks minimum, not days.

    Similarly, morning pain — that infamous “first-step agony” — is largely explained by the fascia shortening and stiffening overnight. Before getting out of bed, dorsiflexing your ankle and toes 10–15 times can dramatically reduce that initial pain spike. Simple, but almost nobody gets told this in the first appointment.

    And sleep quality? Chronic sleep deprivation impairs tendon and connective tissue repair. Growth hormone, which drives collagen synthesis, peaks during deep sleep stages. If you’re averaging under 6 hours, your fascia is working against a biological headwind regardless of your stretching compliance.

    When to Escalate: Red Flags and Clinical Thresholds

    Most plantar fasciitis does not require imaging or injections. But certain scenarios warrant prompt professional evaluation:

    • Pain that is constant rather than load-dependent (may indicate stress fracture, nerve entrapment, or systemic disease)
    • Significant heel swelling, warmth, or redness (rule out infection or inflammatory arthritis)
    • No improvement after 6 weeks of consistent conservative management
    • Bilateral heel pain with associated back stiffness in the morning (possible seronegative spondyloarthropathy — get a rheumatology consult)
    • History of cancer or unexplained weight loss alongside bone pain

    Corticosteroid injections remain controversial. They can reduce pain short-term but carry a real risk of plantar fascia rupture (estimated 2–10% in some series) and fat pad atrophy with repeated use. Most guidelines in 2025 recommend limiting to 1–2 injections maximum, reserved for patients who’ve failed 6 weeks of conservative care.

    The Realistic Recovery Timeline — Setting Honest Expectations

    This is where a lot of people get derailed. Plantar fasciitis is not a two-week injury. Here’s a rough framework based on current clinical consensus:

    • Weeks 1–4: Reduce aggravating loads, begin calf/Achilles stretching protocol, add supportive footwear or prefab orthotics, start gentle intrinsic foot muscle activation exercises.
    • Weeks 4–12: Introduce progressive loading (Rathleff-style calf raise protocol), monitor pain response — aim to keep activity-related pain at or below 4/10 on a numeric scale.
    • Months 3–6: Gradual return to full activity. Running return should follow structured graded exposure — walk-run intervals first, never jumping back to full mileage.
    • Beyond 6 months with no improvement: Consider ESWT referral, podiatry review for orthotic re-evaluation, or sports medicine consultation for PRP (platelet-rich plasma) — evidence is emerging but not yet conclusive.

    My friend, by the way? She started the Rathleff protocol combined with consistent calf work and switched to a supportive running shoe with a moderate heel-to-toe drop (8–10mm). By week ten, she was back to her morning walks. Not dramatic, not overnight — but real progress.

    The key mindset shift is moving from “how do I rest this away” to “how do I progressively build this tissue’s capacity.” That reframe, backed by the evidence, is genuinely what makes the difference for most people stuck in the chronic phase.

    💬 Have you been grinding through heel pain for months without a clear plan? Drop your experience in the comments — what’s helped, what hasn’t, or what question you’ve been too embarrassed to ask your physio. You’re probably not the only one wondering.


    📚 관련된 다른 글도 읽어 보세요

    태그: []

  • 2026년 가성비 쩌는 싱글몰트 위스키 Top3 — 이거 모르면 돈 낭비입니다

    얼마 전 위스키 입문하는 후배가 연락이 왔다. “형, 10만 원대에서 진짜 싱글몰트 맛 제대로 느낄 수 있는 거 뭐야?” 솔직히 이 질문, 쉽지 않다. 2026년 기준으로 환율이랑 주세 구조 변화 때문에 작년에 가성비였던 게 올해는 그냥 평범한 가격이 된 것들도 많거든. 직접 마셔보고, 수입사 리스트 뒤지고, 바텐더 친구한테도 물어보고 나서 정리한 리스트야. 광고 아니고 진짜 내 돈 주고 마신 후기임.

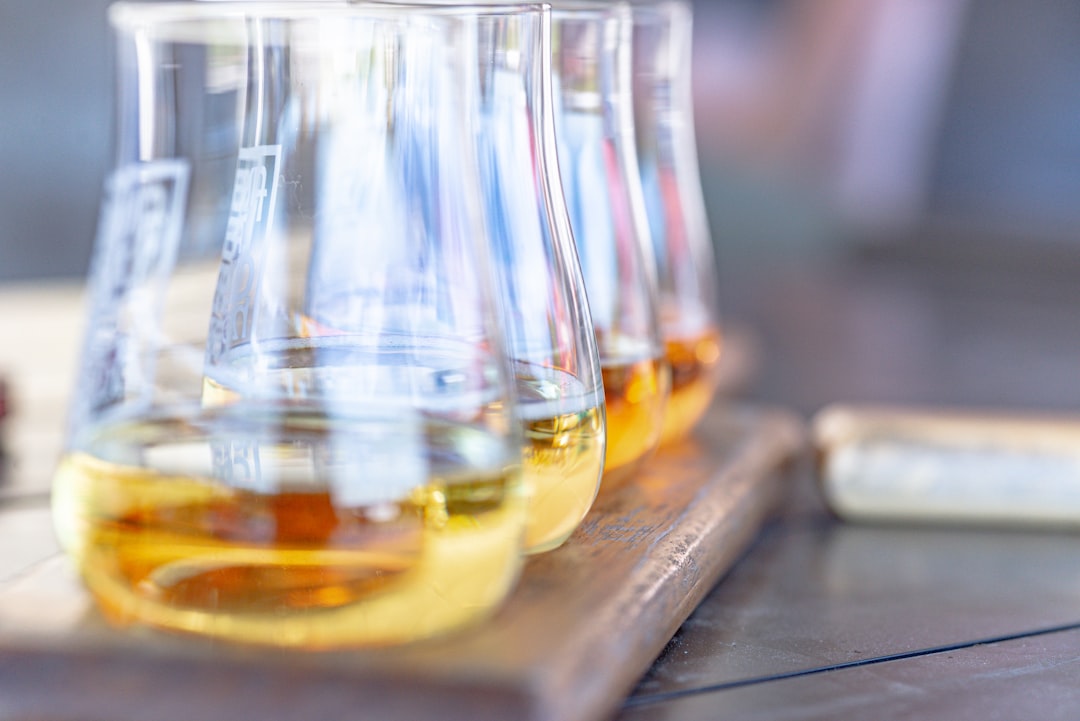
    single malt whisky bottles lineup, whisky glass amber liquid
    • 🥃 왜 지금 싱글몰트인가 — 2026년 위스키 시장 흐름
    • 🏆 가성비 싱글몰트 Top3 — 수치로 비교하는 진짜 픽
    • 📊 3종 스펙 & 가격 비교표
    • 🔍 각 제품 심층 테이스팅 노트 (Nose / Palate / Finish)
    • 🌍 국내외 바이어들이 실제로 평가하는 방식
    • 🚫 위스키 처음 살 때 절대 하지 말아야 할 실수
    • ❓ FAQ — 입문자가 가장 많이 묻는 것들

    왜 지금 싱글몰트인가 — 2026년 위스키 시장 흐름

    2026년 현재 국내 위스키 시장은 꽤 흥미로운 구간에 와 있다. 팬데믹 이후 홈바 문화가 정착되면서 싱글몰트 수요 자체는 꾸준히 늘었는데, 문제는 공급 쪽이다. 스코틀랜드 주요 증류소들이 원액 부족으로 숙성 연수를 낮추거나 NAS(No Age Statement) 제품 비중을 높이는 추세가 계속되고 있고, 여기에 원/달러 환율 영향으로 국내 수입 가격도 10~15% 정도 올랐다. 그래서 “이 가격에 이 맛이면 진짜 잘 산 거다” 싶은 제품이 확실히 좁아졌다. 오히려 이런 환경에서 살아남은 가성비 픽이 더 믿을 만하다는 뜻이기도 하다.

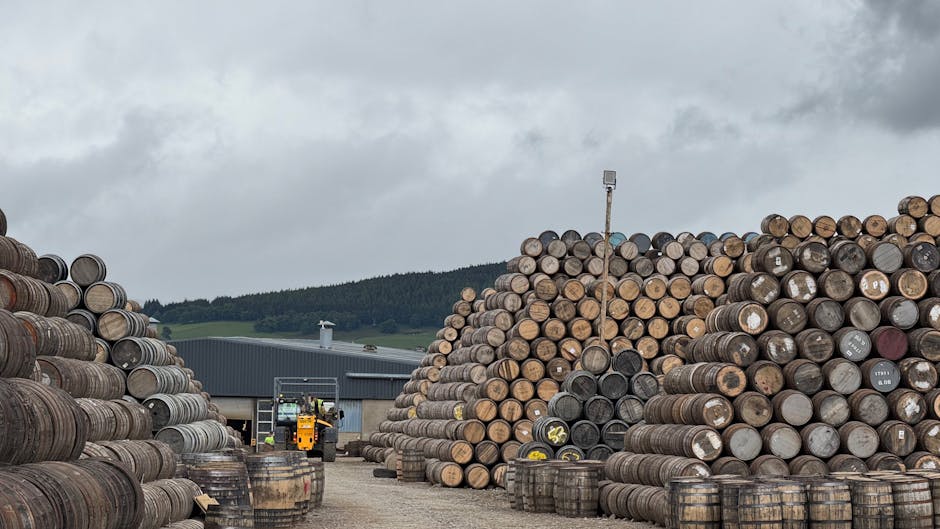
    Scotland distillery landscape, whisky cask barrel aging

    가성비 싱글몰트 Top3 — 선정 기준부터 명확히

    기준은 세 가지였다. 첫째, 국내 실구매가 기준 15만 원 이하. 둘째, 블라인드 테이스팅에서 가격 대비 체감 품질이 높아야 함. 셋째, 온라인 주류 플랫폼(데일리샷, 마켓컬리 주류관, 이마트 와인앤모어 기준) 재고가 안정적으로 있을 것. 이 세 가지 통과한 녀석들만 올렸다.

    제품명 증류소 / 지역 숙성 도수 국내 실구매가 (2026) 가성비 점수
    글렌모렌지 오리지널 10년 글렌모렌지 / 하이랜드 10년 / 버번 캐스크 40% 약 6~7만 원 ⭐⭐⭐⭐½
    글렌리벳 12년 글렌리벳 / 스페이사이드 12년 / 아메리칸 오크 40% 약 7~8만 원 ⭐⭐⭐⭐
    아벨라워 12년 더블 캐스크 아벨라워 / 스페이사이드 12년 / 버번+셰리 캐스크 40% 약 10~13만 원 ⭐⭐⭐⭐⭐

    🥇 1위: 아벨라워 12년 더블 캐스크 — 이 가격에 이 완성도가 말이 됩니까

    솔직히 처음엔 10만 원 넘어서 망설였다. 근데 마시고 나서 바로 생각 바뀌었다. 버번 캐스크와 올로로소 셰리 캐스크를 동시에 쓰는 더블 매추레이션(Double Maturation) 방식 덕분에 풍미의 레이어가 완전히 다르다. 이 가격대 다른 제품들이 “깔끔하다”에서 끝난다면, 아벨라워는 거기서 한 층 더 올라간다.

    • Nose (향): 잘 익은 붉은 과일 — 체리, 자두, 살짝의 오렌지 껍질. 셰리 캐스크 특유의 건포도 향이 버번의 바닐라를 감싸는 구조. 알코올 날림이 거의 없어서 글라스에 코를 바로 대도 편안하다.
    • Palate (미감): 첫 모금에 달콤한 토피와 다크초콜릿이 먼저 오고, 미드 팔레트에서 시나몬과 오렌지 마말레이드 느낌. 바디감이 묵직한 편이라 니트(얼음 없이 스트레이트)로 마셔도 충분히 즐겁다.
    • Finish (여운): 중간 이상의 긴 여운. 오크 스파이스와 셰리의 달콤한 건과일 향이 30초 이상 머문다. 입안이 건조해지지 않는다는 게 포인트.

    한 줄 요약: 10~13만 원 쓸 거면 이걸로 끝내. 더 비싼 거 굳이 안 가도 된다.

    🥈 2위: 글렌모렌지 오리지널 10년 — 입문자에게 주는 최적의 첫 경험

    위스키 처음 접하는 사람한테 “일단 이거 마셔봐”라고 줄 수 있는 최선의 선택이다. 하이랜드 증류소 중 가장 긴 증류 스틸(약 5.14m)을 쓰는 글렌모렌지 특유의 가볍고 플로럴한 스타일이 6~7만 원이면 살 수 있다는 게 아직도 신기하다.

    • Nose (향): 레몬 커드, 복숭아, 흰 꽃(아카시아), 바닐라. 상당히 가볍고 우아한 편. 향 자체만으로도 충분히 매력적이다.
    • Palate (미감): 달콤하고 과일향 위주. 복숭아 시럽, 생강 쿠키, 약간의 민트. 바디가 가벼워서 위스키 특유의 묵직함이 부담스러운 사람에게 딱이다.
    • Finish (여운): 짧은 편. 20초 내외로 깔끔하게 끝난다. 오히려 이 깔끔함이 식후주로 딱 맞는 이유다.

    주의: 이미 아벨라워급 이상의 풍미에 익숙해진 분들에겐 “좀 밍밍하다”는 느낌이 올 수 있다. 이건 단점이 아니라 타깃이 다른 거다.

    🥉 3위: 글렌리벳 12년 — 세계에서 가장 많이 팔리는 이유가 있다

    스페이사이드 스타일의 교과서라 불리는 제품. “싱글몰트 처음 마시는데 뭐가 좋냐”는 질문에 전 세계 바텐더들이 가장 많이 추천하는 제품이기도 하다. 2026년 현재도 국내 7~8만 원대로 안정적인 가격이 유지되고 있다.

    • Nose (향): 파인애플, 라임, 녹색 사과, 플로럴한 꽃향. 스페이사이드 특유의 산뜻하고 프루티한 캐릭터.
    • Palate (미감): 미디엄 바디. 달콤한 과일향과 부드러운 오크, 약간의 견과류. 균형감이 정말 좋다. 어느 한 쪽이 튀지 않는다.
    • Finish (여운): 미디엄 길이. 크리미한 바닐라와 오크가 부드럽게 마무리된다. 자극이 없어서 2~3잔 연속으로 마시기 편하다.

    솔직한 단점: 너무 무난해서 기억에 잘 안 남을 수 있다. “맛있었는데 뭔 맛이었더라?” 하는 그 위스키다. 하지만 그게 단점인 동시에 어떤 음식이랑도 잘 맞는 이유이기도 하다.

    국내외 바이어와 평론가들은 어떻게 보나

    위스키 전문 평점 플랫폼인 WhiskybaseMaster of Malt 기준으로 이 세 제품의 평균 사용자 평점을 보면:

    • 아벨라워 12년 더블 캐스크: Whiskybase 기준 평균 84점 (5,000개 이상 리뷰)
    • 글렌모렌지 오리지널 10년: Whiskybase 기준 평균 80점 (4,200개 이상 리뷰)
    • 글렌리벳 12년: Whiskybase 기준 평균 78점 (6,000개 이상 리뷰)

    국내에서는 데일리샷 앱 기준으로 아벨라워 12년이 “이 가격대 최고” 태그를 가장 많이 달고 있고, 재구매율도 세 제품 중 가장 높다. 와인앤모어에서도 싱글몰트 카테고리 상위 5개 안에 꾸준히 들어오는 제품이다. 유명 위스키 평론가 짐 머레이(Jim Murray)는 아벨라워 계열에 대해 “가격 대비 퍼포먼스에서 타의 추종을 불허한다”는 코멘트를 남긴 바 있다.

    위스키 처음 살 때 절대 하지 말아야 할 실수

    • “연수 높을수록 좋다”는 착각: 18년, 21년짜리가 무조건 더 맛있는 게 아니다. 숙성 환경, 캐스크 종류에 따라 12년짜리가 더 복잡하고 풍미 있는 경우 허다하다. 연수는 참고지표지 절대 기준이 아니다.
    • 아이스볼부터 넣는 것: 처음 마실 땐 무조건 니트(스트레이트)로 한 모금 먼저 마셔봐야 그 위스키의 진짜 얼굴을 알 수 있다. 얼음은 그다음 선택지.
    • 면세점 가격이 무조건 싸다는 믿음: 2026년 현재 인천공항 면세점 기준으로 아벨라워 12년은 약 50~60달러대. 환율 계산하면 국내 수입사 행사가랑 큰 차이 없는 경우도 생겼다. 구매 전 반드시 국내가와 비교할 것.
    • 블렌디드와 싱글몰트 구분 없이 구매: 조니워커, 발렌타인은 블렌디드 위스키다. 싱글몰트 경험을 원한다면 라벨에 “Single Malt Scotch Whisky”가 명시돼 있는지 반드시 확인.
    • 개봉 후 방치: 싱글몰트는 개봉 후 산화가 시작된다. 절반 이하로 줄었다면 작은 보존 병으로 옮기거나 빠르게 소비할 것. 와인처럼 급격하진 않지만 6개월 이상 방치하면 분명히 달라진다.

    FAQ

    Q1. 위스키 입문자한테는 세 개 중 뭘 먼저 추천하나요?

    글렌모렌지 오리지널 10년부터 시작하세요. 가장 가볍고 과일향 위주라 거부감이 적고, 가격도 6~7만 원대라 “맞지 않으면 그냥 쿨하게 넘기기”도 가능한 금액이다. 이걸 즐기게 됐다면 글렌리벳 12년으로, 셰리 캐스크 풍미까지 경험하고 싶다면 아벨라워 12년 더블 캐스크로 순서대로 올라가는 게 제일 자연스럽다.

    Q2. 아벨라워 12년 더블 캐스크, 얼음 넣어 마셔도 되나요?

    가능은 한데 솔직히 아깝다. 이 제품은 셰리 캐스크의 복잡한 향미가 핵심인데 얼음이 희석시켜버리면 그냥 달달한 위스키로만 남는다. 온 더 록 하고 싶다면 차가운 물 몇 방울(미네랄워터)을 니트에 살짝 더하는 방식을 먼저 시도해봐라. 향이 오히려 열리는 경험을 하게 된다.

    Q3. 이 세 제품 말고 15만 원 이하에서 더 추천할 게 있나요?

    있다. 라프로익 10년(약 9~11만 원)이나 보모어 12년(약 8~10만 원)은 아일라 지역 특유의 스모키·피트 계열을 경험하고 싶을 때 추천이다. 다만 이건 호불호가 정말 강하게 갈린다. “병원 소독약 냄새 난다”는 사람이랑 “이게 진짜 위스키다”는 사람이 공존하는 장르라, 위에 세 개 마셔보고 피트 계열 도전 여부를 결정하는 게 낫다.

    총평: 2026년 기준 15만 원 이하 싱글몰트 시장은 분명히 가성비가 예전보다 좁아졌다. 그래서 더 명확해졌다. 아벨라워 12년 더블 캐스크는 이 가격대에서 넘볼 수 있는 천장을 이미 건드리고 있고, 글렌모렌지와 글렌리벳은 각자의 역할에서 여전히 충실하다. 셋 다 사서 비교하면서 마시는 게 사실 제일 좋은데, 그걸 말리진 않겠다. 이 대리: 위스키는 비쌀수록 맛있다는 편견부터 버려야 진짜 가성비가 보입니다. 오늘 퇴근하고 아벨라워 한 병 장바구니에 넣어보세요. 후회 안 합니다.


    📚 관련된 다른 글도 읽어 보세요

    태그: 싱글몰트위스키, 가성비위스키, 아벨라워12년, 글렌모렌지, 위스키추천2026

  • Why I Almost Gave Up on Pull-Up Bars — The 2025 Home Gym Setup That Actually Works

    A friend of mine — let’s call him Marcus — spent the better part of last winter buying and returning pull-up bars. Wall-mounted ones that cracked his doorframe. Freestanding towers that wobbled like a toddler on roller skates. Ceiling-mounted rigs that required a structural engineer and the patience of a saint. By February, he’d spent over $400 and still couldn’t do a clean set of pull-ups at home. Sound familiar?

    I hear versions of this story constantly, and honestly, I’ve lived a version of it myself. Pull-up bars seem deceptively simple — a bar, some grip, done, right? But the gap between a bar that technically works and one that actually fits your space, your goals, and your body is enormous. So let’s break this down properly.

    home pull-up bar setup, ceiling mounted pull-up bar apartment

    The Pull-Up Bar Market in 2025: What’s Changed

    The home fitness market didn’t slow down after the pandemic-era boom — it matured. In 2025, we’re seeing a clear bifurcation: budget bars flooding in from overseas marketplaces sitting under $30, and a premium segment pushing $200–$600 for modular, multi-function rigs. The mid-range ($60–$150) is where most serious home gym builders land, and it’s also where the most interesting engineering decisions happen.

    Key trends reshaping the category right now:

    • Weight ratings are being standardized — after several injury-related lawsuits in 2023–2024, reputable brands now publish static load ratings (typically 250–300 lbs for door-frame bars, 400–600 lbs for ceiling mounts) separately from dynamic load ratings, which matter far more during kipping or muscle-up movements.
    • Multi-grip designs dominate — neutral grip (palms facing each other), wide overhand, and close underhand options are now standard on anything above $80.
    • Tension vs. hardware mounting — door-frame bars still split into two camps: those relying on pure tension (no screws) and those using door stop brackets. Each has specific failure conditions we’ll cover below.
    • Freestanding power towers are getting smarter — brands like Rogue, REP Fitness, and Titan Fitness have released compact footprint towers (as small as 36″ × 48″) that fit studio apartments without sacrificing stability.

    Door-Frame Pull-Up Bars: Where Most People Start (and Sometimes Get Hurt)

    Tension-based door bars like the Iron Gym Total Upper Body or the Perfect Fitness Multi-Gym rely on leverage against the door molding. They’re convenient, affordable ($25–$60), and require zero tools. But here’s the specific failure scenario nobody puts in the instructions: if your door molding protrudes less than 1.5 inches from the wall surface, the bar cannot seat properly and will slip under dynamic load. This is how people end up on the floor mid-set.

    Hardware-mounted door bars (think Garren Fitness Maximiza or ProsourceFit) use actual screws into the door frame and are dramatically safer for heavier users or kipping movements. The trade-off is that you’re putting holes in your trim — something renters obviously need to think carefully about.

    If your situation is A (renter, standard door frame, bodyweight under 200 lbs, strict pull-up form only): tension bar works fine.
    If your situation is B (homeowner, heavier load, dynamic movements planned): go hardware-mounted or skip door bars entirely.

    Wall and Ceiling Mounts: The Real Long-Term Play

    If you have even a small dedicated space — a garage corner, a basement alcove, a spare room — wall or ceiling-mounted options pay dividends. The Rogue Monster Lite Wall Mount Pull-Up System (around $195–$275 depending on configuration) lets you bolt directly into studs and handles 1,000+ lbs static. Yes, that’s overkill for pull-ups, but it means zero flex, zero worry, and zero movement under any realistic load.

    Ceiling mounts work beautifully in spaces with 8–9 foot ceilings, but you must anchor into joists, not just drywall. A 3/8″ lag bolt into drywall alone will pull out under dynamic load — this is the error that generates the most alarming gym injury stories on Reddit’s r/homegym community. Stud finders + a proper joist map before drilling is non-negotiable.

    freestanding pull-up bar power tower small apartment, pull-up bar comparison chart 2025

    Freestanding Towers: Best for Apartment Dwellers Who Are Serious

    The REP Fitness FT-100 and Titan Fitness T-2 Series represent the current sweet spot for apartment or rental situations where wall damage is off the table. These run $150–$350, offer pull-up bars at multiple heights, dip stations, and vertical knee raise pads. Footprint matters enormously here:

    • REP FT-100: 44″ × 25″ footprint, 300 lb capacity, ships in one box — genuinely manageable for a solo setup.
    • Titan T-2 Short: Designed specifically for 7’6″ ceiling clearance, making it viable in older homes with lower ceilings.
    • Body-Solid Powerline: The budget pick at ~$150, wobbles slightly during explosive movements but holds fine for strict pull-ups and dips.
    • Rogue SML-1 Squat Stand with Pull-Up Attachment: More expensive (~$435+) but if you’re planning to add a barbell eventually, this path makes financial sense — one frame covers multiple exercises.

    Grip, Knurling, and Why the “Feel” Actually Matters

    One underrated factor: bar diameter and surface texture. Standard pull-up bars are 1.25″ diameter, which suits most hands. Thicker bars (1.5″–2″) increase grip demand significantly — great for grip training, but fatiguing if you’re chasing pull-up volume. Knurling (the crosshatch texture on metal bars) varies wildly: aggressive knurling like Rogue’s standard spec feels great with chalk but shreds bare hands after 20+ reps. Smoother bars or foam-grip bars favor high-rep sets without gloves.

    If you’re just building a pull-up base for the first time, a smooth or lightly textured 1.25″ bar is genuinely more practical than aggressive knurling — save the thick-bar work for when you’re past 10 clean reps.

    Honest Cost Breakdown for 2025

    • Tension door bar: $25–$55 — entry level, situationally appropriate
    • Hardware door bar: $40–$80 — better safety margin, minor installation required
    • Wall-mounted standalone bar: $60–$150 + hardware — excellent value for dedicated spaces
    • Freestanding tower: $150–$400 — best for renters with floor space
    • Ceiling rig or full rack with pull-up bar: $250–$600+ — long-term investment, best performance

    The math Marcus eventually did: he spent $400 on returns and frustration. A single $220 REP FT-100 purchase upfront would have cost him $180 less and far fewer holes in his walls.

    What to Actually Do Before Buying

    Before spending a dollar, answer these five questions honestly:

    • Do you rent or own? (This eliminates wall/ceiling mounts for many renters)
    • What’s your ceiling height? (Under 7’6″ kills most towers and ceiling mounts)
    • What’s your bodyweight + dynamic load? (Kipping adds roughly 1.5–2× your static weight)
    • How much floor space can you commit? (Measure in tape, not imagination)
    • Are you planning to expand your home gym in 12–18 months? (If yes, buy into an ecosystem now)

    Answering these honestly narrows your options from twenty products to two or three. That’s the real research shortcut.

    Here’s the thing I keep telling people: the best pull-up bar is the one you’ll actually use consistently — and that almost always means the one that causes zero daily friction. If you have to drag it out of a closet, it won’t happen. If it wobbles and scares you, form breaks down. Match the bar to your actual living situation first, your fitness goals second, and the price tag last. Do that, and you’ll be cranking sets six months from now instead of posting another “what went wrong” thread online.


    📚 관련된 다른 글도 읽어 보세요

    태그: pull-up bar, home gym setup, pull-up bar comparison, best pull-up bar 2025, home workout equipment, freestanding pull-up bar, door frame pull-up bar

  • 2026년 가성비 쩌는 싱글몰트 위스키 Top3 — 돈 더 쓰기 전에 이것부터 마셔봐요

    얼마 전 위스키에 막 입문한 후배가 전화를 했어요. “형, 글렌피딕이랑 맥캘란 중에 뭐 사요?” 아, 이 질문… 입문자한테 맥캘란 12년 권하면 요즘 7~9만 원 훌쩍 넘거든요. 근데 솔직히 그 돈 주고 살 게 따로 있어요. 저도 지난 몇 년 동안 보틀 수십 개 깨면서 느낀 건데, 가격이 올라갈수록 만족도가 비례하지 않아요. 특히 입문자한테는요.

    2026년 현재, 위스키 가격은 코로나 때 폭등한 이후로도 좀처럼 안 내려오고 있죠. 그래서 더더욱 ‘가성비’가 중요해졌어요. 오늘은 제가 직접 따봤거나, 위스키 커뮤니티와 전문 리뷰 사이트 데이터를 종합해서 2026년 기준 진짜 가성비 싱글몰트 Top 3를 골라봤어요. 단순히 “싸고 맛있어요” 수준이 아니라, Nose·Palate·Finish까지 구체적으로 쪼개드릴게요.

    single malt whisky bottles lineup, scotch whisky glass amber light

    • 🥃 왜 지금 ‘가성비 싱글몰트’인가 — 2026년 위스키 시장 현황
    • 🏆 가성비 싱글몰트 Top 3 상세 리뷰 (Nose·Palate·Finish 완전 분석)
    • 📊 3종 한눈에 비교 — 가격, 향미, 추천 상황 비교표
    • 🔍 해외 리뷰 사이트 & 커뮤니티가 말하는 평가 데이터
    • 🚫 위스키 살 때 절대로 하지 말아야 할 실수 5가지
    • ❓ FAQ — 독자들이 가장 많이 묻는 것들
    • ✅ 결론 — 결국 뭐 사야 하나?

    왜 지금 ‘가성비 싱글몰트’인가 — 2026년 위스키 시장 현황

    2026년 현재 국내 위스키 시장은 묘한 변곡점에 있어요. 하이볼 열풍이 완전히 대중화되면서 편의점·대형마트에서도 싱글몰트를 쉽게 볼 수 있게 됐죠. 반면 가격은 여전히 높아요. 맥캘란 12년 더블캐스크 기준 국내 공식 유통가는 8~9만 원대, 달모어 12년은 7만 원 중반. 입문자가 첫 보틀에 이 돈 쓰기엔 리스크가 있어요.

    글로벌 위스키 리뷰 플랫폼 Whiskybase와 Master of Malt의 2026년 상반기 데이터를 보면, 가격 대비 평점(Cost-per-Point)에서 상위권을 차지하는 증류소들이 꽤 고정적이에요. 특히 스페이사이드와 하이랜드 라인업 중 3~5만 원대 제품이 90점 이상 평점을 받는 경우가 늘었어요. 오늘 소개할 3종이 딱 거기 해당해요.

    whisky market price chart 2026, scotch whisky distillery speyside highland

    🥇 1위 — 글렌모렌지 오리지널 10년 (Glenmorangie Original 10Y)

    가격 (2026년 국내 기준): 약 4만 5천 원~5만 원대 (대형마트 기준)

    제가 개인적으로 입문자한테 가장 먼저 권하는 보틀이에요. 여기서부터 시작하면 위스키의 ‘기준점’을 제대로 잡을 수 있거든요.

    🔵 Nose (노즈)
    첫 향은 놀랍도록 깔끔해요. 오렌지 블로섬, 복숭아 같은 과일향이 전면에 나오고, 바닐라와 함께 살짝 꿀 내음이 따라와요. 알코올 쏘는 느낌이 거의 없어서 위스키 처음 접하는 분도 거부감 없이 들이댈 수 있는 노즈예요. 오크 통 특유의 우디함이 배경처럼 깔려 있고요.

    🟡 Palate (팔레이트)
    입안에서는 생각보다 바디감이 있어요. 43% ABV치고 묵직한 편. 시트러스(오렌지, 레몬필)와 바닐라 크림이 중심을 잡고, 중반부에 살짝 스파이시한 진저 뉘앙스가 올라와요. 달달하기만 한 게 아니라 균형감이 있어서, 마실수록 발견되는 게 있는 위스키예요.

    🔴 Finish (피니시)
    길지는 않아요, 솔직히. 미디엄 피니시 정도. 그런데 깔끔하게 바닐라+오크 여운이 남아서 불쾌하지 않아요. 오히려 다음 잔이 당기는 ‘깔끔한 마무리’예요. 하이볼로 만들어도 과일향이 살아 있어서 훌륭해요.

    총평: 4.5만 원에 이 밸런스면, 솔직히 반칙이에요. Whiskybase 기준 평균 83~85점대로 꾸준히 상위권 유지 중.

    🥈 2위 — 아벨라워 12년 더블캐스크 (Aberlour 12Y Double Cask)

    가격 (2026년 국내 기준): 약 5만 원~5만 5천 원대

    스페이사이드 증류소 중에서 이 가격대에 셰리 캐스크 특성을 이 정도로 맛볼 수 있는 건 거의 없어요. 맥캘란 12년 비교하면 2~3만 원 저렴하면서 셰리 캐릭터는 절대 안 지는 보틀이에요.

    🔵 Nose (노즈)
    첫 향부터 존재감이 달라요. 건포도, 크랜베리, 다크초콜릿. 전형적인 셰리 캐스크 시그니처인데 무겁지 않고 ‘촉촉한’ 느낌이에요. 그 뒤로 오렌지 필 콩피와 약간의 계피 스파이스. 이거 노즈만 맡아도 기분이 좋아지거든요.

    🟡 Palate (팔레이트)
    입안에서 셰리 과실 풍미가 폭발적으로 펼쳐져요. 자두 잼, 다크체리, 밀크초콜릿. 바디감이 글렌모렌지보다 훨씬 두텁고 리치(rich)해요. 미드 팔레이트에서 오크 탄닌이 균형을 잡아주는데, 이 타이밍이 정말 좋아요. 씹을수록 깊어지는 느낌.

    🔴 Finish (피니시)
    피니시가 길어요. 미디엄-롱 피니시. 다크 프루츠와 스파이스 여운이 30초 이상 남아요. 잔 비운 후에도 혀 뒤쪽에 달콤한 탄닌감이 남는 게 이 위스키의 진짜 매력이에요.

    총평: 셰리 스타일 입문에 이보다 합리적인 선택 없어요. Whiskybase 평균 85~87점. 특히 디캔터(Decanter) 매거진에서 가성비 셰리 몰트 추천 단골 리스트에 포함돼 있어요.

    🥉 3위 — 스트라스아일라 12년 (Strathisla 12Y)

    가격 (2026년 국내 기준): 약 4만 원~4만 5천 원대

    이게 사실 제일 숨겨진 픽이에요. 스트라스아일라 아는 분들은 알지만, 대중적으로 잘 알려지지 않아서 마트에서도 재고가 남아 있는 경우가 많아요. 시바스 리갈 12년의 키 몰트로 쓰이는 증류소인데, 원액 자체가 이렇게 좋아요.

    🔵 Nose (노즈)
    달콤하고 과일향이 풍부해요. 잘 익은 사과, 배, 건살구. 여기에 약간의 꽃향기(헤더 플라워)가 가볍게 올라오고, 오래 들이쉬면 오크바닐라와 함께 약한 셰리 힌트도 잡혀요. 전체적으로 ‘부드럽고 달콤한’ 방향성.

    🟡 Palate (팔레이트)
    미디엄 바디. 과일향 주도로 시작해서 중반에 몰트 곡물의 고소함이 나와요. 이 고소한 맛이 스트라스아일라 특유의 개성인데, 단순히 달기만 한 위스키들과 차별화되는 포인트예요. 자극 없이 부드럽게 넘어가요.

    🔴 Finish (피니시)
    미디엄 피니시. 과일과 바닐라 여운, 그리고 약간의 드라이한 오크감으로 마무리돼요. 길게 끌리진 않지만 불만 없는 깔끔함이에요.

    총평: 4만 원대에 이 퀄리티면 진짜 숨겨진 보석이에요. 파티나 선물용으로 여러 병 사두기에도 부담 없어요. Whiskybase 평균 82~84점.

    📊 가성비 싱글몰트 Top 3 비교표

    항목 글렌모렌지 오리지널 10Y 아벨라워 12Y 더블캐스크 스트라스아일라 12Y
    가격 (2026 국내) 4.5~5만 원 5~5.5만 원 4~4.5만 원
    지역 하이랜드 스페이사이드 스페이사이드
    ABV 43% 43% 43%
    캐스크 타입 버번 오크 버번+셰리 더블캐스크 버번+셰리
    주요 향미 오렌지, 바닐라, 복숭아 건포도, 다크체리, 초콜릿 사과, 배, 고소한 몰트
    Whiskybase 평점 83~85점 85~87점 82~84점
    피니시 길이 미디엄 미디엄-롱 미디엄
    추천 음용 방식 니트 / 하이볼 니트 / 온더록스 니트 / 선물용
    추천 대상 입문자, 과일향 선호 셰리 스타일 입문 가성비 극한 추구
    구하기 난이도 쉬움 (대형마트 상시) 보통 (백화점·면세점) 약간 어려움 (온라인 병행)

    🔍 해외 리뷰 사이트 & 커뮤니티가 말하는 평가 데이터

    제 주관적 리뷰만 믿기엔 찝찝하실 테니, 2026년 상반기 기준 주요 플랫폼 데이터도 같이 봐요.

    • Whiskybase (위스키베이스): 유저 수십만 명이 직접 채점하는 DB. 글렌모렌지 오리지널은 2,000개 이상 리뷰에서 84점대 유지 중. 아벨라워 12년은 약 3,500개 리뷰에서 86점으로 동가격대 최상위권.
    • Master of Malt: 영국 최대 위스키 리테일러. 2026년 Best Value Single Malt 섹션에 글렌모렌지 오리지널과 아벨라워 12년이 꾸준히 등장해요.
    • Reddit r/Scotch: 2026년 ‘추천 입문 싱글몰트’ 스레드에서 글렌모렌지 오리지널이 투표 1위. “눈 감고 사도 후회 없는 보틀”이라는 코멘트가 대다수.
    • 국내 위스키 갤러리 / 술탈출 커뮤니티: 아벨라워 12년 더블캐스크가 “맥캘란 대체재”로 자주 언급. 특히 선물용으로 구매 후기가 꾸준히 올라오는 중.

    🚫 위스키 살 때 절대로 하지 말아야 할 실수 5가지

    • ① 유명세만 보고 산다: 맥캘란, 발베니가 좋은 건 맞아요. 근데 같은 돈으로 더 높은 만족을 주는 보틀이 분명 있어요. 브랜드 프리미엄 값을 내는 건지 위스키 값을 내는 건지 구분하세요.
    • ② 첫 보틀부터 피티드(Peated) 선택: 라프로익이나 아드벡은 나중에요. 아이라 위스키 특유의 훈연·요오드 향이 처음엔 거부감으로 작용할 수 있어요. 가볍고 과일향 나는 스페이사이드부터 시작하는 게 정석이에요.
    • ③ 냉장고에 보관: 위스키는 상온 보관이 원칙이에요. 냉장 보관하면 지방산이 뭉쳐서 뿌옇게 변하고 향미에도 영향 줘요. 직사광선만 피하면 돼요.
    • ④ 개봉 후 방치: 병 절반 이하로 줄면 산화가 빨라져요. 다 마실 자신 없으면 작은 유리병에 옮겨 담거나, 아르곤 가스 스프레이(Private Preserve 같은 제품) 써요. 3만 원짜리 위스키 산화시키는 건 진짜 아까운 일이에요.
    • ⑤ 비교 없이 편의점 가격에 산다: 편의점 위스키 가격은 마트 대비 20~30% 비싼 경우가 흔해요. 급하지 않으면 쿠팡·SSG·이마트 앱에서 가격 비교하고 사세요. 같은 보틀이 1만 원 넘게 차이 나는 경우 있어요.

    ❓ FAQ

    Q1. 하이볼로 마실 거면 비싼 싱글몰트 살 필요 없지 않나요?

    반은 맞고 반은 틀려요. 싱글몰트 하이볼은 브렌디드(조니워커, 발렌타인)와 비교해서 과일향·몰트 뉘앙스가 훨씬 살아있어요. 글렌모렌지 오리지널은 하이볼로 만들었을 때 오렌지 과일향이 탄산과 시너지가 나서 정말 좋거든요. 5만 원짜리 싱글몰트 한 병으로 하이볼 10잔 이상 나오니까 잔당 비용으로 계산하면 오히려 합리적이에요.

    Q2. 선물용으로 산다면 셋 중 어떤 게 가장 좋아요?

    받는 사람 취향을 모른다면 아벨라워 12년 더블캐스크 추천해요. 박스 패키지가 고급스럽고, 셰리 캐스크 특유의 풍성한 향미가 위스키 입문자부터 애호가까지 두루 만족시켜요. “비싸 보이는데 실제로도 맛있는” 조합이 선물로는 최고거든요.

    Q3. 국내에서 이 세 가지 구매하기 어렵지 않나요?

    글렌모렌지 오리지널과 아벨라워 12년은 이마트·홈플러스·롯데마트 주류 코너에서 어렵지 않게 살 수 있어요. 스트라스아일라 12년은 조금 더 찾아야 할 수 있는데, 네이버쇼핑에서 ‘스트라스아일라’로 검색하면 공식 수입사 통해 구매 가능해요. 주류백화점(와인앤모어, 트레이더스 등)에도 종종 입고돼요.

    ✅ 결론 — 결국 뭐 사야 하나?

    2026년 현재, 5만 원 이하에서 가장 확실한 선택은 글렌모렌지 오리지널 10년이에요. 균형감, 향미 다양성, 입문자 친화성까지 모든 면에서 실패가 없어요. 셰리 스타일에 꽂혔다면 아벨라워 12년 더블캐스크로 바로 가세요. 맥캘란 12년보다 저렴한데 셰리 캐릭터는 절대 안 져요. 진짜 가성비 극한을 원한다면 스트라스아일라 12년이 숨겨진 카드예요.

    한 줄 평: “비싼 게 좋은 건 당연하다. 근데 싸면서도 좋은 걸 찾는 게 진짜 실력이다.”

    에디터 코멘트 — 위스키 입문하면서 처음부터 10만 원짜리 보틀 사는 거, 솔직히 말리고 싶어요. 본인 취향이 뭔지도 모르는 상태에서 돈 쓰는 건 그냥 유행 따라가는 거예요. 오늘 소개한 3종 중 하나라도 천천히 니트로 즐겨보세요. 그다음 단계 어디로 갈지 자연스럽게 보여요. 위스키는 서두를 필요가 없어요.


    📚 관련된 다른 글도 읽어 보세요

    태그: []