A neighbor of mine spent nearly $4,000 last spring getting her entire brick chimney repointed — only to watch the same mortar joints start crumbling again by fall. When she called the contractor back, the response was essentially a shrug. Turns out, the crew had used the wrong mortar mix for her older soft brick, and the mismatch caused the new mortar to actually trap moisture and crack. That story stuck with me, and honestly it’s what drove me to dig deep into everything about tuck pointing before tackling my own 1960s-era brick foundation.
So here’s what I found — and what I wish someone had told both of us before we picked up the phone.
What Tuck Pointing Actually Is (And What It Isn’t)
There’s a surprisingly common mix-up between tuck pointing and repointing. Repointing is the broader process of removing deteriorated mortar and replacing it — full stop. Tuck pointing is a specific finishing technique where two different colors of mortar are used: a base mortar that matches the brick color, with a thin, contrasting putty “tuck” line applied over it to create the illusion of very fine, precise joints. It originated in 18th-century Britain as a way to make ordinary brickwork look like expensive gauged brickwork.
In casual American usage, though, most homeowners and even some contractors use “tuck pointing” interchangeably with repointing — so always clarify which service you’re actually getting when you get quotes.
How Bad Does It Have to Get Before You Act?
Here’s the data point that surprised me: mortar joints that are recessed more than ¼ inch (6mm) are generally considered the threshold for mandatory repointing, according to the National Park Service Preservation Briefs. At that point, water infiltration risk escalates sharply. But the real danger isn’t aesthetic — it’s structural. Water that penetrates behind brick can freeze, expand (water expands about 9% when it freezes), and cause spalling or, in worst cases, brick delamination that costs 3–5x more to repair than timely mortar work.
Look for these warning signs on your own walls:
- Crumbling or powdery mortar that you can scratch out with a key — if you can go deeper than ¼ inch easily, act now
- Efflorescence (white chalky streaks) — a sign that water is already moving through the wall
- Stair-step cracks along mortar lines — often indicates differential settling, needs structural assessment first
- Missing mortar chunks at corners or where horizontal and vertical joints meet
- Interior moisture or damp spots on walls adjacent to brick exterior — late-stage warning
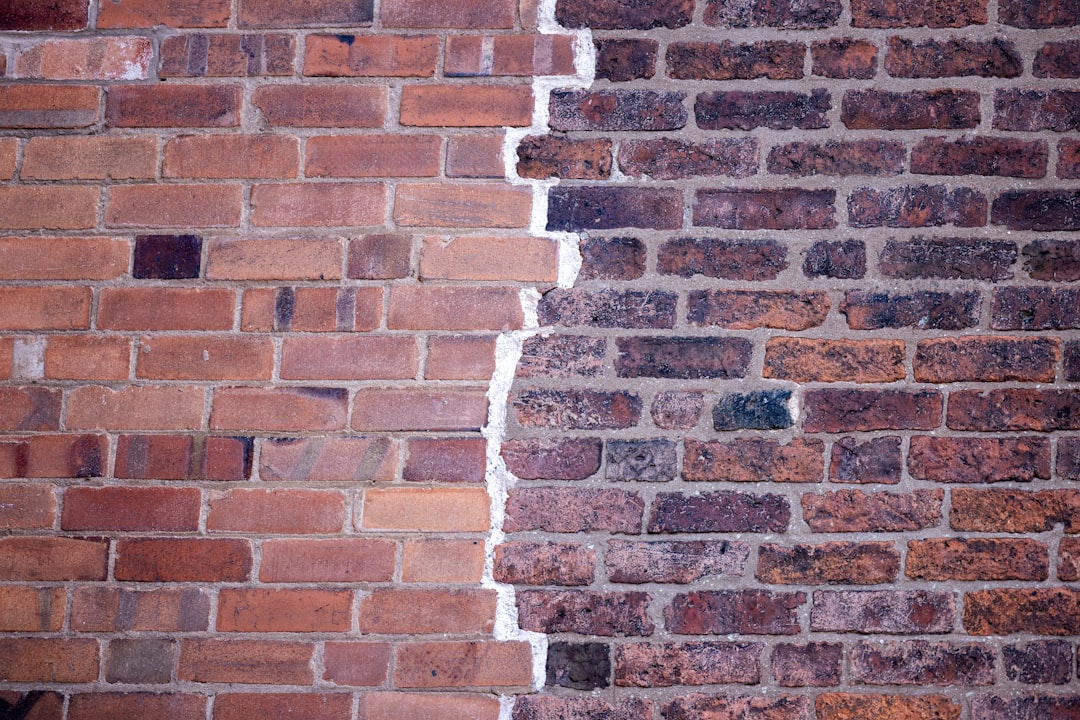
The Mortar Mix Problem Nobody Talks About Enough
This is where my neighbor’s story becomes critically relevant. Pre-1920s brick — and honestly a lot of brick through the 1960s — was made softer and more porous than modern brick. The original mortar used was typically a lime-based mix (Type O or Type K) specifically because it was slightly softer than the brick itself. The mortar was designed to be the sacrificial element — it cracks and weathers before the brick does, and you replace the mortar, not the expensive brick.
Modern Portland cement mortars (Type S or Type N) are much harder. When you use them on soft historic brick, the mortar wins every expansion-contraction cycle. The brick loses. You end up with spalling, face loss, and brick that can’t be repaired without full replacement.
The ASTM mortar type guide is your friend here:
- Type M — Highest strength (2,500 psi), used below grade or in severe weather exposure. Often too hard for older brick.
- Type S — High strength (1,800 psi), good for exterior walls and patios. Standard choice for post-1950s residential brick.
- Type N — Medium strength (750 psi), the most common recommendation for above-grade exterior repointing on average residential brick.
- Type O — Low strength (350 psi), ideal for interior or sheltered work, and often the right choice for pre-1920s soft brick.
If your home is older than 1940, get a mortar hardness test or consult a mason with historic preservation experience before anyone mixes a single bag of product.
DIY vs. Professional: The Honest Cost-Benefit in 2025
Let’s talk numbers. As of 2025, professional tuck pointing/repointing typically runs $5–$25 per linear foot depending on your region, accessibility, and mortar depth. A full chimney repoint on a standard two-story home might cost $800–$2,500. A full exterior wall situation on a large brick home? Easily $8,000–$15,000+.
DIY is genuinely viable for small sections — a 10-foot section of accessible foundation wall, for instance. The tools you need:
- Angle grinder with a mortar raking blade (or a cold chisel and hammer for small jobs) — rake out at least ¾ inch depth, ideally 1 inch
- Stiff brush and compressed air to clean the joint before packing
- Mortar bag or pointing trowel to pack new mortar in ½-inch lifts, not all at once
- Jointing tool matching your original joint profile (concave, V-joint, flush, etc.)
- Plastic sheeting to slow cure — mortar cures best when it dries slowly; direct sun on a hot day causes cracking
The #1 DIY mistake: not removing enough of the old mortar. Less than ¾ inch depth means the new mortar has insufficient mechanical bond area and will fail within 2–3 years. The second most common error: not dampening the brick before applying mortar. Dry brick sucks moisture from the mortar before it cures properly, causing weak, dusty joints.
Real-World Case Studies and Trusted References
The National Park Service Preservation Briefs — specifically Briefs #1 and #2 — are freely available online and remain the gold standard reference for mortar selection on older structures. If you have a pre-1950 home, these documents are worth a Saturday afternoon read.
Old House Journal and This Old House have both published detailed contractor-vetting guides updated for 2025 market conditions. The consensus from both: always ask a potential contractor to specify which ASTM mortar type they intend to use and why, and get it in writing. Any contractor who can’t answer that question clearly is a red flag.
For product selection, Sakrete Mortar Mix Type S and Quikrete Mortar Mix are the most widely available pre-blended options at big-box stores, but for historic work, consider Edison Coatings or St. Astier NHL (Natural Hydraulic Lime) products — both available online and used by preservation professionals nationwide.
Getting the Right Contractor: 5 Questions That Filter Out the Bad Ones Fast
- “What mortar type will you use, and how did you determine that’s right for my brick?” — They should mention brick hardness assessment.
- “How deep will you rake out existing mortar?” — Correct answer: minimum ¾ inch, preferably 1 inch.
- “Will you dampen the joints before packing?” — Correct answer: yes.
- “What joint profile will you match?” — They should look at your existing profile, not just default to concave.
- “Do you offer a written warranty, and what does it specifically cover?” — Industry standard is 1–5 years on labor; material defects fall on product manufacturer.
Timing and Maintenance: Making It Last
The ideal temperature window for tuck pointing work is 40°F–90°F (4°C–32°C), with no rain forecast for at least 48 hours post-application. In most of the US, that means late spring through early fall is your window. Fall scheduling (September–October) often gets you better contractor availability and slightly lower prices compared to peak summer demand.
Once repointed, seal exposed joints on chimneys and parapets (horizontal surfaces that collect standing water) with a breathable masonry sealer — not a film-forming waterproofer, which traps moisture behind the wall. Products labeled “vapor permeable” or with a water vapor transmission rate over 25 perms are what you want. Plan on inspection and minor touch-ups every 5–7 years in normal climates, every 3–5 years in freeze-thaw-heavy climates like the Upper Midwest or New England.
The takeaway is pretty simple: tuck pointing and repointing done right is genuinely one of the highest-ROI maintenance tasks you can do on a brick home. Done wrong — with mismatched mortar, insufficient depth, or skipped curing steps — it accelerates the very damage you were trying to stop. Take the time to match the mortar to the brick, prep the joint properly, and if you’re hiring out, ask the five questions above before you sign anything.
HomePro Tip: If you’re ever unsure whether your brick is soft or hard historic brick, try this simple field test: scratch the brick face with a steel nail. If it scratches easily, it’s likely a softer historic brick that needs a lime-dominant mortar. If the nail barely marks it, modern Type S or N is probably fine. It takes 10 seconds and could save you thousands.
📚 관련된 다른 글도 읽어 보세요
- Why Irish Whiskey Is Taking Over the World in 2026: The Real Story Behind the Boom
- Cognac Brandy & French Food Pairing Guide 2026: What Actually Works (And What Doesn’t)
- 스카치는 이제 옛말? 아이리시 위스키가 2026년 전 세계를 점령하는 진짜 이유 5가지
태그: []
Leave a Reply