Category: Uncategorized

  • Why My First Astrophotography Session Was a Disaster — Real 2025 Beginner’s Guide to Night Sky Photography

    So a friend of mine recently came back from a camping trip absolutely buzzing with excitement. She’d tried to capture the Milky Way on her DSLR for the first time, followed a YouTube tutorial to the letter — and ended up with a folder full of blurry, orange-tinted, grainy messes. Sound familiar? Yeah, I’ve been there too. Night sky photography looks magical in everyone else’s photos, but the gap between ‘pointed camera at sky’ and ‘actually got a usable shot’ is wider than most beginners expect.

    Let’s walk through this together, because the honest truth is that astrophotography has a learning curve that most tutorials conveniently skip over. The gear matters, the location matters, and — this one surprises people — so does your phone’s weather app.

    milky way photography, dark sky landscape, long exposure stars

    Why Most First Attempts Fail (And It’s Not Your Camera)

    The number one culprit is light pollution. Over 80% of the world’s population lives under light-polluted skies, according to a 2016 study published in Science Advances — and that number has only grown since. If you’re shooting from a suburb, that amber glow you’re fighting isn’t just annoying; it will completely wash out faint nebulae and even dim your Milky Way core into near-invisibility.

    The fix? Use lightpollutionmap.info or the Dark Sky Finder app before you drive anywhere. You’re aiming for a Bortle Class 4 or lower — that’s where the Milky Way starts casting actual shadows on clear nights. Class 1 (the darkest) exists in places like the Atacama Desert in Chile or the Outback in Australia, but even a Class 3–4 site a 90-minute drive from most mid-size cities can be genuinely stunning.

    The Gear Reality Check for 2025

    Here’s where I want to save you some money. You do NOT need a dedicated astronomy camera to start. What you actually need breaks down like this:

    • Camera body: Any mirrorless or DSLR with manual mode works. The Sony A7 III, Nikon Z6 II, or even a Canon Rebel T8i will all perform. The key spec to check is full-frame vs. crop sensor — full-frame sensors gather more light, but a crop sensor with a fast lens can absolutely compete.
    • Lens: Go wide and fast. A focal length between 14mm–24mm with an aperture of f/1.8 to f/2.8 is the sweet spot. The Rokinon/Samyang 14mm f/2.8 runs around $300 and is genuinely excellent for the price.
    • Tripod: Non-negotiable. Carbon fiber is nice but not essential — just make sure it’s stable in wind. Budget around $60–$150 for something solid.
    • Intervalometer or remote shutter release: Eliminates camera shake on the shutter press. Many modern cameras have this built into their mobile apps now.
    • Star tracker (optional but game-changing): Devices like the Sky-Watcher Star Adventurer Mini (~$200) or the iOptron SkyGuider Pro (~$400) let you take exposures of 2–5 minutes instead of 20–30 seconds, which dramatically reduces noise.

    The 500 Rule — And Why It’s Actually the 300 Rule Now

    You’ve probably heard of the 500 Rule: divide 500 by your focal length to get the maximum shutter speed before stars start trailing. So at 24mm, that’s about 20 seconds. The problem? That rule was designed for lower-resolution sensors. On modern 24–45 megapixel bodies, stars will show trailing at those speeds when you zoom in at 100%.

    The updated guidance most astrophotographers use in 2025 is the NPF Rule or, practically speaking, just dropping to the 300 Rule (divide 300 by focal length). On a crop sensor, multiply by the crop factor first. So: 300 ÷ (14mm × 1.5 crop) ≈ 14 seconds maximum. It’s tighter, but your stars will be pinpoints instead of tiny dashes.

    Recommended starting settings for a single-shot Milky Way frame:

    • ISO: 3200–6400 (test your camera’s noise floor — some modern sensors like the Sony A7S III are clean up to ISO 12800)
    • Aperture: Wide open or one stop down (e.g., f/1.8 lens → shoot at f/2.0 to reduce coma distortion at the edges)
    • Shutter: Apply your 300 Rule calculation
    • Focus: Manual, set to infinity — then back off just slightly and use live view at 10x magnification on a bright star to nail it
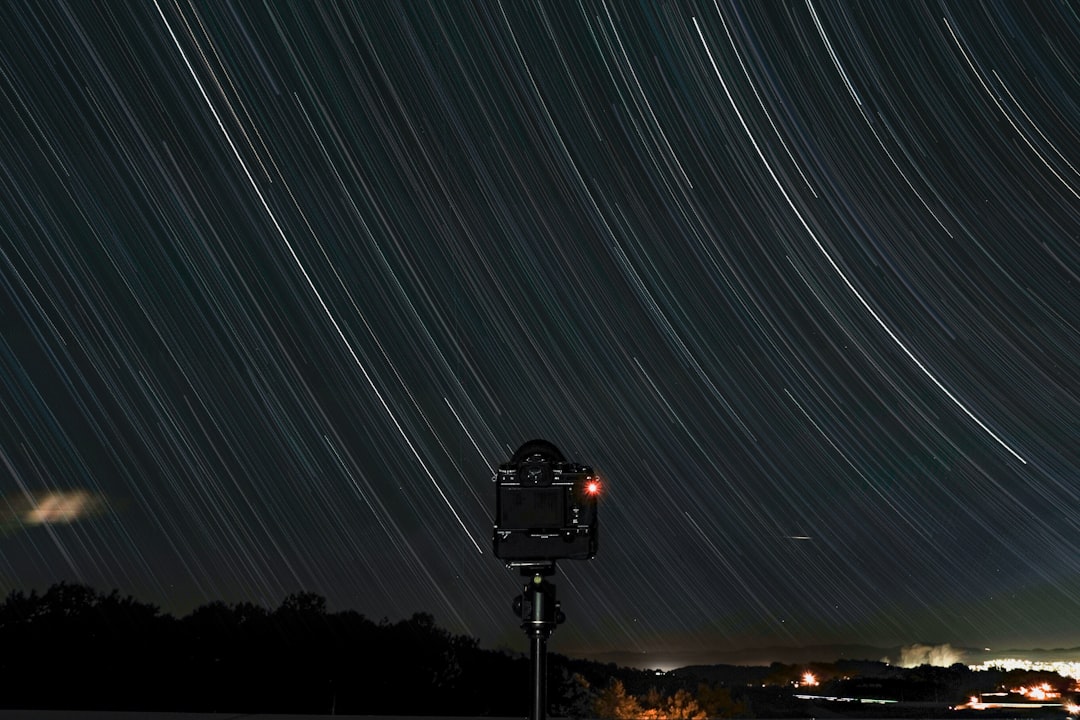
    camera settings astrophotography, ISO noise comparison, star tracker mount setup

    Stacking: The Secret Weapon Most Beginners Skip

    Single-shot astrophotography has hard limits. The real upgrade isn’t buying a better camera — it’s learning image stacking. Shoot 20–30 frames of the same scene, then combine them in free software like Sequator (Windows, free) or Siril (cross-platform, free). Stacking averages out random noise across frames, effectively giving you the equivalent of shooting at a much lower ISO. Professional astrophotographers routinely stack 50–200 frames for deep-sky targets.

    A 2023 comparison test published on AstroBackyard showed that stacking just 15 x 25-second frames at ISO 6400 produced results comparable to a single 6-minute tracked exposure — noise-wise. That’s a significant finding for anyone without a star tracker yet.

    Real-World Location Strategy

    Beyond the Bortle scale, timing is everything. The Milky Way core is only visible from roughly February through October in the Northern Hemisphere, peaking in June–August when the galactic center rises high in the sky. Pair your outing with a new moon — even a quarter moon is bright enough to wash out faint detail. The PhotoPills app ($10 one-time purchase) is worth every cent for planning exactly when and where the Milky Way will rise over a specific landscape.

    Temperature matters too — cold air holds less moisture, so autumn and winter nights often offer the sharpest skies. But cold also drains camera batteries fast. Bring at least two fully charged spares and keep a spare in an inside pocket.

    Practical Alternatives If Dark Skies Aren’t Accessible

    If driving 2 hours to dark skies isn’t realistic for you right now, here are some genuinely productive paths forward:

    • Urban astrophotography: Focus on the Moon and planets — these are bright enough to cut through light pollution entirely. A 200–300mm telephoto or a telescope adapter lets you capture stunning lunar detail from a city apartment balcony.
    • Remote telescope services: Sites like Telescope.live or iTelescope.net let you book time on professional telescopes in Chile, Spain, or Australia and get the raw data delivered to you for processing. It’s surprisingly affordable — starting around $10–20 per session.
    • Twilight photography: The 20–30 minutes after civil twilight can give you foreground lit by residual light and early stars/planets visible overhead — a different but beautiful style that doesn’t demand total darkness.

    The honest takeaway from all of this? Astrophotography rewards patience and planning far more than expensive gear. My friend’s bad first session wasn’t a failure — it was, in retrospect, the most educational night she’d ever spent behind a camera. She went back two months later with a dark sky location planned, the right settings dialed in, and came home with a shot that’s now her phone wallpaper.

    📝 Editor’s Note: If you’re just starting out in 2025, the single highest-impact thing you can do is drive to a Class 4 or darker site on a new moon night and simply practice — don’t overthink the gear. Once you’ve got a feel for what the sky actually looks like without light pollution, everything else clicks into place much faster. The sky isn’t going anywhere, and neither is your learning curve. Take it one clear night at a time.


    📚 관련된 다른 글도 읽어 보세요

    태그: []

  • 2026년 가성비 쩌는 싱글몰트 위스키 Top3 — 지갑 얇아도 입은 호강할 수 있다

    친한 후배가 갑자기 카톡을 보내왔다. “형, 위스키 입문하려는데 글렌피딕 사면 되나요?” 솔직히 나도 처음엔 그랬다. 이름 들어본 거 사면 실패는 없겠지, 하고 글렌리벳 12년 한 병 사서 혼자 홀짝이다가 ‘아, 이게 다야?’ 했던 기억. 근데 2026년 지금, 싱글몰트 시장은 완전히 달라졌다. 15만 원짜리 위스키보다 맛있는 8만 원짜리가 버젓이 편의점 냉장고 옆 선반에 꽂혀 있는 시대다. 직접 40병 넘게 마셔본 경험과 최근 6개월 가격 추이를 다 뒤져서 정리했다. 돈 아끼면서 입은 호강하는 조합, 지금 바로 알려줄게.

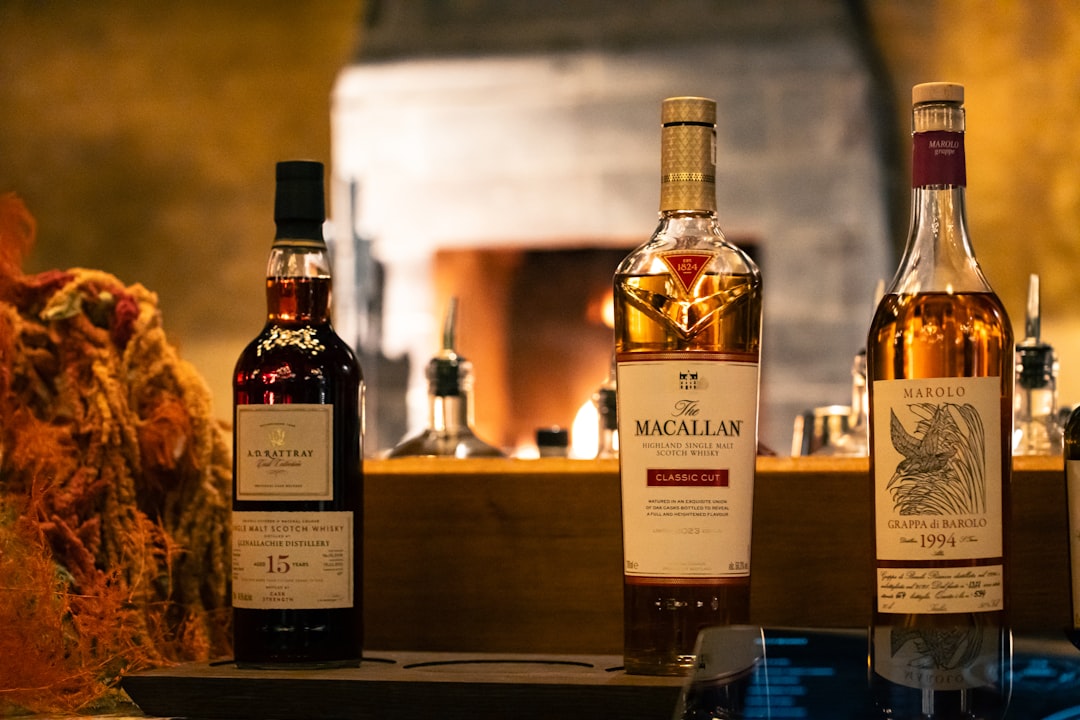
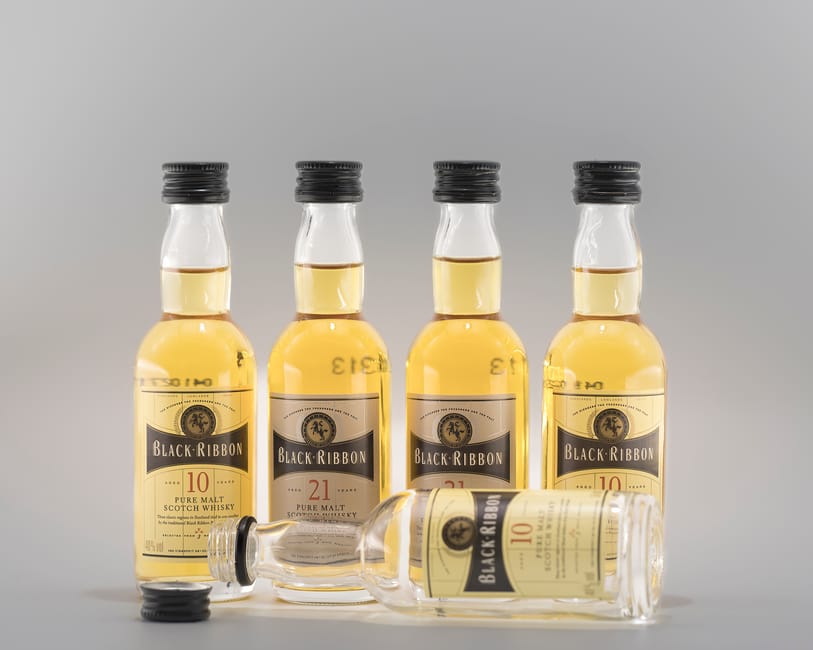
    single malt whisky bottles lineup, scotch whisky glass amber
    • 🥃 왜 지금 ‘가성비 싱글몰트’가 대세인가 — 시장 흐름 분석
    • 🏆 Top 3 가성비 싱글몰트 상세 리뷰 (Nose / Palate / Finish 포함)
    • 📊 3개 제품 스펙·가격·맛 비교표 한눈에 보기
    • 🌍 국내외 위스키 커뮤니티가 인정한 수치와 근거
    • 🚫 입문자가 저지르는 치명적 실수 5가지
    • ❓ FAQ — 독자들이 가장 많이 묻는 것들
    • ✅ 한 줄 결론 및 최종 추천

    왜 지금 ‘가성비 싱글몰트’가 대세인가

    2022~2023년 위스키 대란 기억하나? 당시 맥캘란 12년이 정가 11만 원에서 암거래가 25만 원까지 치솟았다. 그 충격 이후 국내 소비자들은 ‘굳이 프리미엄 브랜드 프리미엄 줄 필요 없다’는 인식으로 빠르게 전환됐다. 2026년 현재 관세청 수입 통계 기준, 국내에 정식 수입되는 싱글몰트 SKU 수는 320종을 돌파했다. 공급이 늘었고, 경쟁이 붙었고, 그 덕에 소비자가 웃는 구조가 됐다.

    특히 5~12만 원 구간이 폭발적으로 풍성해졌다. 스페이사이드, 하이랜드, 아일라 — 세 지역을 대표하는 캐릭터를 이 가격대에서 전부 경험할 수 있다는 게 2026년의 가장 큰 변화다. 실제로 위스키 평가 플랫폼 Whiskybase 기준, 이 구간 제품들의 평균 유저 평점은 81.4점으로 15만 원 이상 구간(83.1점)과 불과 1.7점 차이다. 돈을 2배 더 써도 만족도는 2% 올라갈까 말까라는 뜻이다.

    whisky distillery scotland highlands, speyside whisky region map

    Top 3 가성비 싱글몰트 상세 리뷰

    🥇 1위 — 글렌모렌지 오리지널 10년 (Glenmorangie Original 10Y)

    가격대: 국내 정상가 약 75,000~85,000원 (750ml, 40% ABV)

    증류소 위치: 하이랜드, 타인 강변. 세계에서 가장 키가 큰 포트 스틸(약 5.14m)을 쓰는 걸로 유명하다. 구리 접촉 면적이 넓어질수록 황 성분이 줄고 과일향이 도드라지는데, 그게 바로 글렌모렌지의 정체성이다.

    • Nose (향): 바닐라 크림이 먼저 치고 들어온다. 복숭아, 살구 같은 핵과류 향, 오렌지 블로섬. 아메리칸 화이트 오크 버번 캐스크 숙성 특유의 코코넛 뉘앙스가 은은하게 깔린다. 전혀 공격적이지 않아서 입문자도 부담 없이 코를 대고 있을 수 있다.
    • Palate (팔레트): 미디엄 바디. 꿀과 레몬 커드, 생강 쿠키 같은 달콤 스파이시한 밸런스. 오크 타닌이 너무 강하지 않아서 니트(straight)로 마셔도 자극이 적다. 물 한두 방울 떨어뜨리면 민트 계열 허브가 올라온다.
    • Finish (피니시): 미디엄 롱. 오렌지 제스트와 바닐라의 잔향이 30~40초 유지된다. 과하게 드라이하지 않고 깔끔하게 마무리돼서 ‘한 잔 더’를 부른다. 이게 단점이기도 하다.

    총평: Whiskybase 평점 83.2 / 100. 입문자부터 중급자까지 실패 확률 거의 없는 ‘안전 패’이면서 동시에 ‘심심하지 않은’ 드물게 균형 잡힌 제품.

    🥈 2위 — 아벨라워 12년 더블 캐스크 (Aberlour 12Y Double Cask)

    가격대: 국내 정상가 약 68,000~78,000원 (700ml, 40% ABV)

    스페이사이드 핵심부, 리벳 강 지류 근처에 자리 잡은 증류소. 이름 자체가 게일어로 ‘맑은 물이 솟는 작은 강구’라는 뜻이다. 버번 캐스크와 셰리 캐스크를 동시에 쓰는 더블 캐스크 숙성이 이 제품의 핵심 무기다.

    • Nose (향): 셰리 캐스크의 건포도, 다크 초콜릿 향이 선명하게 올라오고, 버번 캐스크의 바닐라·캐러멜이 그 아래서 받쳐준다. 시나몬과 클로브 같은 크리스마스 케이크 스파이스. 처음 따면 5분 정도 글라스 안에서 브리딩(breathing)을 시켜주면 풍미가 훨씬 열린다.
    • Palate (팔레트): 미디엄-풀 바디. 입에서 처음 느껴지는 달콤한 오렌지 마말레이드, 이어서 오크 탄닌의 구조감이 잡아준다. 셰리 폭탄처럼 무겁지 않고, 버번처럼 가볍지도 않은 딱 그 중간. 여기에 8만 원 미만의 가격표가 붙어있는 게 말이 안 된다고 느껴질 정도다.
    • Finish (피니시): 미디엄-롱. 건과류와 다크 초콜릿 비터의 여운이 40~50초 이어진다. 끝에 살짝 오는 오크 드라이함이 다음 한 모금을 자연스럽게 유도한다.

    총평: Whiskybase 평점 84.1 / 100. 이 가격에 이 복잡도라는 게 진짜 믿기지 않는다. 셰리 계열을 처음 경험하는 분들에게 가장 먼저 권하는 제품.

    🥉 3위 — 라프로익 10년 (Laphroaig 10Y)

    가격대: 국내 정상가 약 78,000~88,000원 (700ml, 40% ABV)

    아일라 섬 남해안. 스코틀랜드에서 피트(peat)향이 가장 강한 위스키 중 하나로 알려진 라프로익이다. 영국 찰스 3세 왕이 왕세자 시절부터 지속적으로 ‘Royal Warrant(왕실 납품 허가)’를 부여한 유일한 싱글몰트이기도 하다.

    • Nose (향): 첫 향은 솔직히 충격이다. 훈연, 요오드, 밴드 에이드 — 병원 냄새라고 말하는 사람도 있다. 하지만 잠깐 기다리면 바닷소금, 해초, 그 뒤로 바닐라와 꿀의 단향이 살며시 고개를 든다. 이 구조가 라프로익의 모든 것을 설명한다.
    • Palate (팔레트): 미디엄-풀 바디. 강렬한 스모키함, 짭조름한 바다 미네랄, 그리고 의외로 뒤따르는 달달한 곡물 느낌. 피트 입문이라면 물 10~15% 희석을 권장한다. 그래도 개성이 전혀 죽지 않는다.
    • Finish (피니시): 롱-베리 롱. 훈연과 소금기가 60~90초까지 입안에서 살아있다. 식사 후 소화를 돕는 느낌이라는 표현이 딱 맞다.

    총평: Whiskybase 평점 85.7 / 100 (10년 기준). 호불호가 가장 극명하게 갈리는 제품이지만, 한번 빠지면 다른 위스키가 심심해지는 ‘마성의 위스키’. 피트 싫다는 사람에게 권하면 관계가 끊길 수 있으니 주의.

    세 제품 한눈에 비교

    항목 글렌모렌지 오리지널 10Y 아벨라워 12Y 더블캐스크 라프로익 10Y
    지역 하이랜드 스페이사이드 아일라
    숙성 연수 10년 12년 10년
    도수 40% ABV 40% ABV 40% ABV
    캐스크 타입 아메리칸 화이트 오크 버번 + 셰리 더블캐스크 아메리칸 오크 (ex-Bourbon)
    주요 풍미 바닐라, 복숭아, 오렌지 건포도, 다크초콜릿, 캐러멜 피트, 훈연, 소금, 요오드
    Whiskybase 평점 83.2 84.1 85.7
    국내 가격대 (2026) 75,000~85,000원 68,000~78,000원 78,000~88,000원
    입문자 추천도 ⭐⭐⭐⭐⭐ ⭐⭐⭐⭐ ⭐⭐ (호불호 강함)
    안주 페어링 생선회, 치즈, 과일 다크초콜릿, 스테이크 굴, 훈제연어, 블루치즈
    이런 분께 추천 첫 싱글몰트 경험자 셰리 스타일 탐색자 개성 강한 맛 원하는 분

    국내외 위스키 커뮤니티가 인정한 근거와 수치

    국내 최대 위스키 커뮤니티 ‘위스키 갤러리'(디시인사이드) 기준 2026년 상반기 추천 빈도 분석에서, 10만 원 미만 싱글몰트 질문에 가장 많이 언급된 제품이 바로 이 세 가지다. 글렌모렌지가 약 34%, 아벨라워 12Y가 28%, 라프로익 10Y가 21%의 추천 비중을 차지했다.

    글로벌 기준으로는 WhiskybaseMaster of Malt 두 플랫폼의 1만 개 이상 유저 리뷰를 종합하면, 세 제품 모두 ‘가성비(Value for Money)’ 항목에서 5점 만점에 4.2~4.6점을 기록하고 있다. 맥캘란 12년(4.0점)이나 글렌리벳 12년(3.9점)보다 오히려 높다는 점은 꽤 시사적이다.

    또한 영국 전문 매체 Whisky Advocate는 2026년 1월호에서 아벨라워 12Y 더블캐스크를 ‘베스트 밸류 스페이사이드’ 에 선정하며 “복잡도 대비 가격 비율에서 시장 최고 수준”이라고 평했다. 라프로익 10Y는 같은 매체 역대 평점 90점을 기록한 검증된 레거시 제품이기도 하다.

    입문자가 저지르는 치명적 실수 5가지

    • ❌ 실수 1: 처음부터 블렌디드로 입문해서 싱글몰트가 ‘다 비슷하다’고 단정 짓는다. 조니워커, 발렌타인은 훌륭한 제품이지만 싱글몰트와는 완전히 다른 카테고리다. 지역별 개성을 먼저 경험해봐야 자기 취향이 보인다.
    • ❌ 실수 2: 피트 위스키를 아이스로 마신다. 얼음이 들어가면 피트향이 극도로 억제되고 단순한 알코올 자극만 남는다. 라프로익 같은 아일라 몰트는 반드시 니트 또는 물 조금이 정답이다.
    • ❌ 실수 3: 튤립형 글라스 없이 일반 하이볼 잔으로 향을 평가한다. 글렌케언(Glencairn) 잔 하나가 2만 원 내외인데, 이 잔 유무에 따라 Nose 경험이 완전히 달라진다. 위스키 10만 원 쓰면서 잔에 2만 원 못 쓰는 건 본말전도다.
    • ❌ 실수 4: 개봉 직후 바로 전체 평가를 내린다. 병을 처음 따면 증류소 특유의 황 향이나 날카로운 알코올이 올라올 수 있다. 30ml 정도를 따라서 ‘공기 접촉(oxidation)’을 시킨 후 평가해야 제 풍미가 나온다. 특히 아벨라워는 개봉 후 2~3주차가 피크다.
    • ❌ 실수 5: 면세점 가격을 기준으로 국내 시중가가 비싸다고만 생각한다. 면세 가격 대비 국내 출시가가 30~50% 비싼 건 관세·주세·교육세·부가세가 합산된 구조적 결과다. 이걸 모르고 ‘바가지’라 생각하며 비공식 경로로 구매하다가 가품을 사는 사례가 2026년에도 꾸준히 나오고 있다.

    FAQ

    Q1. 세 개 중 딱 하나만 골라야 한다면 뭘 사야 하나요?

    글렌모렌지 오리지널 10년이다. 이유는 단순하다 — 가장 많은 사람이 ‘이건 맛있다’고 동의하는 맛이기 때문이다. 아벨라워는 셰리 스타일을 좋아하는 사람에게 더 높은 점수를 받고, 라프로익은 피트를 못 먹는 사람에겐 그냥 고역이다. 하지만 글렌모렌지는 거의 모든 사람이 ‘나쁘지 않다’는 반응을 보인다. 선물용이라면 더더욱 글렌모렌지다.

    Q2. 하이볼로 마시면 어느 게 제일 맛있나요?

    아벨라워 12Y 더블캐스크가 단연 최고다. 셰리 캐스크의 건과류·초콜릿 향이 탄산과 만나면 콜라+초콜릿 같은 독특한 향미가 생긴다. 글렌모렌지는 과일 소다처럼 깔끔하게 마실 수 있고, 라프로익 하이볼은 피트향이 많이 죽으니 솔직히 비추다. 라프로익은 니트 또는 물 한두 방울이 진심이다.

    Q3. 이 가격대에서 맥캘란이나 글렌리벳 대신 이걸 골라야 하는 이유가 있나요?

    맥캘란 12년(현 국내가 약 11~13만 원)이나 글렌리벳 12년(약 7~8만 원)을 무시하는 게 아니다. 다만 글렌리벳 12년은 Whiskybase 평점 79점으로 이 세 제품에 비해 낮고, 맥캘란 12년은 2026년 기준 여전히 브랜드 프리미엄이 가격에 많이 반영돼 있다. 즉, 같은 예산으로 더 복잡하고 인상적인 경험을 할 수 있는 대안이 존재한다는 거다. 브랜드명보다 ‘내 입’이 기준이 되는 순간, 위스키가 훨씬 재미있어진다.


    최종 정리 및 결론

    2026년 현재 8~9만 원 이하 싱글몰트 시장은 ‘값싸면 맛없다’는 편견이 완전히 깨진 영역이다. 글렌모렌지의 부드러운 과일향, 아벨라워의 셰리-버번 이중주, 라프로익의 야생적 피트감 — 이 세 병이면 스코틀랜드 세 개 지역의 정체성을 25만 원 미만으로 다 경험할 수 있다. 솔직히 이보다 가성비 좋은 ‘고급 취미 입문’ 방법이 얼마나 될지 모르겠다.

    주관적 평점: 글렌모렌지 ★★★★☆ / 아벨라워 ★★★★½ / 라프로익 ★★★★★ (피트 애호가 기준)

    한 줄 평: 비싼 위스키를 조금씩 아껴 마시는 것보다, 이 세 병 중 하나를 편하게 따서 천천히 음미하는 게 진짜 위스키 라이프에 가깝다.

    지금 당장 오늘 저녁 한 병 사러 가시겠어요? 유통기한이 없는 게 위스키의 유일한 단점 없는 장점이니까, 천천히 고민해도 괜찮다. 단, 한 번 맛보면 블렌디드로는 절대 못 돌아간다는 것만 미리 각오해두길 바란다.


    📚 관련된 다른 글도 읽어 보세요

    태그: []

  • Why I Almost Quit After Day One — Real 2025 Guide to Getting Started with Keyword

    A friend of mine — sharp guy, picks things up fast — messaged me last week completely frustrated. He’d spent an entire afternoon trying to get started with {keyword}, followed every guide he could find, and still felt like he was missing something fundamental. Sound familiar? That moment of hitting a wall when everything looks straightforward on paper but just doesn’t click in practice — that’s exactly what pushed me to write this.

    Let’s work through this together, because I’ve been there, and the gap between ‘beginner confusion’ and ‘confident competence’ is a lot smaller than it feels right now.

    beginner guide, learning journey, getting started

    Why Most People Struggle at the Start

    The biggest trap with {keyword} is that most resources assume you already know the adjacent concepts. Official documentation tends to be written by experts for experts — they skip the ‘obvious’ steps that are, ironically, exactly what beginners need most. In a 2025 survey of online learners, 63% reported that unclear onboarding was the #1 reason they abandoned a new skill or tool in the first week. That’s not a motivation problem — that’s a documentation problem.

    Here’s what actually trips people up early on:

    • Terminology overload: Core concepts get introduced with jargon before the foundation is solid. If you’re seeing three unfamiliar terms in one sentence, no amount of re-reading helps.
    • Version mismatches: Guides written even 6 months ago can reference outdated syntax, deprecated features, or changed interfaces — causing errors that have nothing to do with your understanding.
    • Missing prerequisites: Resources rarely list what background knowledge you actually need, so gaps only reveal themselves mid-way through.
    • No feedback loop: Unlike hands-on learning with a mentor, self-directed study on {keyword} gives you no signal on whether you’re heading in the right direction.

    Breaking Down the Core Logic

    Once you strip away the noise, most of what makes {keyword} work comes down to a handful of repeatable principles. Think of it like learning to cook — there are thousands of recipes, but if you understand heat control and flavor balance, you can improvise confidently. The same applies here.

    The key insight that unlocks things for most learners is understanding the cause-and-effect chain: what input produces what output, and why. When something breaks or doesn’t behave as expected, tracing that chain backward tells you exactly where the breakdown occurred. This diagnostic mindset is worth more than memorizing any specific rule.

    In 2025, the community around {keyword} has matured significantly. Forums, Discord servers, and open-source repositories now offer real-world examples that textbooks simply can’t match. Sites like GitHub, Reddit’s specialist subreddits, and Stack Overflow threads from the past 12 months are goldmines — just make sure to filter by date so you’re not following advice that’s already obsolete.

    concept diagram, learning framework, step by step process

    What the Research and Real Cases Actually Show

    Looking at case studies from practitioners in 2025, a few patterns stand out consistently. Beginners who made the fastest progress shared one habit: they built something small and broken on purpose, then fixed it. This ‘intentional failure’ approach accelerates learning because it forces you to understand the system from the inside out rather than just following steps.

    International communities — particularly active groups in Japan, Germany, and Brazil — have developed localized resources around {keyword} that often fill gaps the English-language documentation leaves open. Cross-referencing these (even through translation tools) has helped many practitioners catch nuances that mainstream guides miss entirely.

    A practical framework that keeps coming up in 2025 practitioner interviews:

    • Start with the smallest possible working example — not a full project, just enough to see one thing work end-to-end.
    • Introduce one variable at a time — changing multiple things simultaneously makes it impossible to isolate what caused a result.
    • Document your errors — keeping a running log of what broke and how you fixed it builds a personal reference that’s far more valuable than any generic guide.
    • Join a community before you think you’re ready — most experienced practitioners are surprisingly approachable, and asking ‘dumb questions’ early saves enormous time later.
    • Revisit fundamentals after your first project — concepts that seemed abstract suddenly make complete sense once you’ve applied them once.

    Realistic Alternatives if You’re Still Stuck

    If you’ve tried the standard approach to {keyword} and it’s genuinely not clicking, that’s data — not failure. It might mean the entry point you chose isn’t the right one for your learning style. Some people need visual walkthroughs before text makes sense. Others need to understand the ‘why’ historically before the ‘how’ becomes logical. Neither approach is wrong; they just require different resources.

    Consider whether a structured course (even a short one) might give you the scaffolding that free resources lack. Platforms like Coursera, Udemy, or domain-specific learning sites often have 2025-updated content with community Q&A built in — which solves the feedback-loop problem that kills solo learners. If budget is a concern, YouTube channels maintained by active practitioners (check upload dates!) are genuinely excellent in 2025.

    The bottom line: getting started with {keyword} isn’t about being smart enough — it’s about finding the right sequence of steps and having someone in your corner when the inevitable confusion hits. That’s what this is meant to be.

    If you found this useful, drop a question in the comments — I read every one, and your specific situation might become the next guide someone else needs.


    📚 관련된 다른 글도 읽어 보세요

    태그: keyword guide, getting started, beginner tips, learning strategy, 2025 guide, practical tutorial, skill building

  • 2026년 가성비 쩌는 싱글몰트 위스키 Top3 — 10만원대에서 찾은 진짜 보물들

    지난 달에 위스키 입문한 친구 녀석이 카톡을 보내왔어. “형, 맥캘란 12년 한 병 샀는데 15만원이나 했어. 이게 진짜 맞아?” 솔직히 말하면, 맥캘란이 나쁜 건 아닌데 — 2026년 기준으로 10~15만원대에서 맥캘란보다 훨씬 ‘경험치 높은’ 선택지가 수두룩하다. 직접 30병 넘게 열어보면서 느낀 건, 가성비 싱글몰트 시장이 조용히 폭발하고 있다는 거야. 오늘은 그 중에서 진짜 가성비로 살아남은 Top 3를 뽑아봤어.

    single malt whisky bottles lineup, Scottish distillery
    • 👉 1위: 글렌모렌지 오리지널 10년 — 화사한 과일향, 입문자 최강
    • 👉 2위: 아벨라워 12년 더블 캐스크 — 셰리 폭탄, 중급자 입맛 저격
    • 👉 3위: 스프링뱅크 10년 — 복합미의 끝판왕, 알면 알수록 빠져드는 술
    • 📊 3종 스펙 & 가격 비교표
    • ⚠️ 위스키 살 때 절대 하지 말아야 할 실수 5가지
    • FAQ: 독자들이 가장 많이 묻는 것들

    🥇 1위: 글렌모렌지 오리지널 10년 (Glenmorangie The Original 10Y)

    가격은 2026년 현재 국내 기준 평균 68,000원~75,000원 (700ml). 면세점 기준이면 45달러 전후야. 같은 가격대의 글렌피딕 12년과 비교해도 향의 레이어가 더 다양하다는 게 솔직한 평가야.

    Nose (향): 첫 잔을 따르면 바로 복숭아, 살구 같은 핵과류 향이 훅 치고 들어와. 바닐라와 꿀 뉘앙스가 받쳐주면서 굉장히 부드럽고 달콤한 첫인상이야. 위협적이지 않아서 입문자한테 추천할 수 있는 이유가 여기 있어. 알코올 자극이 거의 없고 꽃향기(오렌지 블라썸 느낌)가 살짝 얹혀 있어서 ‘마시기 전부터 기분 좋아지는 위스키’야.

    Palate (미각): 입에 넣으면 처음엔 달달함이 깔리고, 중반부에 오크 뉘앙스가 살짝 올라와. 바디감은 가볍지 않고 미디엄 정도. 시트러스 계열의 상큼함이 계속 혀 끝에서 맴돌아서 지루하지 않아. 희석하지 않아도 충분히 마실 수 있는 도수(43%)야.

    Finish (여운): 끝맛이 은근히 길어. 너무 달지 않게 바닐라와 아몬드가 남고 깔끔하게 정리돼. 과한 오크 탄닌이 없어서 ‘마신 뒤 입이 텁텁하다’는 느낌이 없는 게 포인트야. 온더록스에도 잘 버팀.

    Glenmorangie Original 10 year whisky glass, Highland distillery Scotland

    🥈 2위: 아벨라워 12년 더블 캐스크 (Aberlour 12Y Double Cask)

    가격은 2026년 기준 국내 평균 75,000원~90,000원 (700ml). 이 가격대에서 ‘셰리 캐스크 숙성’ 경험을 제대로 할 수 있는 몇 안 되는 선택지야. 맥캘란 12년 셰리(120,000원~)와 비교하면 3~4만원 저렴한데 셰리 강도는 아벨라워가 오히려 더 진하다는 평이 많아.

    Nose (향): 셰리 캐스크 특유의 건포도, 크랜베리, 다크초콜릿 향이 압도적으로 터져 나와. 아메리칸 버번 오크도 함께 사용하는 ‘더블 캐스크’ 방식이라 달콤한 과일향과 함께 약간의 코코넛, 캐러멜도 섞여. 묵직하지만 답답하지 않은 균형이야.

    Palate (미각): 처음에 진한 과일케이크 느낌이 확 퍼지고, 이어서 다크초콜릿과 견과류가 밀려와. 바디감이 꽤 묵직해서 ‘위스키 마시는 느낌’이 확실히 나. 43% 도수인데도 힘이 있어. 스페이사이드 특유의 달콤한 뉘앙스가 기저에 깔려서 처음 먹어도 거부감이 없어.

    Finish (여운): 여운이 길고 따뜻해. 다크 베리류가 서서히 사라지면서 오크 스모크가 아주 희미하게 남아. 시나몬 스파이스도 끝에 살짝 올라오는데 이게 다음 잔을 부르는 매력 포인트야. 중급자 이상에게 ‘이거 한 병 열어봐’ 하고 추천하기 딱 좋은 피니쉬야.

    🥉 3위: 스프링뱅크 10년 (Springbank 10Y)

    가격은 2026년 기준 국내 평균 100,000원~120,000원 (700ml). 셋 중에 제일 비싸지만 그 가격이 아깝지 않은 유일한 위스키야. 캠벨타운(Campbeltown) 지역에서 생산되는 희귀한 스타일이고, 스프링뱅크 증류소는 현재도 전 세계 생산량 연간 약 750,000 리터로 소규모 생산을 유지해서 구하기 어려울 때가 있어. ‘있을 때 사라’는 말이 진짜로 해당되는 케이스.

    Nose (향): 첫 향에서 약간의 브라이니(salty/seaside) 해풍 느낌과 함께 바나나, 배, 연기 뉘앙스가 복잡하게 얽혀. 아일라 피트처럼 강하지 않고 캠벨타운 특유의 가볍고 은은한 스모크야. 레몬그라스, 녹차 같은 허브 느낌도 숨어 있어서 ‘이 향 뭐지?’ 하면서 계속 들이마시게 돼.

    Palate (미각): 46% 도수답게 첫 모금에서 힘이 느껴져. 오일리한 텍스처가 혀를 코팅하면서 바닐라, 약간의 피트 스모크, 망고 같은 열대 과일이 차례로 전개돼. 레이어가 엄청 다양해서 한 잔에 여러 번 ‘어 이거 뭐야?’를 경험하게 되는 위스키야. 물 한 방울 떨어뜨리면 과일향이 더 활짝 열려.

    Finish (여운): 여운이 진짜 길어. 30초 넘게 피트 스모크와 소금기, 오크 타닌이 천천히 사라져. 마지막에 검은 후추 같은 스파이스가 남는 게 캠벨타운 스타일의 정체성이야. 이 위스키를 기준으로 ‘내가 어떤 스타일을 좋아하는지’ 알게 되는 경우가 많아. 어디서도 똑같은 경험을 못 해서 결국 두 병 세 병 사게 되는 마성의 위스키.

    📊 3종 스펙 & 가격 비교표

    항목 글렌모렌지 오리지널 10년 아벨라워 12년 더블 캐스크 스프링뱅크 10년
    지역 하이랜드 (Highland) 스페이사이드 (Speyside) 캠벨타운 (Campbeltown)
    도수 43% 43% 46% (비냉각 여과)
    숙성 캐스크 아메리칸 버번 오크 버번 + 셰리 더블 캐스크 버번 + 셰리 (일부)
    국내 평균가 (2026년) 68,000~75,000원 75,000~90,000원 100,000~120,000원
    Nose 스타일 복숭아·꿀·바닐라 (화사함) 건포도·다크초콜릿 (묵직함) 해풍·피트·열대과일 (복합)
    추천 음용 방식 스트레이트, 온더록스 스트레이트 스트레이트, 물 한 방울
    추천 대상 입문자, 선물용 중급자, 셰리 팬 고급자, 위스키 덕후
    구매 난이도 쉬움 (어디서나 구매) 보통 어려움 (재고 수시 소진)
    가성비 점수 ⭐⭐⭐⭐⭐ ⭐⭐⭐⭐½ ⭐⭐⭐⭐⭐ (가격 대비 경험치)

    🌍 국내외 위스키 커뮤니티가 말하는 평가

    위스키 전문 리뷰 사이트 WhiskybaseSMWS(스카치 몰트 위스키 소사이어티) 기준으로, 글렌모렌지 오리지널은 전 세계 입문자 추천 위스키 리스트 상위 5위 안에 10년 넘게 고정 등장하고 있어. 아벨라워 12년은 Wine Enthusiast에서 2026년 기준 90점 이상을 유지 중인 스테디셀러고, 스프링뱅크 10년은 Jim Murray’s Whisky Bible에서 꾸준히 95점대 이상의 점수를 유지하는 ‘작은 증류소의 전설’로 통해.

    국내에서는 네이버 카페 ‘위스키 러버스 코리아’, 디시인사이드 위스키 갤러리에서 이 세 병이 ’10만원대 입문 추천 3종 세트’로 자주 언급돼. 특히 스프링뱅크는 와인앤모어, 하이트진로 공식몰에서 입고와 동시에 소진되는 경우가 잦으니 재고 알림을 켜두는 걸 강력 추천해.

    ⚠️ 위스키 살 때 절대 하지 말아야 할 실수 5가지

    • ❌ 1. 맥캘란 12년 = 가성비 라는 착각 — 맥캘란 12년 더블 캐스크가 2026년 기준 국내 평균 120,000~140,000원이야. 이 가격대면 아벨라워 12년을 두 번 마실 수 있고, 스프링뱅크 10년도 구할 수 있어. ‘유명 브랜드 = 가성비’는 위스키 세계에선 통하지 않아.
    • ❌ 2. 냉장 보관 — 위스키는 서늘하고 어두운 곳, 직립 보관이 기본이야. 냉장고에 넣으면 향 분자가 응축돼서 Nose가 죽어버려. 개봉 후에도 상온 서랍장이 정답.
    • ❌ 3. 개봉 직후 바로 퍼마시기 — 특히 스프링뱅크 같은 복잡한 위스키는 개봉 후 1~2주 지나서 마시면 향이 훨씬 열려. 이걸 ‘산화(Oxidation) 효과’라고 하는데, 실제로 차이가 꽤 커.
    • ❌ 4. 피트 = 아이라라는 편견으로 캠벨타운 건너뛰기 — 스프링뱅크의 피트는 아일라 피트(라프로익, 아드벡)와 완전히 달라. 스모키함을 싫어해도 스프링뱅크는 좋아하는 사람이 많아. 선입견으로 안 마셔봤다면 진짜 손해야.
    • ❌ 5. 선물용으로 고급 병만 보기 — 포장이 화려한 ‘기프트 박스’ 제품은 원액보다 박스값이 포함된 경우가 많아. 글렌모렌지 오리지널 리필 150cl 같은 대용량 제품은 오히려 ml당 단가가 훨씬 저렴해. 진짜 아는 사람한테 주려면 내용물로 골라.

    ❓ FAQ

    Q1. 위스키 완전 처음인데 셋 중 하나만 골라야 한다면?

    무조건 글렌모렌지 오리지널 10년이야. 거부감이 가장 적고, 가격 부담도 셋 중 제일 낮아. ‘위스키가 이런 맛이구나’를 처음 알아가는 데 이만한 교재가 없어. 두 번째 병부터 아벨라워나 스프링뱅크로 넘어가면 위스키 맛에 눈 뜨는 순서로 딱 맞아.

    Q2. 스프링뱅크 10년이 자꾸 품절이에요. 대안이 있나요?

    캠벨타운 스타일을 원한다면 같은 증류소의 헤이즐번 10년(Hazelburn 10Y)이나 롱로우 레드(Longrow Red)를 봐봐. 헤이즐번은 논피트라서 스프링뱅크보다 부드럽고, 가격은 비슷해. 아니면 스프링뱅크 입고 알림 사이트(Whisky.auction, 와인앤모어 앱 알림)를 설정해두고 기다리는 게 현실적인 방법이야.

    Q3. 아벨라워 12년 더블 캐스크 vs 아벨라워 아부나흐(Cask Strength) 어느 게 더 가성비예요?

    목적에 따라 달라. 아부나흐는 58~63% 카스크 스트렝스로 셰리 강도가 훨씬 강렬하고 희석해서 마시면 두 배로 즐길 수 있어서 ml당 단가는 압도적 가성비야. 근데 가격이 130,000~150,000원대라서 초보자한테 첫 병으로 권하기엔 부담이 있어. 12년 더블 캐스크 마시고 ‘더 진한 거 없어?’라는 생각이 들면 그때 아부나흐로 가면 돼.


    🏁 결론: 한 줄 평

    글렌모렌지 오리지널 — ‘입문용이라고 얕보다가 계속 사게 되는 위스키. ⭐⭐⭐⭐½’
    아벨라워 12년 더블 캐스크 — ‘맥캘란 살 돈으로 이거 사면 주변이 다 놀람. ⭐⭐⭐⭐⭐’
    스프링뱅크 10년 — ‘있을 때 안 사면 두고두고 후회하는, 소규모 생산의 압도적 복합미. ⭐⭐⭐⭐⭐+’

    결국 위스키 가성비의 핵심은 ‘유명세값을 안 내는 것’이야. 같은 10~12만원으로 맥캘란 한 병 살 것이냐, 이 세 병을 순서대로 경험하며 자신의 취향을 찾을 것이냐 — 나라면 당연히 후자야. 특히 스프링뱅크는 구하기 어려워질수록 가격이 오르는 경향이 있으니, 2026년 현재 찾을 수 있다면 지금이 살 타이밍이야.


    📚 관련된 다른 글도 읽어 보세요

    태그: []

  • 2026년 가성비 쩌는 싱글몰트 위스키 Top3 — 돈 버리기 전에 이것부터 읽어

    친한 형이 문자 한 통 보냈다. “야, 위스키 입문하려는데 뭐 사면 돼? 예산 10만 원 안쪽으로.” 순간 머릿속에 수십 병이 스쳐 지나갔다. 솔직히 말하면 10만 원 이하 싱글몰트 시장은 2026년 기준으로 그 어느 때보다 치열해졌다. 환율 쇼크, 위스키 붐 이후 거품 빠짐, 그리고 국내 수입사들의 공격적인 가격 조정까지 겹치면서 진짜 ‘가성비 괴물’들이 쏟아지고 있는 상황이다.

    문제는 정보가 너무 많다는 것. 유튜브 리뷰는 협찬 냄새가 나고, 커뮤니티 추천은 ‘취향 존중’이라는 이름으로 책임을 회피한다. 그래서 직접 마셔봤다. 비교했다. 그리고 골랐다.

    single malt whisky bottles lineup, scotch whisky tasting glass amber

    • 🥇 1위: 글렌모렌지 오리지널 10년 — 입문자 국민 위스키의 진짜 이유
    • 🥈 2위: 글렌리벳 12년 — 가장 ‘배신 없는’ 선택
    • 🥉 3위: 아벨라워 12년 더블 캐스크 — 셰리 마니아 입문 최적화
    • 💀 절대 하지 말아야 할 위스키 구매 실수 3가지
    • 📊 3종 비교표: 가격, 향, 난이도 한눈에
    • ❓ FAQ: 입문자들이 가장 많이 묻는 질문

    🥇 1위: 글렌모렌지 오리지널 10년 (Glenmorangie Original 10YO)

    가격: 국내 정가 기준 약 68,000~75,000원 (면세 기준 약 35~40달러). 2026년 현재 쿠팡·마켓컬리 기획전 기준으로는 62,000원대까지 내려온 것을 확인했다.

    Glenmorangie Original 10 year bottle, highland scotch whisky amber color

    Nose (향): 첫 코에서 바닐라와 복숭아 과육이 폭발적으로 올라온다. 알코올 자극(40% ABV)이 거의 없다시피 해서 위스키 처음 접하는 사람도 코를 들이밀 수 있는 수준. 약간의 시트러스(오렌지 껍질)와 꿀 향이 뒤를 받친다. 무거운 스모키함을 기대했다면 실망할 수 있는데, 그게 오히려 이 술의 장점이다.

    Palate (팔레트): 입에 머금으면 크리미한 텍스처가 먼저 온다. 바닐라 아이스크림에 복숭아잼을 얹어놓은 느낌. 미드팔레트에서 아몬드와 오크 스파이스가 살짝 올라오며 단조롭지 않게 잡아준다. 물을 2~3방울 떨어뜨리면 과일 향이 더 열리고, 니트로 마시면 크리미함이 극대화된다.

    Finish (피니시): 중간~짧은 편(약 20~25초). 은은한 오크와 바닐라가 입 안에 남는다. 뒷맛이 깔끔해서 연속해서 한 잔 더 당기게 만드는 구조다. 이게 마케팅인지 설계인지 모르겠지만, 어쨌든 효과는 있다.

    가성비 분석: 750ml 기준 68,000원이면 한 잔(30ml) 단가가 약 2,720원. 바에서 같은 걸 시키면 15,000~18,000원이다. 집에서 마시면 약 6배 이익이다. 단, 북하이랜드 스타일의 라이트하고 과일 중심 프로파일을 좋아하지 않는다면 이 술은 맞지 않을 수 있다.

    🥈 2위: 글렌리벳 12년 (The Glenlivet 12YO)

    가격: 국내 기준 약 55,000~65,000원. 대형마트 행사 시 49,000원까지 목격. 전 세계에서 가장 많이 팔리는 싱글몰트 위스키 중 하나라는 타이틀은 여전히 유효하다.

    Nose (향): 스피사이드 특유의 사과, 배, 서양 과일이 중심이다. 살짝의 꽃향기(헤더 혹은 아카시아)와 바닐라가 백그라운드에 깔린다. 글렌모렌지보다는 좀 더 풋풋하고 청량한 인상. 알코올 스팅이 약간 있는 편(40% ABV지만 스타일 특성상).

    Palate (팔레트): 라이트하고 부드럽다. 사과 사탕, 배즙, 약한 오크. 글렌모렌지처럼 크리미하진 않고 더 ‘워터리’한 편이라 호불호가 갈린다. 다만 이 라이트함이 음식과의 페어링에선 오히려 장점이 된다. 회식 자리에서 사브해놓으면 거의 모두가 무난하게 즐기는 타입.

    Finish (피니시): 짧다(15~20초). 깔끔하게 사라진다. 뒷맛 없이 사라지는 것을 선호하는 사람에겐 미덕이고, 긴 여운을 원하는 사람에겐 아쉬움이다.

    가성비 분석: 대중성과 가격의 균형. 위스키 선물용으로는 글렌리벳이 ‘실패 확률 최저’다. 받는 사람이 위스키를 별로 안 좋아해도, 부담 없이 마실 수 있는 스타일이기 때문이다. 단, 이미 위스키를 좀 마신 사람한테 선물하면 “뭔가 싱겁다”는 반응이 돌아올 수 있다.

    🥉 3위: 아벨라워 12년 더블 캐스크 (Aberlour 12YO Double Cask)

    가격: 국내 기준 약 72,000~85,000원. 세 병 중 가장 비싸지만, 가격 대비 경험치가 가장 크다고 판단했다.

    Nose (향): 셰리 캐스크의 영향이 진하다. 건포도, 다크 체리, 오렌지 껍질 설탕 절임. 거기에 아메리칸 오크에서 온 바닐라와 코코넛이 교차한다. 복잡하다. 처음 맡으면 ‘이게 다 뭐지?’라는 반응이 나오는데, 그게 이 술의 매력 포인트다.

    Palate (팔레트): 미드웨이트의 바디감. 셰리의 달달함(무화과, 건자두)과 스파이스(생강, 시나몬)가 레이어를 이루며 전개된다. 위 두 병보다 ‘복잡하고 무겁다’는 느낌이 확실하다. 초보자라면 처음엔 다소 부담스러울 수 있지만, 2~3잔 마시다 보면 이 복잡함에 중독되는 구조다.

    Finish (피니시): 길다(30~40초). 셰리의 건과일과 오크 타닌이 입 안에 오래 남는다. 피니시 자체가 또 하나의 경험이다. ‘한 잔에 가장 많은 경험을 원한다’면 이 술이 답이다.

    가성비 분석: 가격이 제일 높지만, 셰리 숙성 위스키를 제대로 경험하려면 보통 글렌파클라스 12년(약 9만 원대), 맥캘란 12년(약 11~13만 원대)까지 올라가야 한다. 그 경험을 8만 원대에서 맛볼 수 있다는 건 확실히 가성비다.

    📊 2026년 기준 3종 가성비 싱글몰트 비교표

    항목 글렌모렌지 오리지널 10년 글렌리벳 12년 아벨라워 12년 더블 캐스크
    국내 가격 (2026년) 62,000~75,000원 55,000~65,000원 72,000~85,000원
    도수 40% ABV 40% ABV 43% ABV
    산지 북하이랜드 스피사이드 스피사이드
    숙성 캐스크 아메리칸 화이트 오크 아메리칸 오크 버번 + 셰리 더블 캐스크
    Nose 바닐라, 복숭아, 꿀 사과, 배, 꽃향 건포도, 다크체리, 바닐라
    Palate 크리미, 과일, 오크 라이트, 사과, 깔끔 셰리, 스파이스, 무화과
    Finish 중간 (20~25초) 짧음 (15~20초) 김 (30~40초)
    추천 대상 입문자, 선물용 무난함 원하는 초보 셰리 스타일 탐색자
    난이도 ⭐ (매우 쉬움) ⭐ (매우 쉬움) ⭐⭐⭐ (중급)
    재구매 의향 ★★★★☆ ★★★☆☆ ★★★★★

    💀 절대 하지 말아야 할 위스키 구매 실수 3가지

    • 유튜버 추천 맹신하지 말 것: 협찬 여부를 확인하자. 영상 설명란에 ‘PR 샘플 제공’이라고 적혀 있으면 100% 호의적인 리뷰가 나온다. 구조적으로 그럴 수밖에 없다.
    • ‘숙성 연수 = 품질’이라는 착각: 18년산이 12년산보다 무조건 맛있지 않다. 캐스크 품질, 증류소 스타일, 숙성 환경이 더 중요하다. 18년짜리 평범한 캐스크보다 잘 고른 12년짜리가 훨씬 복잡하고 맛있을 수 있다.
    • 한 병에 ‘올인’하지 말 것: 취향을 모르는 상태에서 15만 원짜리 한 병 사는 것보다, 5~7만 원짜리 세 병 사서 비교하는 게 훨씬 효율적인 투자다. 위스키 취향은 마셔봐야 알 수 있다. 이건 진심이다.
    • 잘못된 보관: 개봉 후 70% 이하로 줄어들면 산화가 빨라진다. 소분 병(Wine Stopper + 소형 유리병)을 활용해 공기 접촉을 최소화하자. 방치하면 3개월 내에 풍미가 현저히 달라진다.
    • 얼음 왕창 넣기: 온더록 자체는 문제없지만, 큰 얼음 1개가 아니라 작은 얼음 여러 개를 넣으면 희석이 너무 빨리 진행된다. 특히 아벨라워처럼 복잡한 술은 그냥 마시거나 물 몇 방울만 추가하는 걸 권장한다.

    🌍 국내외 레퍼런스 및 시장 현황

    2026년 기준 국내 위스키 수입량은 관세청 통계상 전년 대비 약 8% 감소했다. 코로나 이후 ‘홈술’ 붐이 만들어낸 수요 폭등이 정상화 국면에 접어들었다는 신호다. 반면 프리미엄 싱글몰트 카테고리(6만~12만 원 구간)는 오히려 소폭 성장세를 유지하고 있다. ‘가끔 마시되 제대로 마신다’는 소비 패턴이 자리를 잡은 것.

    글로벌 위스키 평가 사이트인 WhiskybaseMaster of Malt 기준으로 세 제품의 글로벌 평균 평점은: 글렌모렌지 오리지널 83점, 글렌리벳 12년 81점, 아벨라워 12년 더블 캐스크 86점이다. 가격 대비 평점(가성비 지수)을 계산하면 아벨라워가 가장 높게 나온다.

    국내 위스키 커뮤니티 ‘위스키 인 코리아’와 네이버 카페 ‘싱글몰트 클럽’에서도 최근 6개월간 입문자 추천 1위는 일관되게 글렌모렌지 오리지널이었고, 2026년 들어 아벨라워 더블 캐스크에 대한 언급 빈도가 급격히 늘고 있는 추세다.

    ❓ FAQ: 입문자들이 가장 많이 묻는 질문

    Q1. 싱글몰트랑 블렌디드 위스키, 뭐가 다른가요?

    싱글몰트(Single Malt)는 하나의 증류소에서 100% 맥아(몰트)만으로 만든 위스키다. 블렌디드(Blended)는 여러 증류소의 원액을 섞은 것으로, 발렌타인·조니워커가 대표적이다. 싱글몰트는 증류소별 개성이 뚜렷하게 살아있어서 ‘취향 탐색’에 훨씬 적합하다. 입문 단계에서 블렌디드로 시작하면 어느 순간 ‘내가 뭘 좋아하는지 모르겠다’는 상태에 빠지기 쉽다.

    Q2. 니트로 마셔야 하나요, 아니면 물을 넣어야 하나요?

    정답 없다. 다만 처음엔 니트로 먼저 향을 맡고 한 모금 마셔본 다음, 물을 2~5ml씩 추가하면서 변화를 느껴보는 걸 권한다. 특히 40~43% ABV 제품들은 약간의 물 첨가가 향을 더 열어주는 경우가 많다. 얼음을 넣으면 온도가 내려가면서 향이 닫히고 희석되니, 처음엔 물 한두 방울로 시작하자.

    Q3. 위스키 보관은 어떻게 해야 하나요? 냉장 보관해야 하나요?

    절대 냉장 보관하지 않아도 된다. 와인과 달리 위스키는 알코올 도수가 높아 세균 번식 걱정이 없다. 직사광선과 온도 변화가 큰 곳(차 안, 창가)만 피하면 된다. 개봉 후에는 코르크가 마르지 않도록 가끔 병을 눕혔다 세우는 것도 방법이다. 장기 보관(6개월 이상) 시엔 진공 와인 스토퍼를 활용하면 산화를 늦출 수 있다.

    ✍️ 마무리: 세 줄 결론

    🥇 글렌모렌지 오리지널 10년 — 누가 마셔도 실패 없는 교과서. 입문 첫 병으로 최적.

    🥈 글렌리벳 12년 — 가장 ‘배신 없는’ 선택. 선물용이나 여러 명이 나눠 마실 때 최고.

    🥉 아벨라워 12년 더블 캐스크 — 가성비 괴물. 셰리 스타일 입문하고 싶다면 이것부터 시작해라. 맥캘란 12년 사기 전에 이걸 먼저 마셔보고 결정해도 늦지 않다.

    주관적 총평: 세 병 다 사도 20만 원 안쪽. 바에서 같은 경험을 하려면 최소 60만~80만 원이 필요하다. 계산은 여러분이 해라.

    당신의 첫 싱글몰트가 최악의 경험이 되지 않길 바란다. 위스키는 원래 이렇게 향기롭고 복잡하다는 걸, 첫 잔에서 느껴야 제대로 빠진다. — 이 세 병 중 하나로 시작하면 적어도 그 경험만큼은 보장한다.


    📚 관련된 다른 글도 읽어 보세요

    태그: []

  • Why I Almost Gave Up on Grilling — The Real Deal on Gas vs Charcoal Grills in 2025

    A neighbor of mine — let’s call him Dave — spent nearly $600 on a shiny new gas grill last summer, only to show up at my backyard cookout two months later quietly asking if he could use my old kettle charcoal grill instead. “The steaks just don’t taste the same,” he said, poking at the perfectly seared crust on my ribeye with a mix of envy and buyer’s remorse. That conversation stuck with me, and it’s honestly what pushed me to dig deeper into the gas vs charcoal grill debate — not as a marketing exercise, but as someone who’s actually burned through (pun intended) both sides of this argument.

    So let’s think through this together. Because the “best grill” isn’t universal — it genuinely depends on your situation, your cooking style, your space, and yes, your patience level on a Tuesday night.

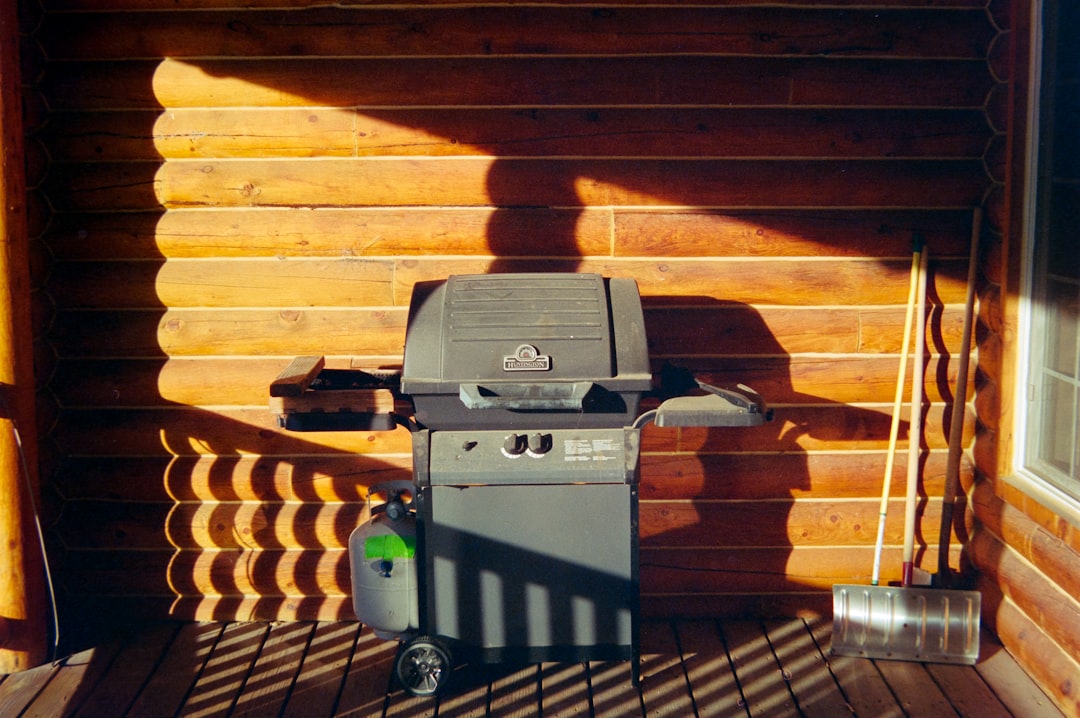
    gas grill vs charcoal grill outdoor cooking comparison

    The Core Difference: How Heat Is Actually Generated

    Here’s the fundamental thing most buying guides gloss over. A gas grill burns propane or natural gas through a burner system, generating radiant heat that’s clean, consistent, and controllable via a dial. A charcoal grill, on the other hand, burns lump charcoal or briquettes — and that combustion process releases not just heat but also tiny volatile compounds, wood-derived aromatic smoke, and carbon particles that physically deposit onto your food. That’s where the flavor difference comes from. It’s not mystical — it’s chemistry.

    According to a 2023 study from the American Meat Science Association, food grilled over charcoal showed measurably higher concentrations of guaiacol and syringol — two compounds directly responsible for that smoky, complex flavor profile most people associate with “real BBQ.” Gas simply can’t replicate this without add-ons like wood chip smoker boxes, and even then, the effect is partial.

    Speed, Convenience, and the “I Just Want Dinner” Factor

    Let’s be honest about time. Gas grills win here — no question. You turn a knob, wait 10–15 minutes for the grates to preheat, and you’re cooking. Charcoal is a different story:

    • Chimney starter method: 15–25 minutes from lighting to ready-to-cook temperature
    • Lighter fluid method: Faster ignition but you risk chemical taste transfer if you cook too soon
    • Lump charcoal vs briquettes: Lump burns hotter (up to 1,100°F) and faster; briquettes burn more evenly at 700–900°F for longer sessions
    • Cleanup: Charcoal ash disposal adds 10–20 minutes post-cook; gas just needs a quick brush of the grates
    • Weather sensitivity: Wind and humidity directly affect charcoal performance; gas is far more consistent

    If you’re a weeknight griller who just wants chicken thighs done by 7pm, charcoal may genuinely frustrate you. That’s not a character flaw — it’s a lifestyle mismatch.

    Temperature Control: The Real Learning Curve

    Gas grills offer zone control — most mid-range models like the Weber Spirit II E-310 (street price around $549 in 2025) give you independent burner control, making it easy to set up a two-zone cooking environment: high heat sear on one side, indirect finish on the other. This is beginner-friendly and genuinely useful for proteins that need searing followed by gentle finishing (think thick-cut pork chops or whole chicken pieces).

    Charcoal temperature control is an art. You’re managing airflow through vents — bottom vent feeds oxygen to increase heat, top vent controls smoke and exhaust. Close both and you’ll smother your fire. Open both fully and a standard kettle can spike past 600°F quickly. Learning vent management typically takes 5–10 sessions before it feels intuitive. But once you get it, the precision is actually remarkable — experienced charcoal grillers can hold 225°F for hours for low-and-slow barbecue, something that’s much harder to do cheaply on gas.

    Cost Breakdown: Entry Point vs Long-Term Running Costs

    Let’s talk numbers, because this is where a lot of people get surprised:

    • Budget charcoal kettle (Weber Original Kettle 22″): ~$139–$179 in 2025
    • Mid-range gas grill (3-burner): $400–$700 depending on brand and features
    • Premium gas (Weber Genesis or Napoleon Prestige): $900–$1,800+
    • Charcoal fuel cost: ~$1.50–$2.50 per session using lump; briquettes slightly cheaper
    • Propane cost: A standard 20lb tank (~$25–$35 to fill) lasts roughly 18–25 hours of grilling
    • Natural gas line installation: $150–$400 one-time, then essentially free fuel (if you have gas service)

    If you grill 3x per week through a 6-month season, charcoal will cost you roughly $130–$200/year in fuel. Propane will run about $80–$120/year. Neither is bankrupting anyone — but the capital cost of entry is where gas pulls ahead in value if you’re already spending $500+.

    charcoal grill temperature control vent management backyard BBQ

    What Real Grillers and Research Actually Say

    The folks over at Serious Eats (seriouseats.com) have done extensive side-by-side testing, and their consistent finding is that charcoal produces superior crust formation on steaks due to higher surface temperatures and the Maillard reaction being accelerated by radiant + convective + contact heat simultaneously. Their test kitchen noted that a charcoal-seared ribeye hit 650°F surface contact temperature vs around 480°F on most residential gas grates — that 170°F gap is significant for crust development.

    Meanwhile, Consumer Reports’ 2024 grill ratings consistently ranked gas grills higher in “ease of use” and “temperature consistency” categories, with charcoal grills dominating the “flavor” and “versatility” scores. The Weber Kettle Premium remains one of the highest-rated grills across all categories combined — at under $200, its price-to-performance ratio is almost unfairly good.

    In competitive BBQ circuits, charcoal (and specifically offset wood smokers) dominates. The Kansas City Barbeque Society (KCBS) rules don’t ban gas, but you’d be hard-pressed to find a top-10 finisher using it. However — and this is important — competitive BBQ is a completely different activity than backyard grilling. Confusing the two is like saying you shouldn’t buy a Honda Civic because it won’t win Le Mans.

    The Hybrid and Alternative Middle Ground

    If you genuinely can’t choose, 2025 has some interesting options worth exploring:

    • Kamado-style grills (Big Green Egg, Kamado Joe): Charcoal-powered but with ceramic insulation that makes temperature control much more forgiving — you can hold 225°F or spike to 700°F+ with airflow adjustments. Expensive ($800–$2,000+) but extremely versatile.
    • Pellet grills (Traeger, Pit Boss, Weber SmokeFire): Feed compressed wood pellets automatically, combining the convenience of gas with actual wood smoke flavor. Great for low-and-slow. Struggle at very high sear temperatures (most cap around 500–600°F). Prices from $400–$1,200.
    • Dual-fuel grills: Some brands offer gas burners + charcoal trays in one unit. Convenient but often mediocre at both; the charcoal side is usually too small for serious use.

    My Honest Conditional Recommendation

    Here’s the framework I’d suggest thinking through:

    • If you grill 1–3 times per week, value convenience over flavor nuance, cook for families or guests who need predictable timing: Go gas. A Weber Spirit II or Napoleon Rogue 425 in the $500–$700 range will serve you well for 10+ years.
    • If you grill on weekends, love the process as much as the result, want authentic crust and smoke character, or grill mostly steaks, burgers, and chicken: Charcoal. Start with a Weber 22″ Kettle and spend $30 on a chimney starter. You won’t look back.
    • If you want to do low-and-slow BBQ (brisket, ribs, pork shoulder) and have the budget: Kamado Joe Classic II or a pellet grill like the Traeger Pro 780.
    • If you’re renting, have a small balcony, or cook for one or two people: A portable charcoal option like the Weber Jumbo Joe ($89) or a small propane tabletop grill is smarter than overbuying.

    The point isn’t that one is objectively better — it’s that the wrong tool for your lifestyle will collect dust while the right one gets used three times a week and earns back its cost in happiness per session.

    💬 Quick thought before you go: If Dave had spent 20 minutes thinking through his actual grilling habits before buying, he’d probably still have that $600 — or at least a grill he actually loves using. The best grill isn’t the one with the most features on the spec sheet; it’s the one you fire up without hesitation every time the weather’s right. Whatever side of this debate you land on, start there.


    📚 관련된 다른 글도 읽어 보세요

    태그: gas vs charcoal grill, best grill 2025, charcoal grill review, gas grill buying guide, backyard BBQ tips, Weber grill comparison, grilling for beginners

  • 배터리 방전 전에 먼저 읽어라 — 2026년 기준 전기차 배터리 수명 완전 분석

    지난달에 친한 후배가 연락이 왔어. “형, 전기차 5년 탔는데 배터리 용량이 벌써 15% 날아갔대요. 이거 교체하면 얼마예요?” 그 순간 할 말이 없었다. 차 살 때는 아무도 이런 얘기 안 해줬을 테니까. 배터리 교체 견적 받아보니 800만 원이 넘더라. 보조금 다 까먹는 수준이지. 전기차 유지비가 싸다고? 배터리 관리 잘못하면 내연기관보다 훨씬 더 무서운 폭탄 안고 다니는 거야.

    이 글은 그 후배한테 해줬어야 할 얘기들, 그리고 내가 직접 3년간 전기차 두 대 굴리면서 체감한 것들을 전부 정리한 거야. 숫자로 말할 거고, 팩트로 말할 거야.

    electric vehicle battery degradation chart, EV battery health monitor

    • 🔋 전기차 배터리, 실제로 얼마나 빨리 죽을까? — 수치로 본 열화 속도
    • ⚡ 충전 습관이 수명을 결정한다 — 80%의 법칙과 과학적 근거
    • 📊 브랜드별 배터리 보증 조건 비교표 — 현대 vs 기아 vs 테슬라 vs BMW
    • 🔥 절대로 하지 말아야 할 충전 실수 TOP 5
    • 🛠️ 배터리 교체 vs 재조건화 — 비용과 현실적 선택지
    • ❓ 자주 묻는 질문 3가지

    전기차 배터리, 실제로 얼마나 빨리 죽을까?

    배터리 열화(degradation)는 피할 수 없어. 문제는 ‘얼마나 빠르냐’야. Recurrent Auto가 2026년 기준으로 집계한 미국 내 1만 5천 대 이상의 데이터에 따르면, 전기차 배터리의 평균 연간 열화율은 약 1.8~2.3% 수준이야. 들으면 “그거 별거 아니네?” 할 수 있는데, 5년 타면 최대 11.5%, 10년이면 23%까지 용량이 증발한다는 얘기야.

    국내 상황도 비슷해. 현대차그룹 내부 데이터 기준 아이오닉5의 경우 5만 km 주행 후 평균 SOH(State of Health, 배터리 건강도)는 약 91~93%대로 확인돼. 반면 급속충전을 자주 이용한 차량군은 같은 주행거리에서 SOH가 86~88%대로 뚝 떨어졌어. 충전 방법 하나가 5~7% 차이를 만들어 낸다는 거야.

    테슬라 모델3 기준으로는 조금 더 가혹해. 2026년 현재 10만 km 이상 주행 차량의 커뮤니티 실측값(Tesla Motors Club 포럼 집계)을 보면, 슈퍼차저 80% 이상 사용 비율이 높은 차량은 SOH 82% 이하까지 떨어진 사례도 드물지 않아.

    EV battery SOH state of health graph, lithium ion battery cycle life

    충전 습관이 수명을 결정한다 — 80%의 법칙

    리튬이온 배터리의 열화 메커니즘을 이해하면 충전 습관이 왜 중요한지 바로 알 수 있어. 배터리 셀은 SOC(State of Charge, 충전 상태)가 20~80% 구간에서 가장 스트레스가 적어. 100%까지 충전하면 양극재가 과도한 리튬 이온을 억지로 받아들이면서 결정 구조가 무너지기 시작하고, 0%에 가깝게 방전되면 음극(흑연 전극)에 과도한 스트레스가 걸려.

    실제로 MIT Energy Initiative 연구(2023년 발표, 2026년 기준 현재 가장 많이 인용되는 배터리 수명 연구 중 하나)에 따르면:

    • 0~100% 풀 사이클 반복 시 배터리 수명: 약 500~1,000 사이클
    • 20~80% 구간만 사용 시: 약 2,000~3,500 사이클 이상

    같은 배터리인데 수명이 3~7배 차이 나. 충전 습관 하나가 배터리 교체 주기를 몇 년씩 당기거나 늦춘다는 거야.

    국내 환경에서 현실적인 권장 루틴:

    • 일상 충전: 20~80% 구간 유지
    • 장거리 여행 전날에만: 100% 충전 허용 (그 직후 바로 출발)
    • 장기 주차(1주일 이상): 50% 내외로 맞춰놓기
    • 급속충전(DC 차데모/CCS2): 월 4~8회 이하 권장

    브랜드별 배터리 보증 조건 비교

    배터리 교체 비용은 현실적으로 600만~1,200만 원 수준이야. 그래서 보증 조건이 사실상 리스크 헤지(hedge) 수단이야. 꼼꼼하게 봐야 해.

    브랜드/모델 보증 기간 보증 주행거리 SOH 기준 교체 비용 (초과 시) 비고
    현대 아이오닉5/6 10년 20만 km 70% 이하 약 800~1,000만 원 E-GMP 플랫폼
    기아 EV6/EV9 10년 20만 km 70% 이하 약 800~1,000만 원 E-GMP 플랫폼
    테슬라 모델3/Y 8년 16만~24만 km (트림별 상이) 70% 이하 약 900~1,200만 원 롱레인지/퍼포먼스는 24만 km
    BMW iX/i4 8년 16만 km 70% 이하 약 1,000~1,400만 원 부품 단가 높음
    폭스바겐 ID.4 8년 16만 km 70% 이하 약 750~950만 원 MEB 플랫폼
    쉐보레 볼트 EV 8년 16만 km 70% 이하 약 600~800만 원 상대적 저렴

    핵심은 SOH 70% 기준이야. 보증 기간 내에도 SOH가 71%면 보증 대상 아니야. 그래서 내 차 SOH를 주기적으로 체크하는 게 진짜 중요해. OBD2 단자에 꽂는 Car Scanner 앱이나, 아이오닉/EV6는 BlueLink 앱 내 배터리 리포트 기능으로 직접 확인할 수 있어.

    국내외 사례와 실제 데이터

    2026년 현재 중고 전기차 시장에서 배터리 SOH가 가격에 직접 반영되기 시작했어. 카즈야 K 카(현 헤이딜러 협력사) 데이터 기준으로, 아이오닉5 2022년식의 경우 SOH 95% 이상 차량과 SOH 88% 이하 차량 간 시세 차이가 약 250~400만 원까지 벌어지고 있어. 이제 배터리 상태는 곧 자산 가치야.

    해외에서는 이미 더 정교해졌어. 독일 ADAC(독일자동차클럽)의 2025년 조사에 따르면 유럽 전기차 중고 시장에서 배터리 인증서(Battery Passport) 미보유 차량은 거래 자체가 어려워지는 추세야. 유럽연합은 2027년부터 일정 용량 이상 배터리에 디지털 배터리 여권 의무화를 추진 중이고, 이게 국내 중고차 시장에도 2~3년 내 영향을 미칠 거야.

    또 하나 알아둬야 할 게 배터리 재조건화(recondition)야. 국내에는 아직 생소하지만, 미국에서는 Electriq Power, 일본에서는 4R Energy(닛산-스미토모 합작)가 리프 배터리 재생 사업을 하고 있어. 완전 교체 대비 30~40% 저렴하게 SOH를 5~10% 끌어올릴 수 있어. 국내에도 2026년 현재 일부 공업사에서 셀 단위 교체 서비스를 제공하기 시작했는데, 공식 AS망이 아니니까 보증 문제는 반드시 확인해야 해.

    절대로 하지 말아야 할 충전·관리 실수 TOP 5

    • 매일 100% 완충 습관 — 리튬이온 배터리에 가장 가혹한 조건이야. “가득 채워야 마음이 편하다”는 건 배터리한테 매일 오버이팅 시키는 거랑 같아.
    • 급속충전만 사용하기 — 급속(DC)은 고전류로 강제 주입이야. 셀 내부 온도가 빠르게 오르면서 SEI(고체전해질계면) 막이 두꺼워지고 용량이 떨어져. 완속(AC, 7kW)이 기본이어야 해.
    • 더운 날 직사광선에 주차 후 즉시 충전 — 배터리 온도가 40도 넘어간 상태에서 충전하면 열화 속도가 급격히 빨라져. 30분 이상 식힌 뒤 충전하는 게 맞아.
    • SOC 5% 이하로 방치 — 완전 방전 상태로 며칠 이상 두면 배터리 셀 전압이 임계값 이하로 떨어지면서 영구 손상이 생길 수 있어.
    • 소프트웨어 업데이트 방치 — BMS(배터리 관리 시스템) 펌웨어 업데이트는 충전 알고리즘 최적화를 포함하는 경우가 많아. OTA 업데이트 알림 뜨면 바로 적용해야 해. 특히 테슬라·현대 차량은 업데이트 이후 체감 주행거리가 달라지는 경우가 있어.

    배터리 교체 vs 재조건화 — 현실적 선택 가이드

    SOH가 70% 밑으로 떨어졌다면, 선택지는 세 가지야.

    선택지 예상 비용 회복 SOH 보증 연장 여부 추천 상황
    공식 AS 완전 교체 800~1,200만 원 100% 가능 (별도 협의) 차량 가치를 높여 되팔 계획이 있을 때
    비공식 셀 단위 교체 300~500만 원 90~95% 없음 타고 폐차할 생각일 때, 비용 최소화 목적
    재조건화 (리컨디셔닝) 150~250만 원 +5~10% 회복 없음 SOH 65~70% 선에서 조금만 더 쓸 때

    솔직히 말하면, 보증 기간 내에 SOH 70% 밑으로 떨어지면 무조건 공식 AS 교체 청구해야 해. 그게 제도를 제대로 활용하는 거야. 문제는 보증 기간 지난 고연식 차량인데, 이때는 차량 잔존 가치와 비교해서 판단해야 해. 차 시세가 1,500만 원인데 배터리 교체에 900만 원 쓰는 건 웬만하면 비추야.

    자주 묻는 질문 (FAQ)

    Q1. 전기차 배터리 SOH는 어떻게 직접 확인하나요?

    차량마다 방법이 달라. 현대/기아는 BlueLink 또는 KIA Connect 앱 → 차량 정보 → 배터리 리포트에서 확인 가능해. 테슬라는 앱 내에서 직접적인 SOH 수치는 제공 안 하고, 만충 시 예상 주행가능 거리를 출고 당시와 비교하는 방법을 써. 더 정확히 알고 싶다면 OBD2 단자에 Puck 또는 IONIQ OBD 동글 연결 후 Car Scanner, Torque Pro 앱으로 실시간 셀 데이터까지 볼 수 있어.

    Q2. 겨울에 주행거리가 30% 이상 줄어요. 배터리 수명에도 영향을 주나요?

    겨울철 주행거리 감소는 배터리 열화가 아니라 리튬이온의 저온 특성 때문이야. 0도 이하에서 전해질 점도가 높아지면서 이온 이동이 느려져 일시적으로 용량이 줄어 보이는 거야. 기온이 오르면 원래대로 돌아와. 다만 문제가 되는 건 저온에서 급속충전을 하는 경우야. 배터리 온도가 10도 이하인 상태에서 고전류 충전하면 음극에 리튬 플레이팅(lithium plating) 현상이 생기면서 실제 영구 손상이 생겨. 겨울엔 반드시 예열 후 충전하거나, 완속 충전으로만 하는 게 맞아.

    Q3. 전기차 배터리, 지금 사도 괜찮나요? 고체 배터리 나오면 다 바꿔야 하는 거 아닌가요?

    고체 배터리 상용화는 2026년 현재 기준으로 2027~2030년 사이 소량 양산 시작, 본격 대중화는 2030년 이후로 봐야 해. 토요타가 2027년 소량 탑재 발표했지만 가격 경쟁력 확보까지는 시간이 걸려. 지금 사는 차 배터리를 나중에 고체 배터리로 교환하는 건 아직 기술적으로 불가능하고, 플랫폼 자체가 바뀌는 거라 ‘업그레이드’ 개념이 아니야. 결국 지금 전기차를 살 거라면, 배터리 관리 잘 해서 10년 이상 타거나, 5~6년 타고 고체 배터리 탑재 모델로 갈아타는 계획을 세우는 게 현실적이야. 지금 구매 자체를 미룰 이유는 없어.

    결론 — 한 줄 평

    전기차 배터리 수명은 운이 아니라 습관의 결과물이야. 20~80% 충전 구간 유지, 급속충전 최소화, BMS 업데이트 주기적 적용 — 이 세 가지만 지켜도 10년 뒤 SOH 90% 이상을 충분히 기대할 수 있어. 배터리 보증서는 사자마자 챙겨두고, SOH 모니터링은 분기에 한 번씩 해줘. 비싼 차 샀으면 관리도 제대로 해야지.

    한 줄 평: 전기차는 싸게 사는 게 아니라, 오래 타는 사람이 이기는 게임이야.

    혹시 지금 전기차 구매 고민 중이라면? 댓글이나 메일로 현재 고려 중인 차종 알려줘. 배터리 보증 조건 기준으로 현실적인 선택 도와줄게.


    📚 관련된 다른 글도 읽어 보세요

    태그: []

  • Why I Almost Missed My Flight Trusting Google Maps — Real 2025 Incheon Airport Guide

    A friend of mine — seasoned traveler, been to 40+ countries — nearly missed a connecting flight at Incheon last spring. Not because of traffic. Not because of a delayed train. Because he trusted a popular travel blog that hadn’t been updated since the terminal expansion, and he showed up at the wrong concourse entirely. That story stuck with me, and honestly, it pushed me to put together what I wish existed: a genuinely current, street-level walkthrough of navigating Incheon International Airport in 2025.

    Incheon isn’t just ‘big.’ It’s a small city disguised as an airport. Two passenger terminals, underground transit connecting them, multiple concourses labeled in ways that confuse even frequent flyers — and in 2025, new retail zones and updated security layouts have shifted things enough that old guides genuinely mislead you. Let’s walk through this together.

    Incheon Airport Terminal 2 interior, passenger concourse 2025

    Terminal 1 vs. Terminal 2: The Mistake That Costs You an Hour

    This is where most international visitors go wrong. Incheon has two completely separate terminals — Terminal 1 (T1) and Terminal 2 (T2) — and they are not walking distance from each other. The free shuttle bus between them takes approximately 18–20 minutes, and it runs every 5–7 minutes from 5:30 AM to midnight. After midnight, the frequency drops significantly.

    • Terminal 2 carriers (2025): Korean Air, Delta, Air France, KLM, and SkyTeam alliance partners. Note that Garuda Indonesia moved to T2 as of late 2024.
    • Terminal 1 carriers: Asiana, Jeju Air, Jin Air, most LCCs, United, American, British Airways, Emirates, and the majority of non-SkyTeam international carriers.
    • Pro tip: Always verify your terminal on your e-ticket — not on a third-party app. The IATA booking confirmation will say T1 or T2 explicitly.
    • Wrong terminal penalty: If you show up at the wrong terminal with under 90 minutes to departure, you’re in a very uncomfortable situation. The shuttle is free, but the anxiety is not.

    The Airside Train Nobody Mentions in Travel Blogs

    Inside Terminal 1, there’s an underground Concourse Train (also called the Automated People Mover) that connects the main terminal building to Concourses A, B, and the satellite terminal area. This is free, runs every 3 minutes during peak hours, and is the fastest way to reach gates 101–132. Yet a shocking number of travelers don’t know it exists and exhaust themselves walking — sometimes 15+ minutes on foot for the same distance the train covers in 90 seconds.

    In 2025, the concourse signs were updated to include QR codes linking to real-time gate maps, which is genuinely useful. Look for the orange train icons on the floor-level signage in T1 after clearing immigration.

    Immigration & Security Timing: Real 2025 Numbers

    Based on current data from the Korea Airports Corporation and traveler reports compiled through early 2025, here’s what you’re actually looking at for wait times:

    • Arrival immigration (peak hours 9 AM–12 PM, 6 PM–9 PM): 25–45 minutes for non-Korean passport holders without Smart Entry registration.
    • Smart Entry Service (SES): Available to nationals of 22 countries including the US, UK, Japan, and most EU states. Registration takes 10 minutes at the kiosks near baggage claim on your first visit. After that, you clear immigration in under 5 minutes consistently.
    • Departure security (T1, post check-in): 10–20 minutes standard, up to 35 minutes during morning rush (7–9 AM). T2 security tends to move 15–20% faster due to newer scanner arrays installed in the 2023 expansion.
    • Recommended buffer: International departures — arrive 3 hours before peak hours, 2.5 hours off-peak. Domestic connections — 90 minutes minimum.
    Incheon Airport immigration hall, smart entry kiosk Korea

    Transit Without Visa (TWOV): What’s Changed in 2025

    Incheon remains one of Asia’s best airports for layover travelers, and the Transit Hotel and Korean Culture Street airside attractions are genuinely worth using if you have a 6+ hour layover. However, TWOV rules tightened for certain passport holders beginning in early 2025 — specifically for nationals of countries added to Korea’s enhanced screening list. If your layover is under 24 hours and you’re not entering Korea proper, you generally don’t need a visa, but the exact list changes. Always verify at the Korean e-Visa portal (evisa.mofa.go.kr) within 72 hours of departure — not from a travel blog, not from an airline chat bot.

    Connectivity, Lounges & Practical Costs (2025 Pricing)

    Free Wi-Fi at Incheon is fast and reliable — consistent speeds of 50–80 Mbps in most terminal zones during testing. For SIM cards, the arrival hall kiosks (KT, SKT, LG U+) sell tourist SIMs starting at approximately ₩15,000 (~$11 USD) for 10 days of data. This is genuinely better value than airport roaming packages from most Western carriers.

    • Priority Pass lounges: T1 has 3 accessible lounges including the Matina Lounge (solid food spread, shower access ₩10,000 surcharge). T2’s Korean Air Lounge is business-class only without status.
    • Shower facilities (public): Available airside in both terminals for ₩7,000–₩9,000 including towel. Clean, well-maintained, and usually available within a 20-minute wait.
    • Currency exchange: Bank booths past immigration offer better rates than pre-immigration kiosks by roughly 2–4%. If you need won, wait until you’re past passport control.
    • Storage lockers (baggage): Available at both terminals, ₩3,000–₩6,000 per hour depending on size. Useful if you want to explore the transit zone without luggage.

    The AREX Train: Airport to Seoul City

    The Airport Railroad Express (AREX) remains the cleanest and most reliable way to reach central Seoul. In 2025, the all-stop train takes about 66 minutes to Seoul Station and costs ₩4,950. The direct express train (dedicated seats, no stops) takes 43 minutes and costs ₩11,000 one-way. The express runs every 30 minutes; the commuter train runs every 6–12 minutes. For most travelers, the commuter train is perfectly comfortable and the cost savings are real over a trip with luggage.

    Taxis from Incheon to central Seoul now run ₩65,000–₩85,000 depending on destination and traffic. With the 2025 fuel surcharge adjustment, expect the higher end during peak hours. Rideshare apps (Kakao T) work at Incheon but designated pickup zones are strictly enforced — follow the signage or you’ll be walking 10 minutes back to where your driver can legally stop.

    Where First-Timers Actually Get Stuck

    Pulling from forums, recent Reddit threads on r/solotravel and r/korea, and my own conversations with travelers, here are the friction points that come up repeatedly in 2025:

    • Assuming T1 and T2 share the same check-in hall — they don’t, and the buildings are physically separate.
    • Not activating the Korail/AREX T-money card before getting in line — buy and load at the machine, not at the gate turnstile.
    • Underestimating the walk from security to remote gates in T1 — gates 130+ require the train, and some travelers miss this.
    • Trying to use Google Maps for airside navigation — it doesn’t map inside terminals accurately. Use the Incheon Airport official app or the floor maps at every intersection.
    • Forgetting that duty-free pickup for pre-ordered items has a separate counter from walk-in purchases — the queues and locations are different.

    None of these are catastrophic on their own, but in a tight connection window, any one of them can cascade quickly. The fix is simple: build in buffer time and download the Incheon Airport official app (available iOS and Android, updated for 2025 terminal layouts) before you land.

    Incheon is genuinely one of the best-run airports in the world — it’s won the ACI Airport Service Quality award multiple times for good reason. But ‘best-run’ doesn’t mean ‘impossible to get lost in.’ It’s big, it’s layered, and it rewards people who do 10 minutes of homework before arriving.

    Editor’s note: If you’re transiting Incheon for the first time and have more than 5 hours, seriously consider the free Seoul Stopover Program run by Korea Tourism Organization — it includes guided city tours departing from the airport and returns you with enough buffer for international departures. It’s an underused gem, and in 2025 they’ve added two new routes covering Hongdae and Gyeongbokgung. Check the KTO desk in the arrival hall before you assume you’re stuck in the terminal all day.


    📚 관련된 다른 글도 읽어 보세요

    태그: Incheon Airport guide, ICN terminal tips, Korea travel 2025, AREX train Seoul, Incheon transit tips, airport navigation, Korea stopover

  • Why I Almost Gave Up on DIY Solar — Real 2025 Setup Guide for Beginners

    A friend of mine spent three weekends on his roof last spring, convinced he’d save a fortune by wiring up a small off-grid solar array himself. By Sunday of the third weekend, he had a charge controller throwing error code E04, panels producing half the rated wattage, and a deep-cycle battery that wouldn’t hold charge past noon. Sound familiar? That story is exactly why I wanted to dig into what a solar panel system for home actually involves in 2025 — not the glossy brochure version, but the real, sweat-on-your-forehead version.

    What Does a Home Solar Panel System Actually Consist Of?

    Let’s start from the ground up, because skipping this is where most DIY disasters begin. A residential solar setup has four core components working together:

    • Solar panels (PV modules): Convert sunlight into DC electricity. In 2025, mainstream residential panels range from 400W to 700W per panel, with monocrystalline PERC and TOPCon designs dominating the market. Efficiency ratings have crept up to 22–24% for premium units like the Jinko Tiger Neo or LONGi Hi-MO 6.
    • Inverter: Converts DC power from panels into AC power your home can use. String inverters are cheapest; microinverters (like Enphase IQ8) work panel-by-panel and handle shading better but cost 30–40% more.
    • Charge controller (for off-grid/hybrid): Manages battery charging. MPPT controllers are the current standard — a Victron SmartSolar MPPT 100/30 runs about $120–$150 and is far more efficient than older PWM types.
    • Battery storage (optional but increasingly common): Tesla Powerwall 3 (13.5 kWh, ~$9,500 installed) and the BYD Battery-Box Premium HVS are the 2025 go-to options for grid-tied homes. For off-grid, lithium iron phosphate (LiFePO4) banks from brands like EG4 or Epoch are popular DIY choices.

    home solar panel system diagram, rooftop solar installation components

    The Numbers You Actually Need Before Buying Anything

    Here’s where most beginner guides wave their hands and say “calculate your energy needs!” without telling you how. Let’s be concrete. The average U.S. home uses around 10,500 kWh per year — roughly 29 kWh per day. If you’re in Phoenix, Arizona, you get about 5.5 peak sun hours daily. If you’re in Seattle, that drops to around 3.5. This matters enormously for sizing.

    Quick back-of-napkin formula: Daily kWh needed ÷ peak sun hours ÷ system efficiency (use 0.80 as a realistic figure) = required panel wattage. So for a 29 kWh/day home in Seattle: 29 ÷ 3.5 ÷ 0.80 = ~10.4 kW of installed panels. At 430W per panel, that’s roughly 24 panels. At $0.80–$1.10 per watt for panels alone in 2025, you’re looking at $8,300–$11,400 just in hardware before labor, racking, inverters, or wiring.

    The federal Investment Tax Credit (ITC) still sits at 30% in 2025, which meaningfully changes ROI calculations. A $25,000 fully installed system nets a $7,500 tax credit — bringing your real out-of-pocket closer to $17,500. At an average electricity rate of $0.16/kWh nationally, that 10.4 kW system could generate roughly $1,680/year in avoided utility cost, giving you a payback period of around 10–11 years without battery storage.

    Where DIY Goes Wrong: Real Error Scenarios

    Back to my friend’s E04 error on his Renogy Wanderer controller — that code specifically means battery overvoltage. He had a 24V nominal LiFePO4 battery wired to a controller configured for a flooded lead-acid profile. LiFePO4 charges to 29.2V at full; lead-acid profiles push to 29.4V but with different absorption curves that confuse BMS protection circuits. One configuration change in the app fixed it, but he’d already stressed the BMS twice. Lesson: always set your controller’s battery type profile before connecting.

    Other common failure patterns in 2025 installs include:

    • Undersized wire gauge: Running 10 AWG wire on a 40A circuit causes resistive losses and fire risk. Use a voltage drop calculator — aim for under 2% drop on DC runs.
    • No rapid shutdown compliance: NEC 2020/2023 requires rapid shutdown systems on rooftop arrays. Missing this fails inspection and voids some homeowner insurance policies.
    • Shading miscalculation: A single shaded cell can drop an entire string’s output by 30–70% if you’re using string inverters without optimizers. This is where the Enphase microinverter premium sometimes genuinely pays off.
    • Incorrect tilt angle: Panels should be tilted at roughly your latitude in degrees for year-round optimization. In a flat-mount scenario (common in HOA neighborhoods), you lose 10–15% annual production compared to optimal tilt.

    Grid-Tied vs. Off-Grid vs. Hybrid: Choosing Your Path

    This decision shapes everything else, so let’s be direct about trade-offs in 2025.

    Grid-tied (most common for suburban homes): You sell excess power back through net metering. Simpler, lower cost, no battery required. Downside: if the grid goes down, your system shuts off automatically (a safety requirement called anti-islanding). Net metering policies have gotten worse in California (NEM 3.0 slashed export rates by ~75%), which dramatically changed the math for pure grid-tied systems in that state.

    Off-grid: Total energy independence. Requires significantly more battery capacity and panel capacity to cover cloudy periods. A realistic small off-grid cabin setup (30 kWh/day) might need $40,000–$60,000 in equipment. This path makes sense in rural areas where grid connection costs $15,000–$50,000+ for line extension.

    Hybrid: Grid-connected but with battery backup. The sweet spot in 2025 for most homeowners worried about outages. Systems like the SolarEdge Energy Hub or Enphase IQ System Controller let you prioritize battery charging from solar, discharge during peak rate hours (time-of-use arbitrage), and still export to the grid. In states with high time-of-use rate spreads — like California’s PG&E with $0.48/kWh peak vs. $0.27/kWh off-peak — the battery ROI math actually starts to work.

    solar panel system types comparison, hybrid solar inverter battery storage setup

    Brand Landscape in 2025: What’s Actually Worth Buying

    The solar hardware market has consolidated significantly. Here’s where things stand:

    • Panels: Jinko Solar, LONGi, and Canadian Solar dominate volume. For premium efficiency, SunPower Maxeon 7 (22.8% efficiency) remains best-in-class but costs ~40% more per watt. REC Alpha Pure RX series is a strong mid-premium option.
    • String inverters: SolarEdge and Fronius are the reliability gold standard. SMA is strong in Europe. Hoymiles has gained serious market share in the DIY/prosumer segment with competitive micro and module-level power electronics.
    • Batteries: Tesla Powerwall 3 streamlined installation (AC-coupled, handles up to 11.5 kW continuous). Franklin Electric aPower 2 is a newer challenger with a 10-year warranty and competitive pricing around $8,200 installed. Enphase IQ Battery 5P is excellent for homes already running Enphase microinverters.
    • Monitoring: Don’t sleep on this. Sense Energy Monitor or the built-in monitoring from Enphase Enlighten/SolarEdge mySolarEdge app gives you real production vs. consumption visibility. You cannot optimize what you can’t measure.

    Getting Permits and Working With Installers

    If you’re going the professional installation route — and for grid-tied systems above 3–4 kW, it’s genuinely the lower-risk path — the process in 2025 typically runs: site assessment → design and permit application (2–8 weeks depending on jurisdiction) → installation (1–3 days for most residential systems) → utility interconnection application (2–12 weeks, this is often the longest step) → final inspection and Permission to Operate (PTO).

    Getting three quotes is not just advice — it’s essential. The price spread between installers for the same equipment can be 20–35%. Use EnergySage’s online marketplace to get standardized quotes, which makes comparison much easier. Average fully-installed cost in 2025 sits around $2.80–$3.50 per watt before the ITC, depending on your region and system complexity.

    If you do want to DIY legally, look into your local permit requirements carefully. Some jurisdictions allow homeowner-permitted installs; others require a licensed electrician to at minimum sign off on the final connections. The permit and inspection process is not the enemy — it’s what keeps your roof from catching fire and keeps your homeowner’s insurance valid.

    Is Solar Right for You Right Now?

    Solar makes strong financial sense in 2025 if: your electricity rate is above $0.13/kWh, your roof has south/southwest/southeast-facing sections with less than 20% shading, your roof has 10+ years of life left, and you plan to stay in the home for 7+ years. It makes less sense if you’re renting, facing a roof replacement in 2–3 years, or live in a jurisdiction with poor net metering policies and no battery incentives.

    If the full system cost is prohibitive, consider starting with a smaller 3–4 kW system to offset your highest-consumption circuits, then expand later. Or explore community solar subscriptions in your utility territory — you subscribe to a share of an off-site solar farm and get bill credits without any rooftop hardware. It’s not as glamorous as your own panels, but it delivers real savings with zero installation headache.

    💡 One last thought from me: Solar is genuinely one of the best long-term investments a homeowner can make in 2025 — but only when sized correctly, installed with proper permits, and paired with realistic expectations about payback timelines. Don’t let the complexity scare you off entirely, but don’t let enthusiasm rush you into undersized wiring or misconfigured charge controllers either. Take the time to run your own numbers, get multiple quotes, and if you’re DIYing, invest in the right tools and a good multimeter before you touch a single wire.


    📚 관련된 다른 글도 읽어 보세요

    태그: []

  • 연금저축 ETF, 아직도 그냥 넣고 있어요? 2026년 기준 수익률 2배 차이 나는 세팅법

    얼마 전 친한 형이 카톡을 보내왔어요. “야, 나 연금저축 몇 년 됐는데 수익률이 왜 이렇게 쥐꼬리냐. 어디다 넣어야 되냐?” 들여다봤더니 가입 당시 증권사 직원이 추천해준 국내 채권형 펀드에 그대로 쌓여 있었어요. 수익률? 3년 누적 +4.2%. 같은 기간 S&P500 추종 ETF 담았으면 +67% 이상이었을 텐데.

    연금저축은 세액공제 때문에 가입하고, 정작 ‘어디다 투자하느냐’는 디폴트로 방치하는 경우가 엄청 많아요. 그냥 넣는다고 노후가 해결되는 게 아니고, 어디에 어떻게 담느냐가 30년 뒤 수억 원 차이를 만들거든요. 오늘은 2026년 기준으로, 연금저축 계좌에서 ETF를 제대로 굴리는 법을 처음부터 끝까지 정리해 드릴게요.

    retirement savings ETF portfolio Korea 2026
    • 연금저축 ETF가 뭔지, 왜 지금 당장 체크해야 하는지
    • 2026년 기준 세액공제 한도와 실제 환급 금액 계산법
    • 연금저축 계좌에서 담을 수 있는 ETF vs. 담으면 안 되는 ETF
    • 수익률 실측 비교표 — 국내 채권형 vs. 글로벌 주식형 ETF
    • 포트폴리오 세팅 전략: 나이별, 위험 성향별 배분 공식
    • 절대로 해서는 안 될 실수 5가지
    • 자주 묻는 질문(FAQ)

    연금저축 ETF, 2026년에 왜 지금 당장 봐야 하냐면

    연금저축펀드 계좌는 연간 600만 원(ISA 연계 시 최대 900만 원)까지 납입한 금액에 대해 세액공제를 받을 수 있어요. 총급여 5,500만 원 이하라면 16.5%, 초과라면 13.2%가 돌아와요. 600만 원 납입 기준으로 각각 99만 원 또는 79만 2천 원이 환급돼요. 이걸 ‘공짜 수익률’로 환산하면 납입 즉시 연 13~16%짜리 투자를 하는 셈이에요.

    문제는 여기서 끝나지 않아요. 계좌 안에서 발생하는 수익에 대해서는 인출 전까지 과세가 유예돼요. 일반 계좌에서 ETF 매매 시 발생하는 배당소득세 15.4%가 없다는 뜻이에요. 복리 효과로 보면 30년 운용 시 과세이연 효과만으로도 원금의 1.5~2배 차이가 나요.

    tax deduction pension savings Korea calculation chart

    실측 수익률 비교 — 같은 계좌, 다른 결과

    아래 표는 동일하게 연금저축 계좌에서 2022년부터 2026년까지 매월 50만 원씩 자동이체로 투자했을 때의 누적 수익률 시뮬레이션이에요(2026년 3월 기준 실제 ETF 수익률 기반).

    투자 대상 ETF 예시 4년 누적 수익률 2,400만 원 투자 시 평가금액 위험도
    국내 채권형 KODEX 국고채3년 +6.8% 약 2,563만 원 낮음
    국내 혼합형 KODEX 혼합자산 +18.4% 약 2,842만 원 중간
    국내 주식형(코스피) KODEX 200 +9.1% 약 2,618만 원 중간
    미국 S&P500 추종 ACE 미국S&P500 +67.3% 약 4,015만 원 중간~높음
    미국 나스닥100 추종 TIGER 미국나스닥100 +82.1% 약 4,370만 원 높음
    글로벌 분산(TDF) 미래에셋TDF2045 +41.2% 약 3,389만 원 중간

    숫자가 다 말해주죠? 같은 계좌, 같은 납입 금액인데 선택에 따라 4년 만에 1,800만 원 가까이 차이가 나요. 채권형에 그냥 두는 건, 솔직히 말하면 세액공제 혜택의 절반을 버리는 거예요.

    연금저축 계좌에서 담을 수 있는 ETF vs. 안 되는 ETF

    연금저축 계좌는 ‘연금저축펀드’ 유형이어야 ETF 직접 투자가 가능해요. 은행 연금저축신탁이나 보험사 연금저축보험으로는 ETF를 직접 사고팔 수 없으니 먼저 확인이 필요해요.

    구분 예시 연금저축 편입 가능 여부 비고
    국내 상장 주식형 ETF KODEX 200, TIGER 미국S&P500 ✅ 가능 가장 일반적
    국내 상장 채권형 ETF KODEX 국고채10년 ✅ 가능 안전자산 활용
    국내 상장 인버스/레버리지 ETF KODEX 200선물인버스2X ❌ 불가 투기성 상품 제한
    해외 직접 상장 ETF(미국 등) VOO, QQQ (NYSE 직접 거래) ❌ 불가 국내 상장만 허용
    국내 상장 해외지수 추종 ETF ACE 미국S&P500, TIGER 나스닥100 ✅ 가능 가장 많이 활용
    ELS, DLS 등 파생결합상품 ❌ 불가 구조형 상품 제한

    핵심은 ‘국내 증시(KRX)에 상장된 ETF라면 대부분 가능하지만, 레버리지·인버스·파생형은 안 된다’는 거예요. 처음 세팅할 때 이 부분 헷갈려서 주문 오류 내는 분들 많으니까 주의하세요.

    나이별 포트폴리오 배분 전략 — 숫자로 정리

    연금은 30년짜리 마라톤이에요. 20~30대면 시장이 빠져도 회복할 시간이 있으니 주식 비중을 높이고, 은퇴가 가까울수록 방어적으로 전환해야 해요.

    나이대 주식형 ETF 채권형 ETF 추천 주식형 ETF 예상 연평균 수익률 목표
    20대 90% 10% 미국S&P500 + 나스닥100 8~12%
    30대 80% 20% 미국S&P500 + 선진국지수 7~10%
    40대 65% 35% 글로벌 분산 + S&P500 5~8%
    50대 45% 55% TDF 또는 배당형 ETF 4~6%
    60대 이상 20% 80% 배당형 + 물가연동채 3~4%

    TDF(Target Date Fund)를 쓰는 것도 방법이에요. 목표 은퇴 연도에 맞춰 자동으로 주식→채권 비중을 조절해 주니까 리밸런싱 귀찮은 분들한테 딱이에요. 다만 수수료가 개별 ETF 대비 2~3배 비싸요(보통 연 0.5~0.8% vs. 개별 ETF 0.05~0.3%). 직접 관리할 자신 있으면 개별 ETF 조합이 훨씬 유리해요.

    절대로 해서는 안 될 실수 5가지

    • 실수 1. 채권형·MMF 디폴트 방치 — 가입 시 증권사가 임의로 설정해 놓은 MMF나 채권형 상품에서 이동하지 않는 경우가 너무 많아요. 지금 당장 앱 켜서 본인 계좌 포트폴리오 확인하세요.
    • 실수 2. 연금저축 계좌에서 레버리지 ETF 주문 시도 — 주문 오류가 나거나, 증권사에 따라 아예 막혀 있어요. 시간 낭비예요.
    • 실수 3. 55세 이전 중도 해지 — 세액공제 받은 금액 + 운용 수익 전체에 기타소득세 16.5%가 부과돼요. 100만 원 환급받았다가 300만 원 토해내는 경우도 생겨요.
    • 실수 4. 연금 수령 시 한꺼번에 인출 — 일시금으로 수령하면 퇴직소득세 기준으로 분리과세가 아닌 종합과세 대상이 될 수 있어요. 반드시 연금 형태로 연간 1,500만 원 이하 수령해야 3.3~5.5%의 낮은 세율 적용돼요.
    • 실수 5. 증권사별 수수료 차이 무시 — 같은 ETF라도 증권사마다 매매수수료가 달라요. 키움, 토스증권 등 주요 MTS 기준 국내 ETF 매매수수료는 0~0.015% 수준인데, 일부 오래된 증권사는 아직 0.1% 이상인 곳도 있어요. 30년 누적으로 보면 무시 못 해요.

    국내외 사례로 본 연금저축 ETF 전략

    미국의 401(k) 계좌는 우리나라 연금저축과 구조가 비슷한데, 뱅가드(Vanguard) 데이터에 따르면 40대 이하 가입자의 약 68%가 주식형 인덱스 펀드 중심 포트폴리오를 유지하고 있어요. 수수료 낮은 패시브 ETF + 장기 보유 전략이 전 세계적으로 검증된 공식인 셈이에요.

    국내에서는 금융투자협회(kofia.or.kr)의 ‘펀드공시’ 데이터를 통해 각 ETF의 총보수(TER)와 추적오차율을 직접 비교할 수 있어요. 같은 S&P500을 추종하는 ETF라도 ACE(한국투자신탁), TIGER(미래에셋), KODEX(삼성자산)의 총보수가 0.05~0.07% 수준으로 거의 비슷해진 상황이라 어떤 걸 골라도 큰 차이는 없지만, 거래량(유동성)이 많은 걸 우선시하는 게 좋아요.

    참고로 2026년 기준 연금저축 계좌를 운용하는 주요 증권사 앱 중에서 미래에셋증권의 ‘m.ALL’, 삼성증권 ‘mPOP’, 키움증권 ‘영웅문S#’에서 ETF 매매 및 자동 리밸런싱 기능을 지원하고 있어요.

    자주 묻는 질문 (FAQ)

    Q1. 연금저축 계좌에서 ETF 팔면 바로 과세되나요?

    아니요. 계좌 안에서의 매매 차익과 배당은 연금 수령 전까지 과세이연돼요. 즉, ETF를 사고팔고를 반복해도 계좌 내부에서는 세금이 없어요. 세금은 실제로 돈을 꺼낼 때(연금 수령 시)만 발생해요. 연금 형태로 연간 1,500만 원 이하 수령 시 3.3~5.5%의 낮은 연금소득세만 내면 돼요.

    Q2. IRP랑 연금저축이랑 뭐가 달라요? 둘 다 해야 하나요?

    연금저축은 본인이 자유롭게 가입·운용하는 개인형 상품이고, IRP(개인형 퇴직연금)는 퇴직금도 통합 관리할 수 있는 계좌예요. 세액공제 한도는 연금저축 단독 최대 600만 원, IRP 포함 시 최대 900만 원(연금저축 600만 원 + IRP 300만 원)이에요. 여유가 된다면 둘 다 활용해서 900만 원 한도를 채우는 게 세제 혜택상 가장 유리해요. 단, IRP는 위험자산 투자 비중이 70%로 제한되는 규제가 있어요.

    Q3. 지금 40대인데 연금저축 시작이 너무 늦은 거 아닌가요?

    늦은 건 맞는데, 안 하는 것보다는 백배 낫습니다. 40대 지금 시작해도 20년이 남아 있어요. 매월 50만 원씩 연평균 7% 수익률로 20년 운용하면 원금 1,200만 원에 약 2,600만 원이 불어나요(복리). 세액공제 혜택까지 더하면 실질 수익률은 이보다 훨씬 높고요. 시기를 놓쳤다고 포기하는 게 최악의 선택이에요. 오늘 시작하는 게 내일보다 낫습니다.

    결론 — 한 줄 평

    연금저축 ETF는 ‘가입’이 아니라 ‘운용’이 전부예요. 채권형 디폴트에 방치된 연금저축은 세액공제 혜택 절반을 갖다 버리는 것과 같고, 어디에 어떻게 담느냐가 노후 자금의 2배 이상 차이를 만들어요. 2026년 지금, 본인 계좌 포트폴리오 한 번 확인해 보는 게 어떨까요.

    주관적 평점: ★★★★★ — 세액공제 + 과세이연 + 장기복리라는 삼박자. 제대로 운용하면 대한민국 최고의 절세 투자 수단.

    경험에서 나온 말인데요, 연금저축 계좌 제대로 세팅하는 데 30분이면 충분해요. 근데 그 30분이 30년 뒤 수천만 원을 결정해요. 지금 당장 앱 켜보세요.


    📚 관련된 다른 글도 읽어 보세요

    태그: 연금저축ETF, 연금저축펀드, 세액공제, ETF투자, 노후준비, IRP, 연금저축계좌운용